15 DIY Wall Decor Ideas in 2027 That Make Any Room Feel Personal
Transform blank walls without big renovations using 15 approachable DIY wall decor ideas for 2027—from textured modeling-paste canvases and framed fabric scraps to renter-friendly washi tape murals.
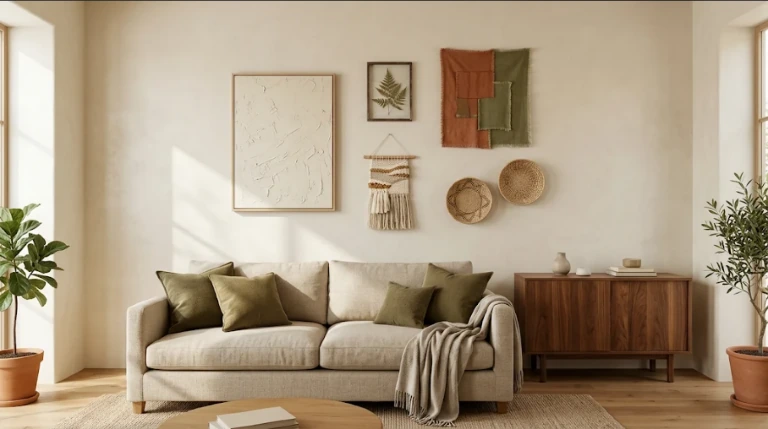
A sunlit organic living room anchored by handmade textured canvas art, pressed botanicals, framed textiles, and natural-fiber baskets.
Why Thoughtful Handmade Wall Decor Outperforms Generic Prints
A blank wall doesn't need a big renovation—or an expensive piece of art—to become your favorite part of a room. A few thoughtful materials, an afternoon of making, and a little attention to scale can turn an empty space into something that feels collected rather than copied.
These 15 DIY wall decor ideas for 2027 range from removable designs for apartments to textured canvas art, framed textiles, and statement gallery arrangements. Each idea includes what you'll need, how to make it, and a practical styling tip so you can choose a project that suits your wall, skill level, and budget.
Which DIY Wall Decor Project Should You Try First?
The easiest way to pick a project is to match it to your space—not just to a pretty photo.
| If your goal is... | Try these ideas | What to know |
|---|---|---|
| Minimal tools | Washi-tape mural, framed fabric, paper shadow box | Great for starting with basic craft supplies |
| A textured, high-end look | Modeling-paste canvas, yarn tapestry, woven basket display | Texture looks especially good in natural light |
| A personal gallery | Thrifted frames, pressed botanicals, embroidery hoops | Mix family finds with handmade pieces |
| A rental-friendly refresh | Lightweight art on suitable removable hangers, washi tape | Always test finishes and follow the hanger's exact instructions |
| A functional wall | Cork-and-fabric memo board, picture ledge | Use suitable secure fasteners for the weight |
| A bold focal point | Color-block canvas trio, vintage mirror cluster | Plan the arrangement on the floor first |
Make a Textured Neutral Canvas With Modeling Paste
Textured abstract canvas art is a good choice when you want a calm, gallery-like focal point without needing to paint recognizable shapes. The relief catches side light, so even a mostly monochromatic piece has depth.
How to make it:
- 1Lay the canvas flat and sketch two or three sweeping curves very lightly in pencil.
- 2Spread thin layers of modeling paste along the curves. Pull a palette knife through the paste to create shallow ridges; avoid heavy buildup that might crack as it dries.
- 3Let the paste cure completely according to its label, then brush over it with ivory, oatmeal, or warm stone-colored acrylic paint.
- 4Add a narrow wood-look frame if you want a more finished appearance.
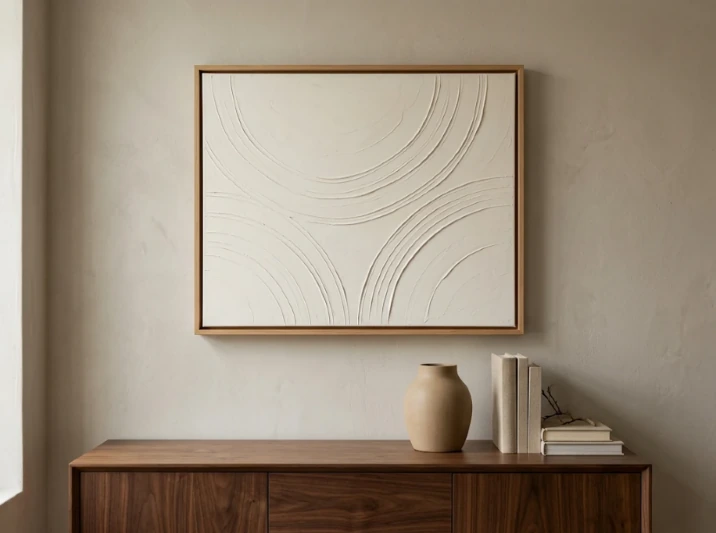
Grazing daylight highlights shallow acrylic modeling-paste ridges framed in slim natural oak.
Frame Beautiful Fabric Scraps as Wall Art
A favorite printed napkin, leftover upholstery sample, or piece of patterned linen can become wall art that feels warmer than a standard poster. This is particularly useful for fabric you love but don't have enough of to sew into something larger.
How to make it:
- 1Choose a fabric with a clear motif or interesting weave and iron out wrinkles according to its care label.
- 2Cut a piece slightly larger than the frame opening, allowing room to position the pattern.
- 3Wrap or mount it against the backing without pulling so tightly that the weave distorts.
- 4Frame it, then repeat with a complementary fabric to create a pair.
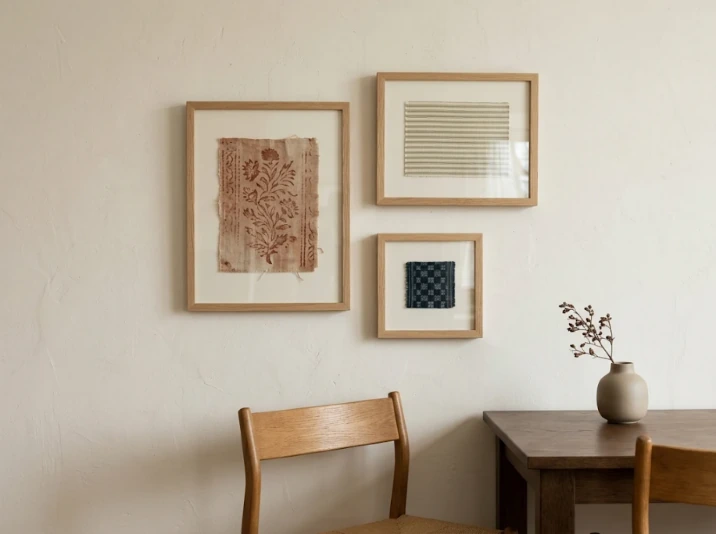
Matching oak frames unify three contrasting textile fragments—block-print linen, woven stripe, and indigo geometric cloth.
Create a Pressed Botanical Gallery
Dried leaves and flowers create delicate artwork that changes with the seasons. A restrained botanical gallery looks lovely near a reading nook, hallway, or bedroom dresser.
How to make it:
- 1Collect only plants you're permitted to pick, selecting thin, healthy specimens rather than thick, juicy stems.
- 2Press them between absorbent sheets inside a flower press or heavy book, replacing damp paper as needed until completely dry.
- 3Arrange one main specimen per sheet, leaving generous blank space.
- 4Attach it gently with conservation-friendly materials and frame it in a dry indoor location out of strong direct sunlight.
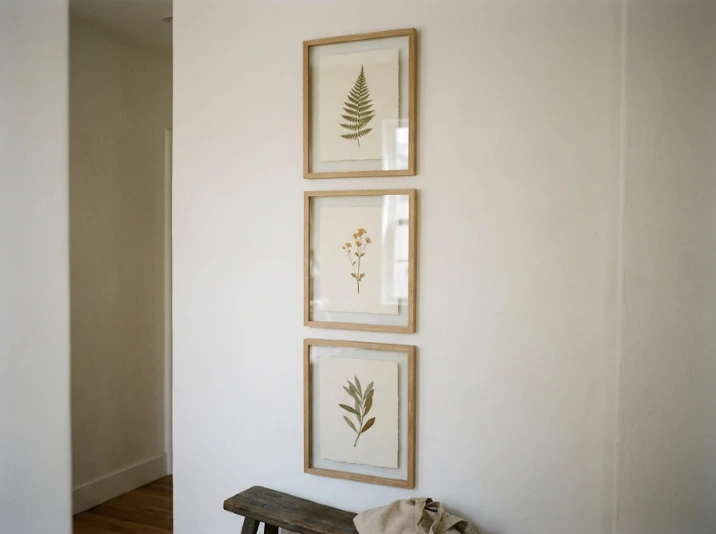
A vertical hallway trio pairs dried fern, wildflower, and olive sprigs with generous deckled cream paper margins.
Design a Removable Washi-Tape Geometric Mural
Want to decorate a dorm or rental without painting? Washi tape can outline an arch, create a grid, or turn a blank corner into a playful geometric feature. It is a simple way to test a bold wall idea before committing to permanent color.
How to make it:
- 1Plan a design on paper—a loose arch, stepped lines, or intersecting rectangles is easier than a complicated pattern.
- 2Mark light guide points with painter's tape, checking that your lines are level.
- 3Apply washi tape in short sections, smoothing from the center outward and trimming tidy corners.
- 4Step back after each line; remove or reposition pieces while they're still easy to adjust.
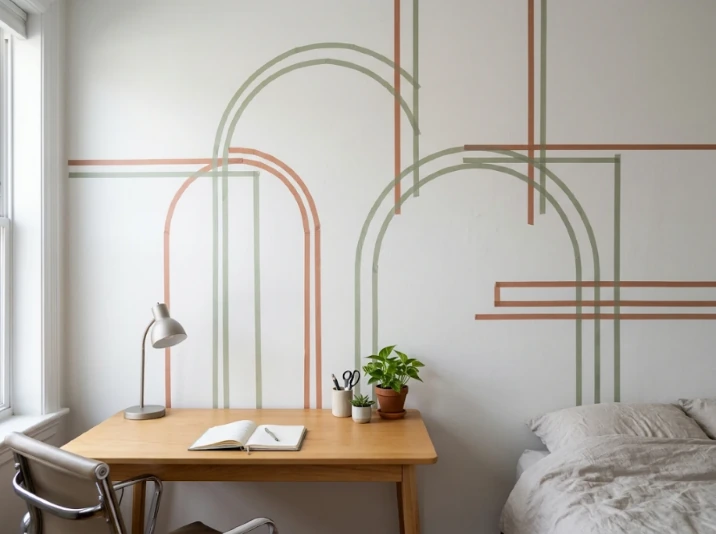
Thin sage-green and muted terracotta washi tape creates crisp architectural linework without a drop of paint.
Build a Gallery Wall From Thrifted Frames
A gallery wall becomes more interesting when it mixes meaningful pieces: a postcard from a trip, a child's drawing, a landscape print you already own, or a small fabric sample. Thrifted frames give those pieces a unified, collected look without buying an expensive matching set.
How to make it:
- 1Limit the palette to two frame finishes so the arrangement feels connected.
- 2Lay the frames on the floor, starting with the largest piece slightly off-center.
- 3Trace each frame onto paper and tape the templates to the wall to test spacing.
- 4Measure and install suitable hardware, then hang and level each piece.
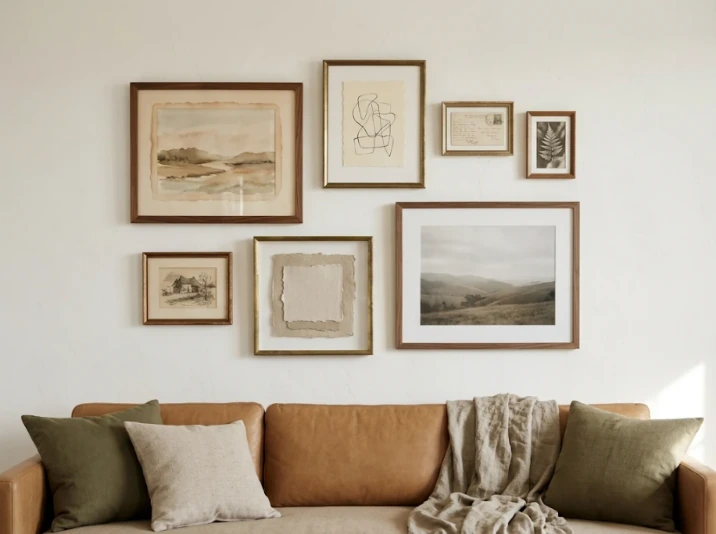
Limiting thrifted frames to walnut and aged brass ties seven distinct personal pieces into one cohesive composition.
Make Air-Dry Clay Medallions on a Framed Backing Board
Air-dry clay gives you a sculptural look without a kiln. Instead of mounting individual pieces straight onto the wall, create a lighter, more manageable collection by attaching small clay medallions securely to a backing board.
How to make it:
- 1Roll clay to a consistent moderate thickness and cut several rounds or organic shapes.
- 2Press shallow lines, dots, or leaf impressions into the surface without making it fragile.
- 3Dry fully and evenly according to the clay manufacturer's directions. Sand edges gently only if the product instructions allow it.
- 4Paint in muted tones if desired, then attach the pieces to the rigid backing with suitable adhesive and hang the finished panel securely.

Hand-incised clay medallions mounted inside a single shallow oak shadow frame bring quiet relief without wall damage.
Paint a Color-Block Canvas Trio
Color-block paintings are forgiving for beginners because the focus is on proportion and palette rather than precise drawing. A trio works especially well over a long couch or dining-room sideboard.
How to make it:
- 1Choose a shared palette such as muted olive, dusty rose, ochre, and cream.
- 2Sketch different large shapes on each canvas: a half-circle, a broad vertical band, and a rounded corner.
- 3Paint the lightest areas first, letting each layer dry before adding adjacent colors; use painter's tape for crisp edges if desired.
- 4Repeat one color across all three canvases to unify the set, then hang with even gaps.
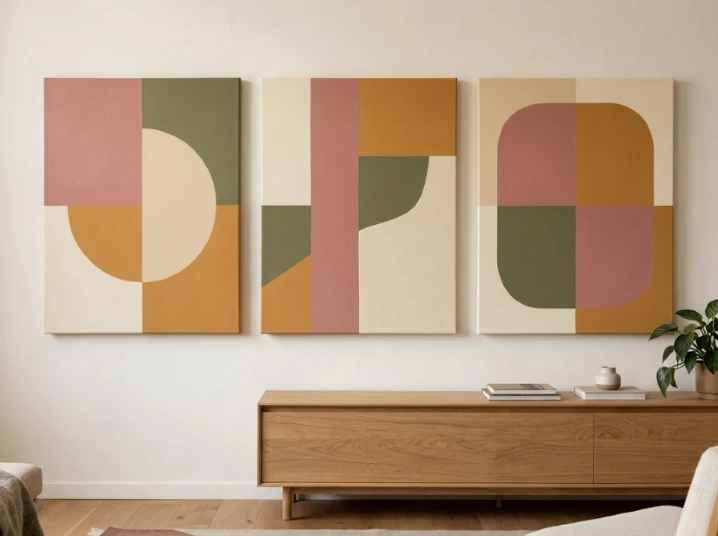
Repeating dusty rose, muted olive, ochre, and cream across three distinct geometric shapes creates effortless visual harmony.
Weave a Simple Yarn-and-Dowel Wall Hanging
A soft yarn hanging adds texture without needing a loom. This project is particularly good for a bedroom, reading corner, or a small section of wall that feels visually hard.
How to make it:
- 1Cut multiple lengths of yarn about twice the desired finished hanging length.
- 2Fold the strands in half and attach them across the dowel using lark's-head knots.
- 3Add a second color in grouped bands or simple repeated knots. Comb loose strands gently if the yarn type allows.
- 4Trim the lower edge into a shallow V or a soft straight line, and tie a secure hanging cord to both ends of the dowel.
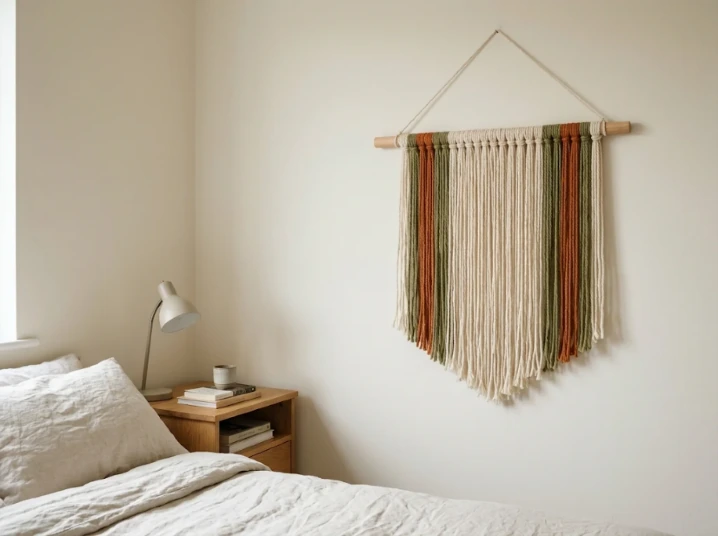
Simple lark's-head knots in cream, olive, and rust yarn soften a bedroom wall with zero loom required.
Turn Peel-and-Stick Wallpaper Into Framed Panels
Peel-and-stick wallpaper is often used to cover an entire wall, but small framed samples can have a stronger effect with much less material. It works especially well when you love a bold pattern but don't want it everywhere.
How to make it:
- 1Choose one wallpaper pattern with a repeat that makes sense in several smaller panels.
- 2Cut the backing boards to size and wipe them clean and dry.
- 3Apply the wallpaper to the boards a little at a time, smoothing bubbles outward with a soft card and keeping the print aligned.
- 4Trim excess paper, place each covered board in a frame, and arrange the finished set together.
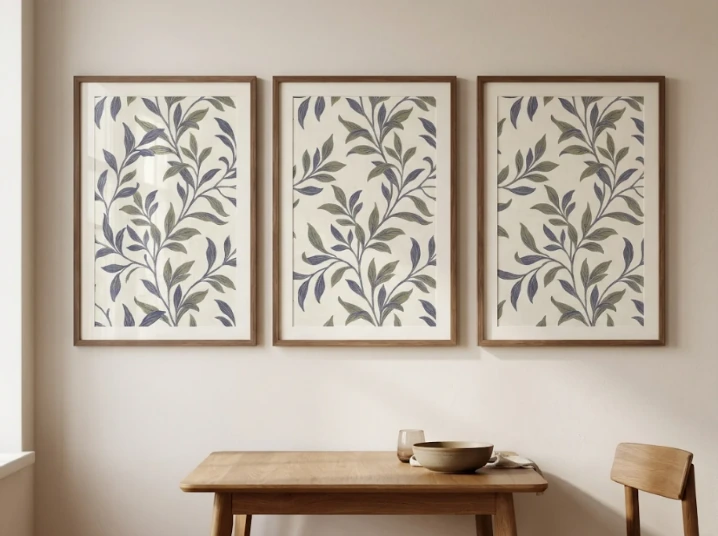
Framing three continuous crops of one indigo-and-olive botanical wallpaper delivers tailored pattern without wallpapering a whole room.
Make Embroidery-Hoop Fabric Wall Art
Embroidery hoops aren't only for finished embroidery. You can use them to display patterned fabric, stitched initials if they're your own work, or simple geometric thread lines.
How to make it:
- 1Select three fabrics that share a similar palette but vary in pattern scale.
- 2Place each fabric over the inner hoop, fit the outer ring, and tighten until the surface is evenly taut.
- 3Trim the excess fabric behind the hoop, leaving enough material to secure it neatly.
- 4Add a small stitched motif to one hoop if you enjoy embroidery, then arrange the group on the wall.
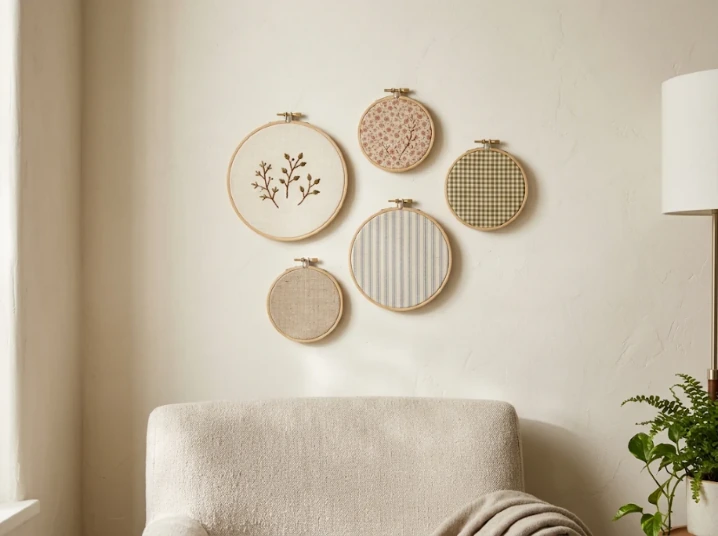
Five bamboo embroidery hoops mix hand-stitched linen with micro-floral, olive gingham, flax, and woven stripe scraps.
Install a Picture Ledge for Rotating Art
A picture ledge lets you change what is on display without creating new nail holes for every frame. It is ideal for people who like seasonal art swaps or have postcards and family pictures they want to rearrange.
How to make it:
- 1Choose a ledge sized to your wall and verify its loading and installation instructions.
- 2Locate studs where possible, mark holes level, and use suitable fasteners for the specific wall construction.
- 3Install the ledge firmly, checking for wobble before placing items on it.
- 4Layer a few lightweight frames, keeping the tallest at the back and smaller art in front.
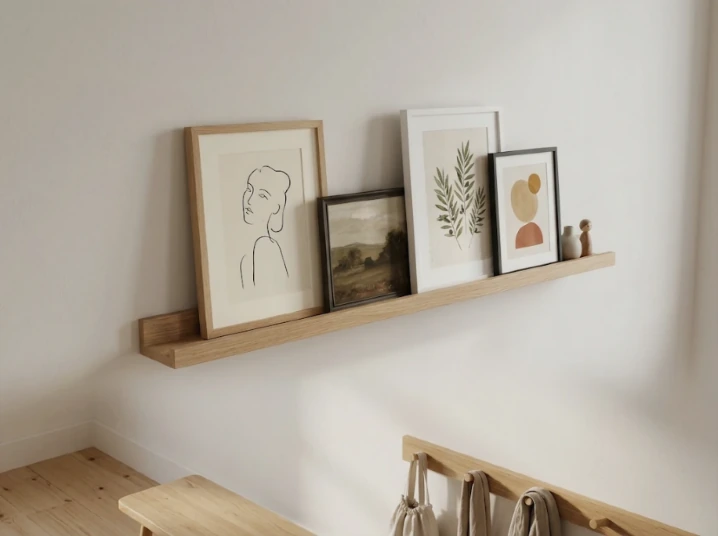
A lipped natural oak picture ledge makes seasonal print rotations effortless with zero extra wall holes.
Craft a Layered Paper Shadow Box
If you enjoy cutting and arranging shapes, a shadow box turns basic paper into art with striking depth. It's an especially good project for a nursery, home office, or quiet hallway.
How to make it:
- 1Draw an uncomplicated scene such as overlapping hills, leaf silhouettes, or a moon over a horizon.
- 2Cut shapes from three or four tones of paper, keeping the finest details away from very thin edges.
- 3Arrange the layers on a backing sheet, using modest foam spacers between some layers to create shadows.
- 4Secure the pieces and close the frame, making sure no paper presses awkwardly against the glazing.
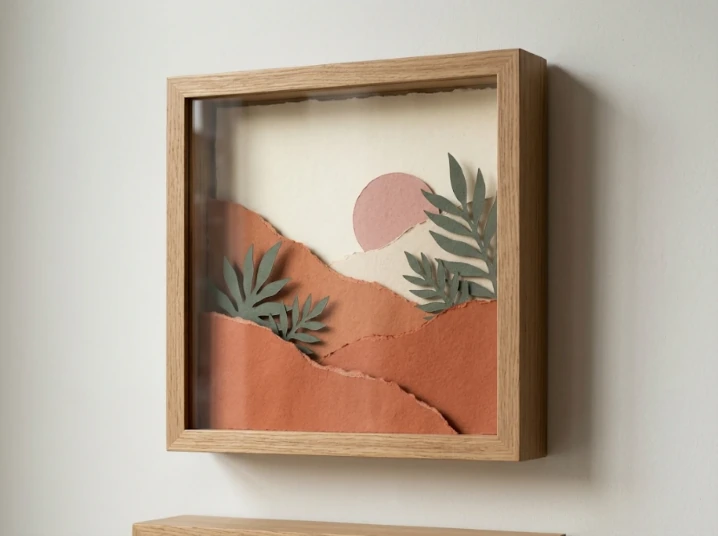
Modest foam spacers between heavyweight cut papers cast genuine soft shadows inside a deep oak shadow box.
Arrange a Wall Display of Woven Baskets
Shallow woven baskets or decorative flat trays bring warmth and natural texture to a plain wall. The nicest arrangements usually mix sizes and weaving patterns while repeating a similar material color.
How to make it:
- 1Inspect baskets for secure rims and attachment points; avoid damaged or brittle pieces.
- 2Lay them on the floor, starting with the largest and adding smaller pieces around it.
- 3Tape paper cutouts to the wall to check the overall size and spacing.
- 4Install suitable hangers and attach each piece securely, accounting for its actual weight and construction.
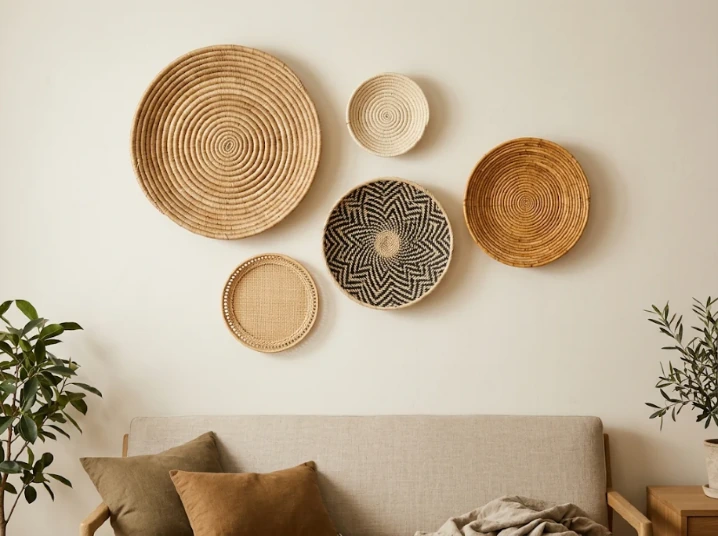
Five distinct natural-fiber baskets create tactile organic warmth above a linen settee.
Cover a Cork Board With Fabric for a Functional Wall
A fabric-covered cork board is part decoration, part organization. Instead of leaving reminders on a desk, you can collect swatches, notes, postcards, and inspiration in one tidy place.
How to make it:
- 1Choose a fabric that will make pinned items easy to read; a small check or neutral linen works well.
- 2Lay the fabric face down, set the board on top, and wrap the material around the edges.
- 3Secure the fabric neatly on the back without covering the mounting points or creating bulky folds at the corners.
- 4Install the board with hardware rated for its weight plus the items you plan to pin, then add just a few meaningful notes and images.
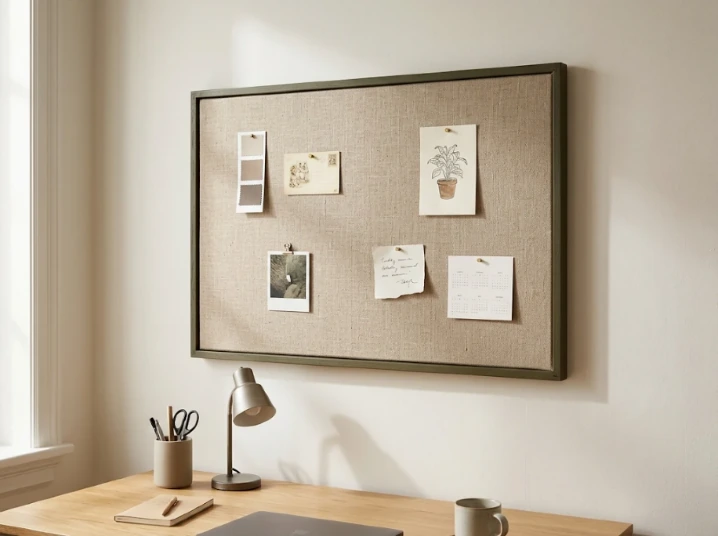
Wrapping a cork board in natural flax linen with an olive wood frame turns daily organization into calm desk art.
Create a Vintage Mirror Cluster
A small cluster of vintage mirrors can brighten a dim entryway while adding detail from different frame shapes. This is more of an arrangement-and-upcycling project than a cutting or construction project, making it a good weekend refresh.
How to make it:
- 1Clean and inspect each mirror, checking the backing and glass for cracks, loose joints, or damaged hanging fittings.
- 2Paint only the frames if you want a more unified finish, following the paint instructions and allowing full curing.
- 3Arrange the mirrors on the floor so the tallest piece anchors the grouping; transfer the positions using paper templates.
- 4Mount each mirror independently using hardware rated for its weight and your wall type. Do not hang heavy or fragile mirrors from ordinary craft adhesive.
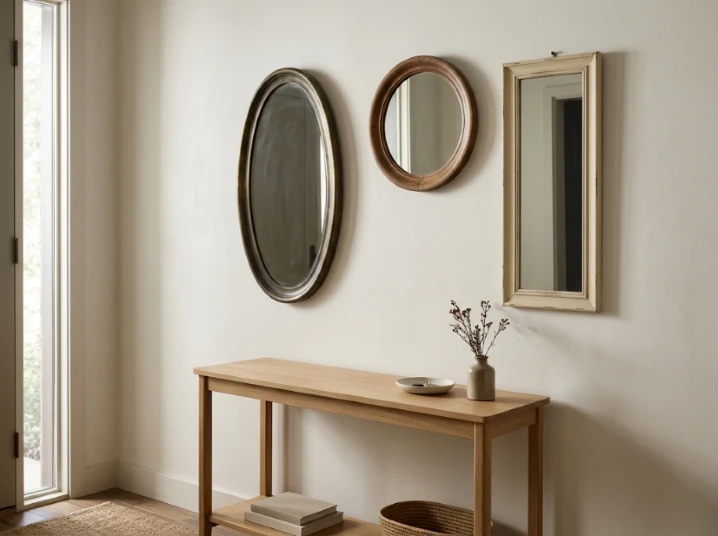
An oval aged-brass mirror, round walnut mirror, and cream rectangular frame bounce morning daylight across an entry console.
How to Make DIY Wall Decor Look Intentional, Not Cluttered
- Start with one focal point: A large canvas, mirror, or textile should lead an arrangement. Surround it with smaller pieces rather than making every item equally prominent.
- Repeat a detail: Two common frame colors, one repeating accent color, or the same kind of natural wood can connect objects that otherwise look different.
- Plan the wall before drilling: Lay items on the floor or use full-size paper templates. Check clearances around doors, shelves, outlets, and furniture.
- Balance texture with blank space: A woven basket wall and a heavily textured tapestry might compete next to each other. Surround tactile pieces with quiet, simple art.
- Use hardware for the real weight: Wall materials differ, and a frame's weight includes its glass, backing, and fittings. Follow manufacturer ratings rather than assuming a hanger works everywhere.
Best DIY Wall Decor Ideas for Renters
If you cannot drill or paint, begin with the washi-tape mural, lightweight framed fabric art, or paper shadow boxes on approved picture-hanging products. For larger artwork, a freestanding display on a stable piece of furniture may be a better option—but it must be placed where it cannot tip or fall.
Frequently Asked Questions
Final Thoughts
The most satisfying DIY wall decor is rarely the most complicated. A small set of framed fabrics, one textured canvas, or a carefully arranged gallery can change how a room feels because it reflects your own choices. Pick one project that matches your space, finish it well, and build on it only if the wall needs more.
Save these DIY wall decor ideas for your next home refresh, and start with the project you can realistically complete with the tools and materials you already have.
Related Editorial Stories
30 Basement Bar Ideas in 2027 That Make Every Gathering Feel Special
Turn an overlooked basement into an intentional, welcoming entertainment haven. Explore 30 basement bar ideas for 2027—from compact dry bars and under-stairs nooks to fluted oak peninsulas, mood-lit speakeasies, and multi-purpose concession lounges.

30 Guest Bedroom Ideas for 2027 That Feel Stylish, Cozy, and Thoughtfully Designed
Transform your spare room into an intentional, welcoming haven. Explore 30 guest bedroom ideas for 2027—from oatmeal retreats and forest-green nooks to space-saving wall beds, reading corners, and hotel-grade welcome stations.
30 Man Cave Decor Ideas in 2027 for Every Style, Space, and Budget
Discover 30 elevated man cave decor ideas for 2027: moody lounges, compact console gaming nooks, sports watch-party layouts, and budget-friendly renter solutions.