30 Cereal Box Storage Ideas in 2027: Clever DIY Organizers and Pantry Hacks
Discover 30 clever cereal box storage ideas for 2027: creative cardboard upcycling crafts, custom drawer trays, and space-saving pantry organization hacks.
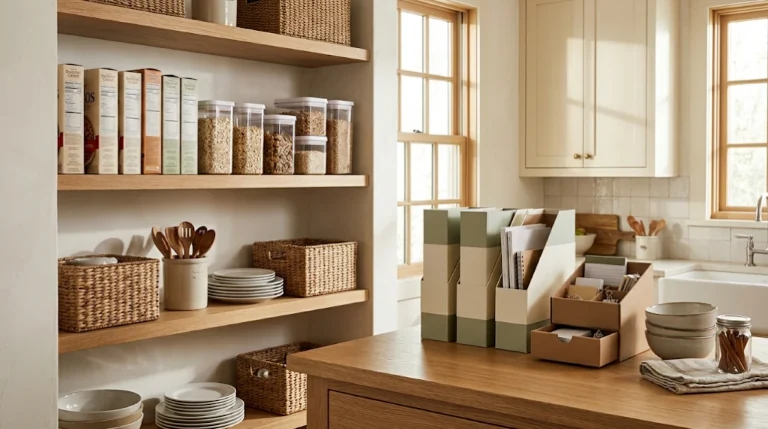
Why Cereal Boxes Are Useful for DIY Storage
A finished cereal box might look like something that belongs in the recycling bin, but it can also become a surprisingly useful storage organizer. With a few simple cuts and some decorative paper, you can turn an empty box into a magazine holder, drawer divider, kitchen storage caddy, or even an attractive desktop organizer.
And if your real challenge is keeping cereal boxes organized in a crowded pantry, there are plenty of practical solutions for that, too.
These 30 cereal box storage ideas for 2027 bring together creative cardboard upcycling projects and space-saving pantry organization tricks. Whether you have a tiny apartment kitchen, a busy family breakfast station, or an overflowing junk drawer, you'll find ideas you can adapt to your space without spending a fortune.
Empty cereal boxes are lightweight, easy to cut, and available in several sizes. Their rectangular shape makes them especially handy for organizing papers, small office supplies, kitchen accessories, and items that need to stand upright.
You can leave the cardboard plain for a quick project or cover it with contact paper, scrapbook paper, or fabric for a more polished finish. The biggest advantage is flexibility. Unlike store-bought organizers, a cereal box can be trimmed to fit the exact drawer, shelf, or cabinet you're trying to organize.
There is one important limitation: cereal box cardboard is thin paperboard. It works best for lightweight items in dry indoor spaces, not heavy tools, wet supplies, or direct storage of loose food.
What You'll Need
Most of these simple DIY cereal box projects use materials you probably already have at home:
- Empty, clean, completely dry cereal boxes
- Scissors or a utility craft knife
- A metal ruler and pencil
- Double-sided tape, craft glue, or adhesive strips
- Wrapping paper, contact paper, or leftover wallpaper scraps
- Optional self-adhesive labels and decorative washi tape
- Optional corrugated cardboard offcuts to reinforce the base
Always use a protected cutting mat, and let an adult handle craft knives or sharp utility blades.
Which Cereal Box Storage Idea Should You Try First?
Before jumping into a project, match your current storage challenge to the most effective solution:
| Storage Challenge | Recommended Project | Key Benefit |
|---|---|---|
| Messy kitchen junk drawer | Custom shallow drawer trays | Tailored compartment heights that prevent jamming |
| Food storage lids everywhere | Angled lid organizer | Keeps container tops visible and upright |
| Piled magazines or notebooks | Sloped magazine holder | Narrow vertical profile saves shelf space |
| Loose tea and seasoning packets | Upright packet caddies | Prevents envelope tears and lost spices |
| Cluttered desktop paperwork | Minimalist file caddies | Coordinated office aesthetic on zero budget |
| Cereal boxes tipping over | Vertical shelf dividers | Freestanding stability for original packaging |
| Deep, hard-to-reach shelves | Pull-out slide-out bins | Smooth access to back cartons without unstacking |
| Stale opened breakfast cereal | Airtight clear dispensers | Hermetic moisture and pest barrier with visible supply |
Part 1: 20 Creative Ways to Repurpose Empty Cereal Boxes
These projects give clean cereal boxes a second life around the kitchen, home office, children's bedroom, and creative craft corner.
DIY Cereal Box Magazine Holders
One of the easiest ways to repurpose a cereal box is to turn it into a vertical magazine holder. The tall, narrow shape is particularly useful for keeping thin magazines, notebooks, and lightweight papers standing neatly on a shelf.
To make one, seal the bottom flaps, then draw an angled line along the front and side panels. Cut away the upper portion so that the back remains tall and the front opening is lower.
Cover the outside with decorative paper and reinforce any weak edges with tape. Make two or three matching holders for a coordinated bookshelf or home-office display.
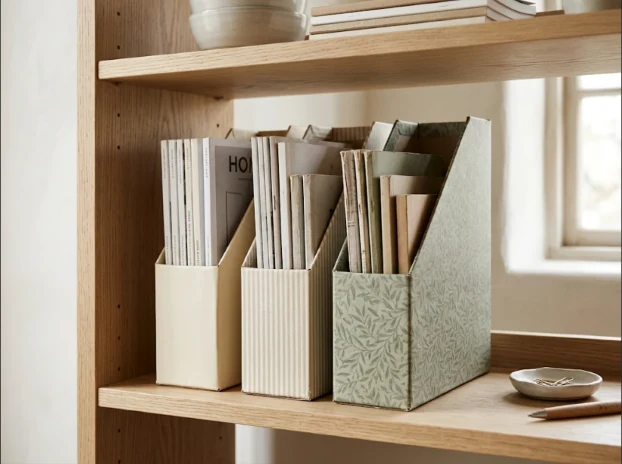
BEST FOR: Magazines, slim notebooks, catalogs, and lightweight folders. PRO STYLING TIP: Choose a large family-size cereal box with a wide base if you plan to store multiple magazines. Heavy hardcover books can bend thin paperboard.
Turn a Cereal Box Into a Food Storage Lid Organizer
If plastic food container lids constantly disappear into the back of your cabinet, this cereal box hack is worth trying.
Use a large, empty cereal box and cut an angled opening similar to a magazine holder. Keep enough height at the back to support the lids, and leave a substantial base so the organizer stays upright.
Place clean, dry lids vertically inside, arranging larger pieces behind smaller ones. The open front makes it easier to see which lid belongs to which container. For extra stability, place the organizer between two larger storage containers or inside a cabinet bin.
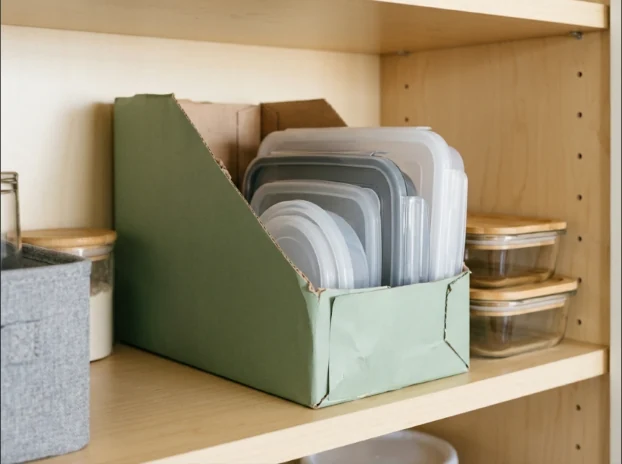
BEST FOR: Lightweight plastic food container lids. PRO STYLING TIP: Measure your widest lid before cutting. If the box is too narrow, wide circular lids may sit awkwardly or deform the paperboard.
Create Custom Kitchen Drawer Organizers
Kitchen junk drawers are rarely the same size, which makes ready-made dividers surprisingly difficult to fit.
Empty cereal boxes provide an inexpensive alternative. Cut several boxes into shallow open-top trays, adjusting each height so it sits comfortably below the top edge of your drawer.
Arrange the trays before decorating them to find a layout that works. You might reserve one compartment for measuring spoons, another for clips, and a third for lightweight kitchen gadgets. Cover the trays with matching paper for a tidy appearance. If they slide around, secure them together with small pieces of double-sided tape.
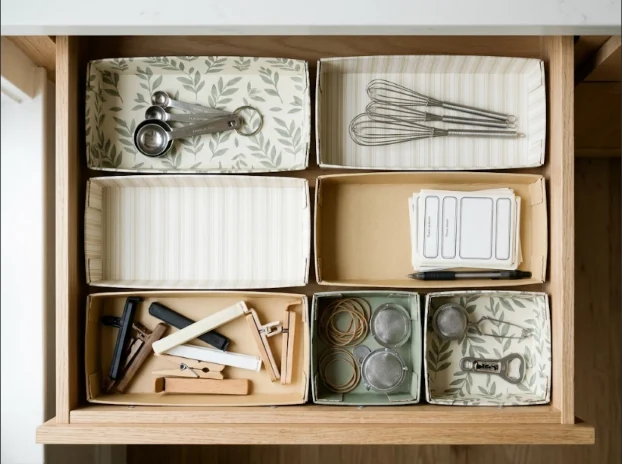
BEST FOR: Measuring spoons, clips, pens, small whisks, and miscellaneous kitchen accessories. PRO STYLING TIP: Keep heavy or sharp metal utensils in stronger organizers rather than lightweight cardboard.
Make an Upright Spice Packet Organizer
Those small seasoning packets and dry sauce-mix envelopes can easily disappear behind larger jars.
A narrow cereal box organizer can keep them together without taking up much shelf space. Cut the box down into a short, upright holder with a lower front opening. Add simple cardboard dividers if you want to separate seasoning mixes from dry soup or sauce packets.
Store the sealed packets with their labels facing forward so you can quickly pull what you need without rummaging.
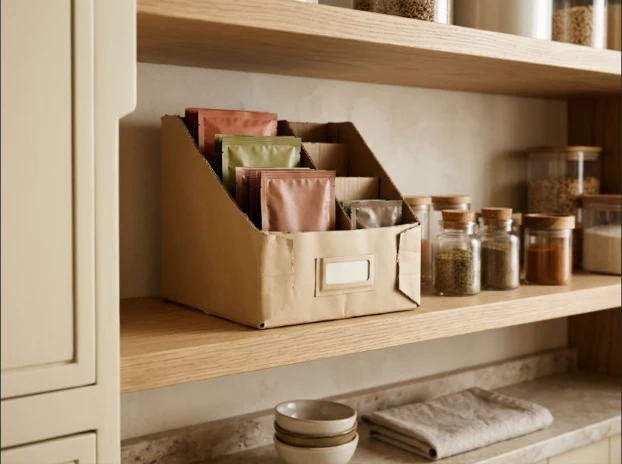
BEST FOR: Sealed seasoning mixes and dry recipe packets. PRO STYLING TIP: Keep the packets in their original sealed packaging so ingredient lists, allergen details, and cooking instructions remain accessible.
Build a Tea Packet Storage Tray
Commercial tea boxes often take up more cabinet space than their contents require, particularly when you have several varieties open at once.
Use a cereal box to make a shallow tray with cardboard partitions. Arrange individually wrapped tea bags or sealed tea sachets by flavor so you can see your choices without pulling multiple boxes out of the cupboard.
Choose a tray dimension that fits comfortably inside a cabinet or on a dry pantry shelf. A paper-covered exterior gives the organizer a bespoke, finished look.
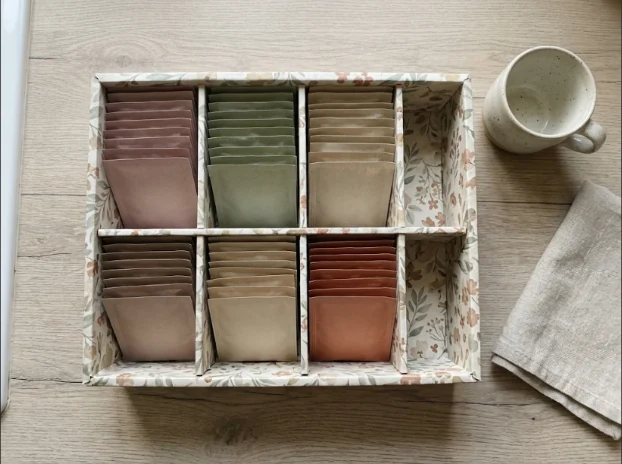
BEST FOR: Individually wrapped tea bags, sealed sachets, and tea accessories. PRO STYLING TIP: For loose or unwrapped tea, always use a food-safe airtight tin instead of placing loose leaves directly against raw cardboard.
Organize Condiment Packets in Small Cubbies
Takeout sauce packets, sealed sugar substitutes, and small single-serve seasonings can quickly become a messy, sprawling collection in a drawer.
Cut one cereal box into two or three shallow square containers. Place the finished compartments inside a drawer or cabinet basket, grouping packets by type—sweeteners in one cubby, soy sauce in another, mustard packets in a third.
This gives every packet a designated home and prevents forgotten items from piling up indefinitely.
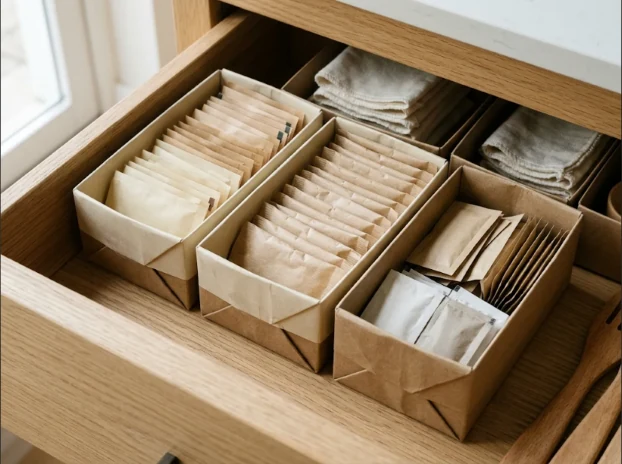
BEST FOR: Dry, clean, unopened condiment packets and single-serve packaged items. PRO STYLING TIP: Keep oily or refrigerated condiments in appropriate washable containers and check best-by dates periodically.
Create a Recipe Card Filing System
Handwritten family recipes and magazine clipping cards deserve a storage system that keeps them organized without bending delicate paper.
Cut a cereal box into a shallow rectangular tray, then add upright cardboard dividers to separate appetizers, mains, baking, and desserts.
You can decorate the outside with leftover textured paper and add simple category index tabs to the dividers. Place the finished tray on a dry kitchen bookshelf away from steam and cooking splashes.
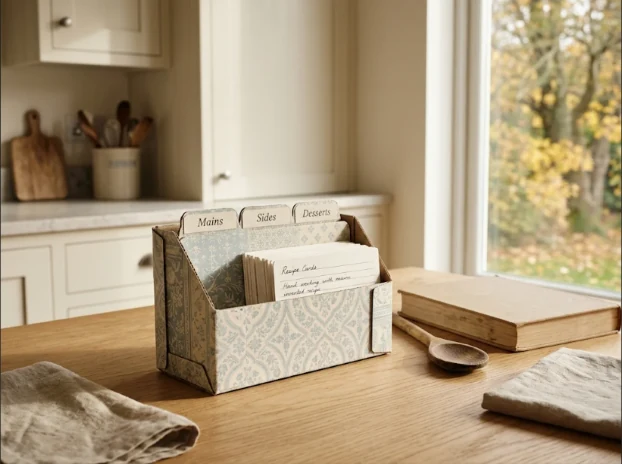
BEST FOR: Recipe index cards, handwritten cooking notes, and clipped meal ideas. PRO STYLING TIP: Measure your largest index card before trimming. A slightly wider tray makes it much easier to flip through cards with one hand.
Make a Takeout Menu and Meal Planning File
Loose restaurant menus, grocery flyers, and weekly meal-planning sheets can make a kitchen counter feel cluttered.
A tall cereal box cut into a sloped file holder gives these papers one convenient, dedicated home.
Use a large box for standard letter-size papers, or fold oversized takeout menus to fit. Place the organizer on a pantry shelf or in an office nook near the kitchen. You can even add internal dividers to separate weekly shopping lists from takeout menus.
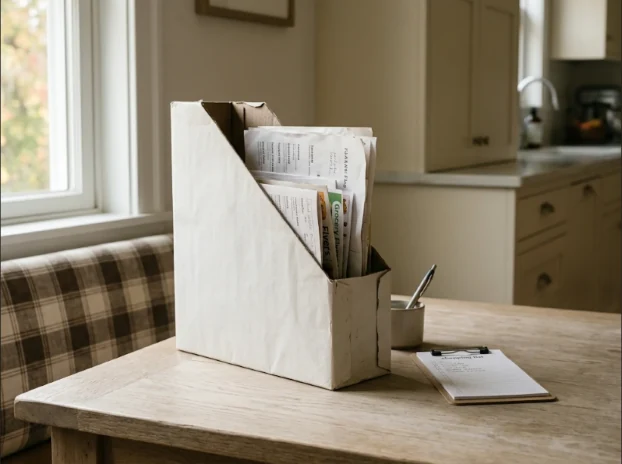
BEST FOR: Paper menus, grocery flyers, lightweight folders, and meal-planning pages. PRO STYLING TIP: Keep only menus for spots you order from frequently, and recycle outdated promotional flyers during your weekly kitchen reset.
Design a Decorative Napkin Holder
Paper napkins tend to slide around inside drawers or accumulate in untidy, collapsing stacks on kitchen counters.
For a simple fix, cut a clean cereal box into a low rectangular caddy with a wide access opening at the top. Fold or wrap decorative paper over the raw cut edges for a clean, tailored finish.
Add an optional cardboard divider if you want to separate everyday luncheon napkins from decorative cocktail napkins. Store the holder in a dry pantry cabinet or dining credenza.
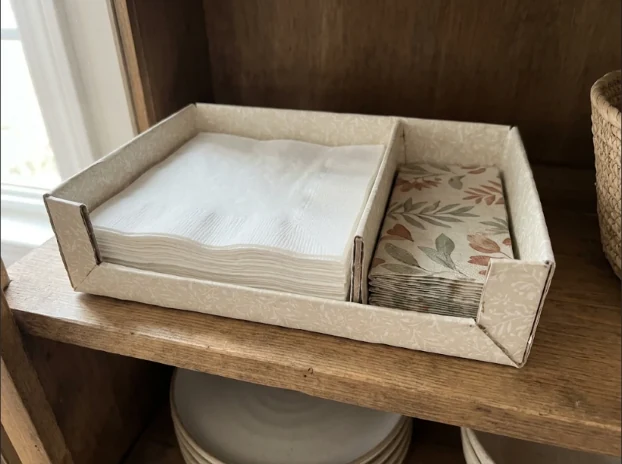
BEST FOR: Packaged or clean folded paper napkins. PRO STYLING TIP: Keep the holder away from sinks and dishwashers, as humidity can cause thin paperboard to soften and bow.
Store Folded Reusable Shopping Bags
Reusable grocery tote bags are wonderful for errands until they become an unwieldy pile at the bottom of a pantry closet.
Fold lightweight fabric shopping bags into uniform rectangles and stand them vertically like filing folders inside a repurposed large cereal box holder.
Place the organizer near your pantry door or entryway console so clean bags are effortless to grab on your way out to the market.
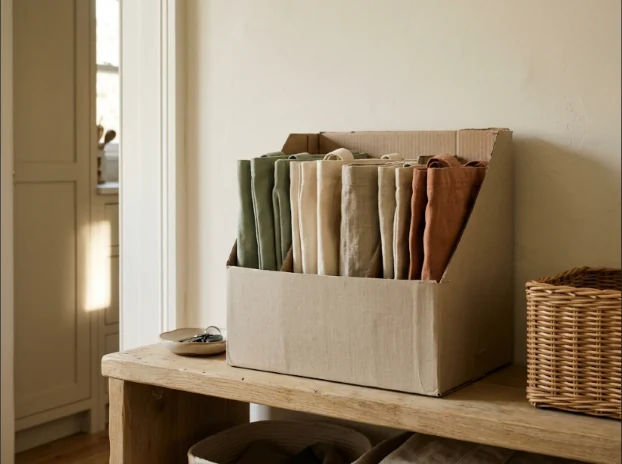
BEST FOR: Foldable lightweight nylon or cotton reusable shopping bags. PRO STYLING TIP: Store only completely clean and dry bags. Heavy canvas totes with rigid bottoms are best kept in a heavier wooden crate.
Make a Kitchen Cleaning Cloth Organizer
When microfiber cleaning cloths are tossed loosely into a utility cabinet, finding the right cloth for delicate glass versus grease cleanup takes extra time.
Fold clean cloths into compact vertical rectangles and file them upright in an open-top cereal box organizer. Use separate sections or two small boxes to separate glass-polishing cloths from everyday counter rags.
The vertical file layout lets you pull a fresh cloth instantly without unstacking the entire pile.
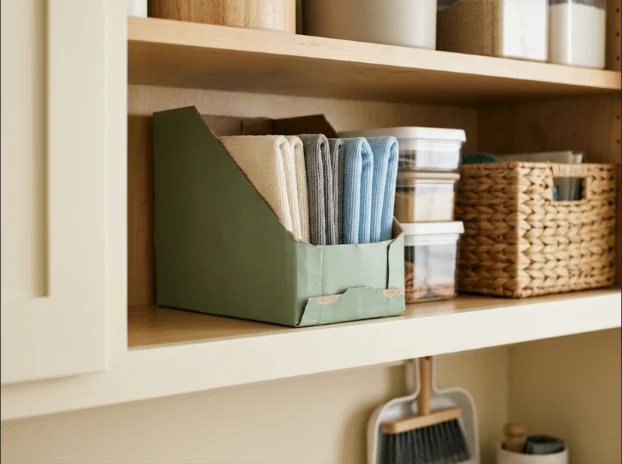
BEST FOR: Clean, thoroughly dry microfiber cloths and lightweight lint-free towels. PRO STYLING TIP: Never place damp cloths inside cardboard storage. Always launder and dry cloths completely to prevent moisture buildup.
Organize Lunchbox Accessories
A kitchen drawer full of reusable silicone muffin cups, bento fork picks, sealing clips, and sandwich cutters can quickly dissolve into chaos.
Cut two or three cereal boxes into shallow trays of varying widths. Reserve the largest section for sandwich cutters and wrap bands, and the smaller trays for tiny condiment cups and clips.
Line the drawer with the trays to establish modular order that speeds up morning lunch packing.
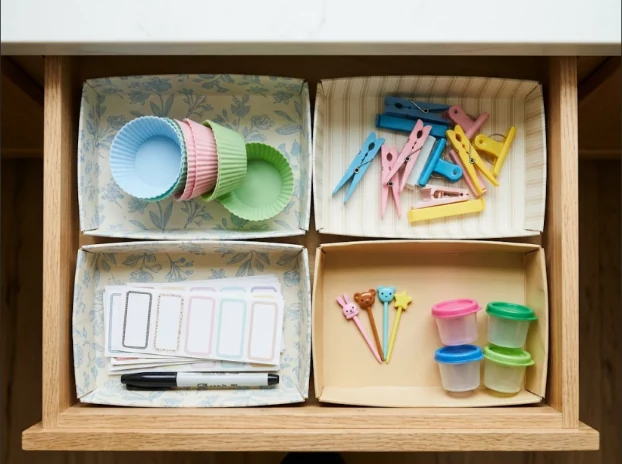
BEST FOR: Clean, dry lunchbox accessories, bag clips, and small packing tools. PRO STYLING TIP: Wash and completely dry all silicone and plastic pieces before returning them to cardboard trays.
Create a Minimalist Desktop Paper Organizer
A clutter-free desk does not require expensive store-bought acrylic bins. A trio of matching cereal boxes can become an elevated filing system for notebooks, invoices, and active projects.
Cut each box into an angled file caddy and wrap the exteriors in matching matte ivory or linen-textured contact paper.
Arrange the organizers side-by-side with taller backs facing the wall. Dedicate one to pending correspondence, one to active notebooks, and one to blank printer paper.
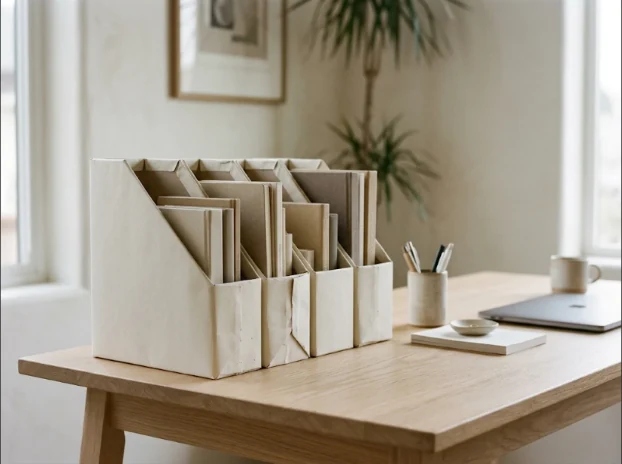
BEST FOR: Home offices, student study desks, and lightweight documents. PRO STYLING TIP: Glue a second layer of cardboard to the bottom interior panel to keep the caddies stable when notebooks are removed.
Build an Entryway Mail Sorting Station
Mail and circulars have a habit of accumulating wherever they are dropped. An upright cereal box mail sorter gives daily post an immediate home.
Use three decorated cereal boxes cut into staggered heights. Place them on an entryway console or shelf near the door.
Label the compartments: Action Required (bills and notices), File/Archive (records and statements), and Reading (catalogs and letters). This simple triage prevents important mail from disappearing under junk mail.
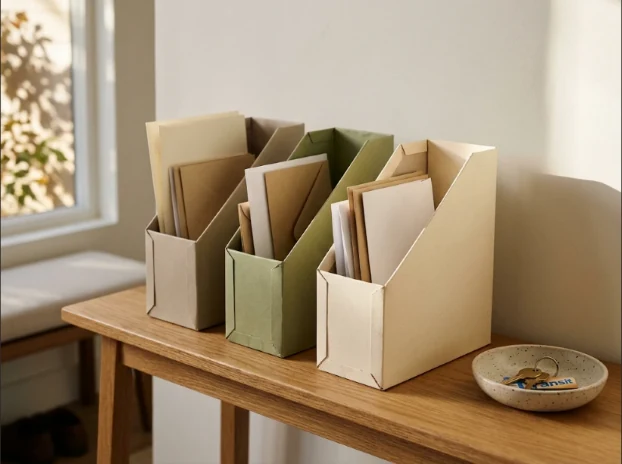
BEST FOR: Envelopes, daily correspondence, and household paperwork. PRO STYLING TIP: Keep personal letters containing sensitive financial details tucked out of direct sight if your entryway is visible to visitors.
Make a Homework and Workbook Station
Children's activity workbooks, reading logs, and assignment folders often end up scattered across dining tables and couches.
Create a dedicated homework caddy using two or three large cereal boxes. Cut them into deep files, wrap them in cheerful coordinated papers, and label them by subject or by child.
Having a portable, lightweight home for school papers makes cleanup fast and helps children develop independent organization habits.
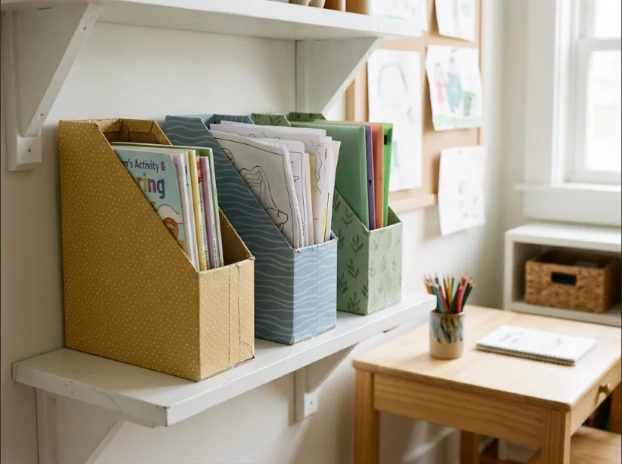
BEST FOR: Thin school workbooks, drawing pads, and daily homework folders. PRO STYLING TIP: Involve kids in choosing wrapping paper patterns, but have an adult handle the ruler and utility knife cutting.
Create an Upright Art Paper Holder
Sheets of colored construction paper, watercolor cutoffs, and cardstock quickly get bent and creased when stored horizontally under heavier craft bins.
A modified cereal box organizer keeps sheets standing vertically so colors and textures are visible at a glance.
Cut a low front opening while keeping full side height to prevent paper corners from curling. Add a piece of cardboard inside as an upright divider between smooth cardstock and textured watercolor paper.
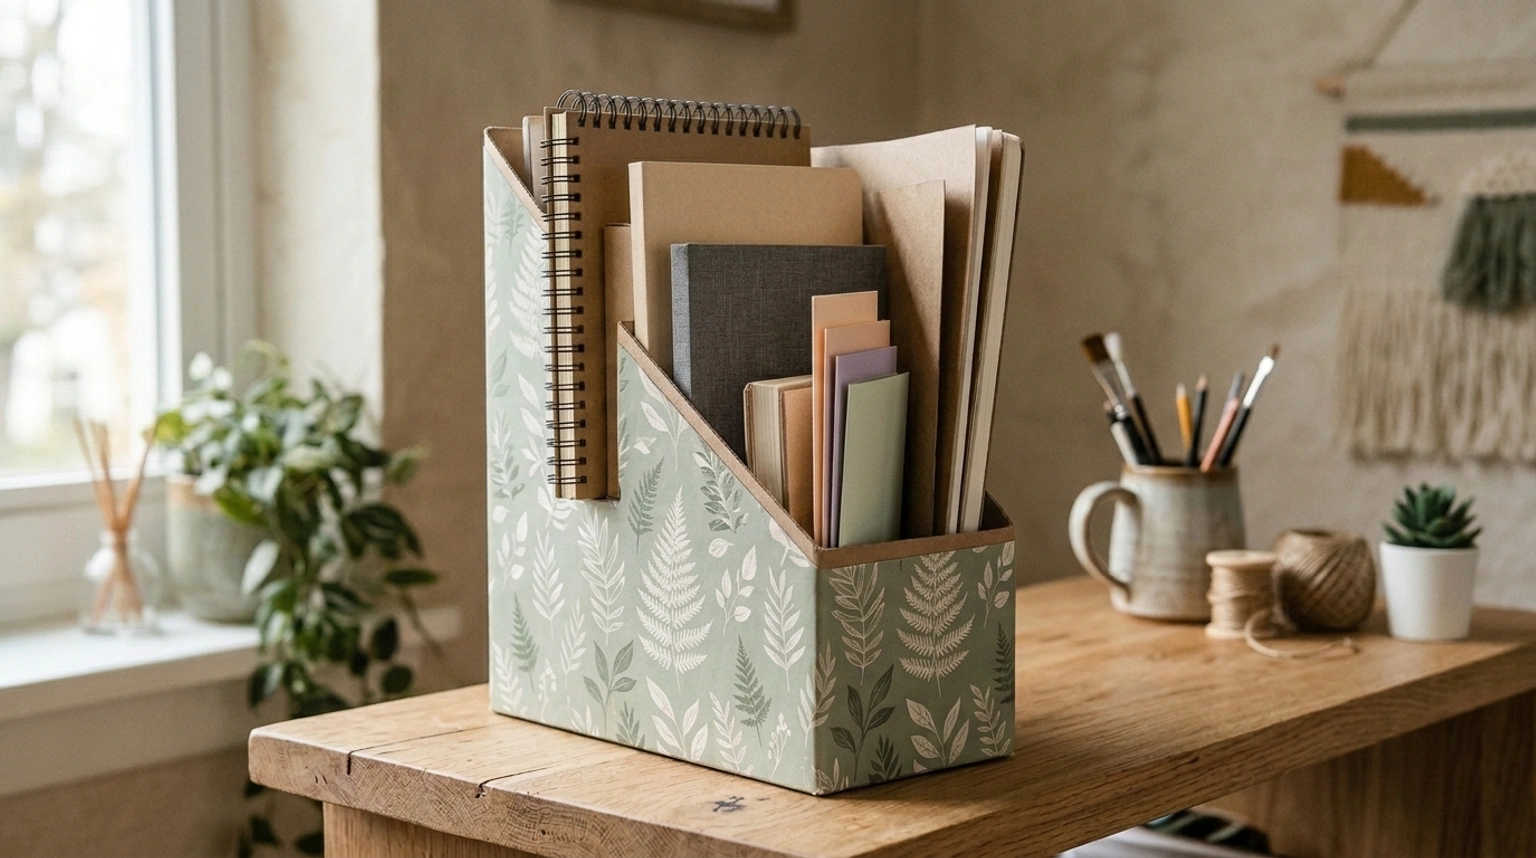
BEST FOR: Small drawing pads, cardstock cutoffs, and craft paper sheets. PRO STYLING TIP: Store full oversized 18x24-inch art sheets flat in an artist portfolio rather than forcing them into narrow cereal boxes.
Turn a Cereal Box Into a Marker and Pencil Caddy
With a few internal cardboard partitions, an empty cereal box transforms into a multi-compartment desktop stationery caddy.
Cut the box down to a height of four to five inches. Cut cardboard strips to the interior width and slot them together in an egg-crate grid to form four separate square chambers.
Wrap the exterior in patterned paper, then sort colored pencils into one section, markers in the second, and gel pens in the third.
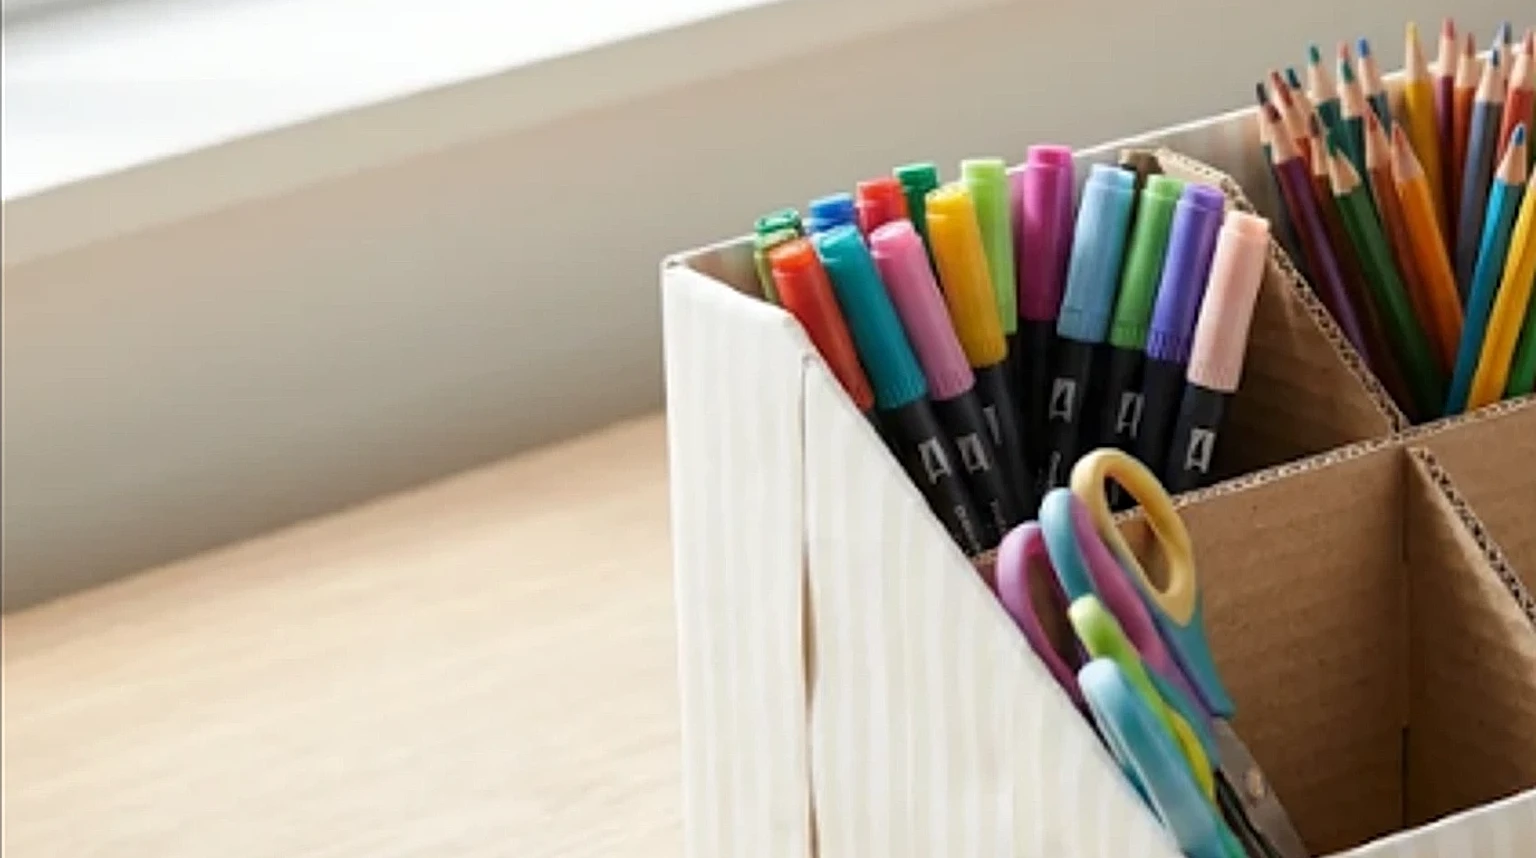
BEST FOR: Colored pencils, felt-tip markers, crayons, and small desktop tools. PRO STYLING TIP: Keep heavier supplies near the center of the caddy to maintain balanced desktop stability.
Organize Washi Tape and Sticker Supplies
Washi tape rolls, sticker sheets, and decorative gift labels get lost easily when tossed into a large craft drawer.
Create a shallow organizer tray from the base of a cereal box. Insert cardboard dividers spaced just wide enough for rolls of decorative tape to stand in rows, with a flat slot reserved for sticker sheets.
Covering the tray in a soft botanical or pastel print makes your crafting setup feel thoughtfully styled and accessible.
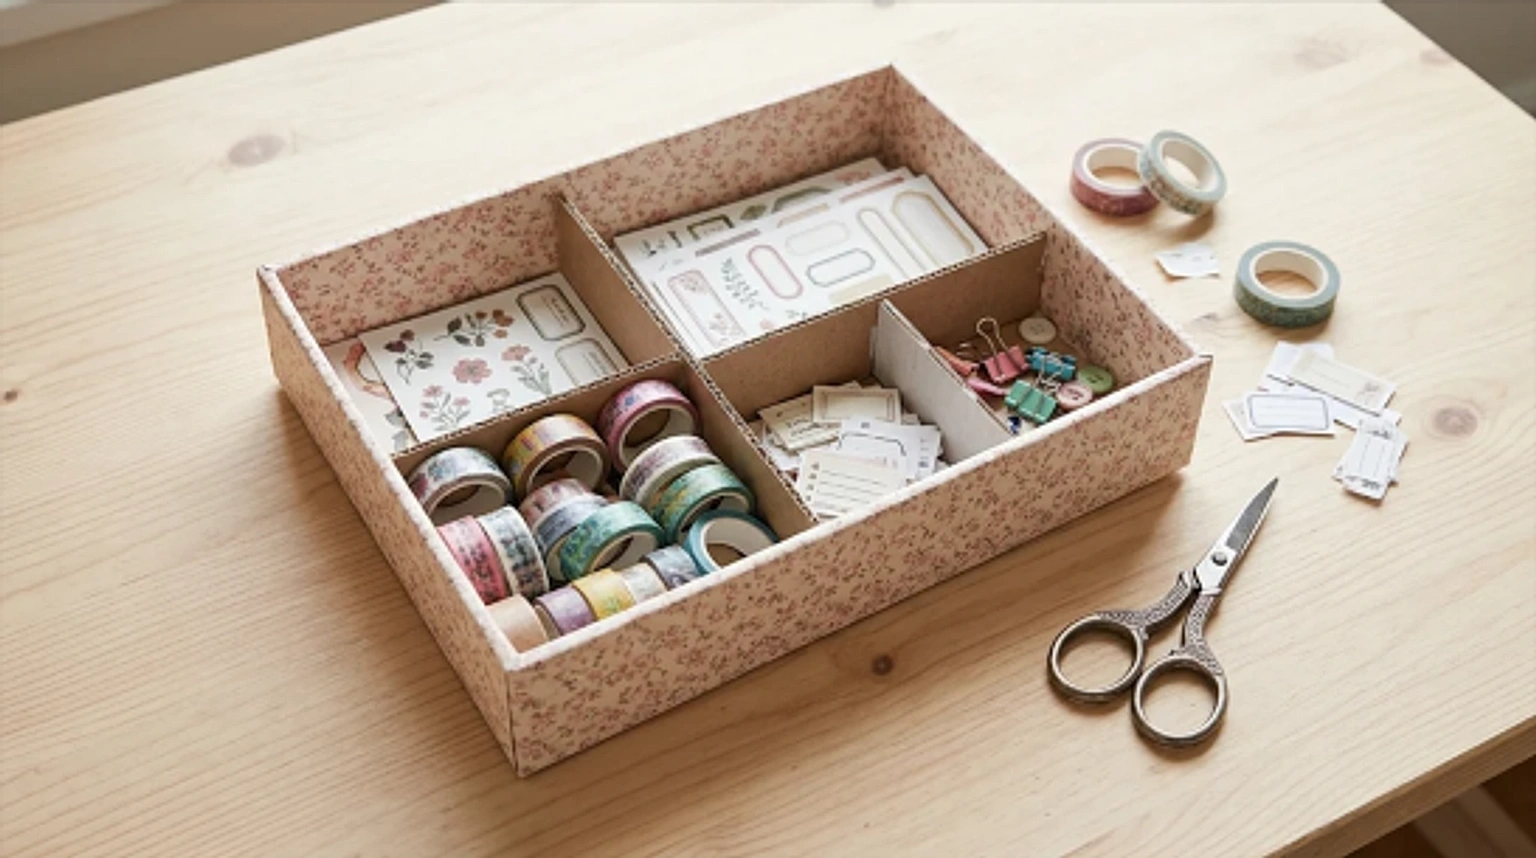
BEST FOR: Washi tape, sticker sheets, labels, and scrapbooking accessories. PRO STYLING TIP: Make dividers removable using small slots so you can reconfigure the layout as your tape collection grows.
Make a Gift-Wrapping Supply Organizer
Gift tags, ribbon spools, folded tissue paper, and decorative remnant sheets are tricky to store neatly between holidays and birthdays.
Cut one cereal box into a shallow tray for ribbons and gift cards, and a second tall box into an upright file for folded wrapping tissue and gift bags.
Store both organizers side-by-side on a closet shelf for an instant, budget-friendly wrapping station.
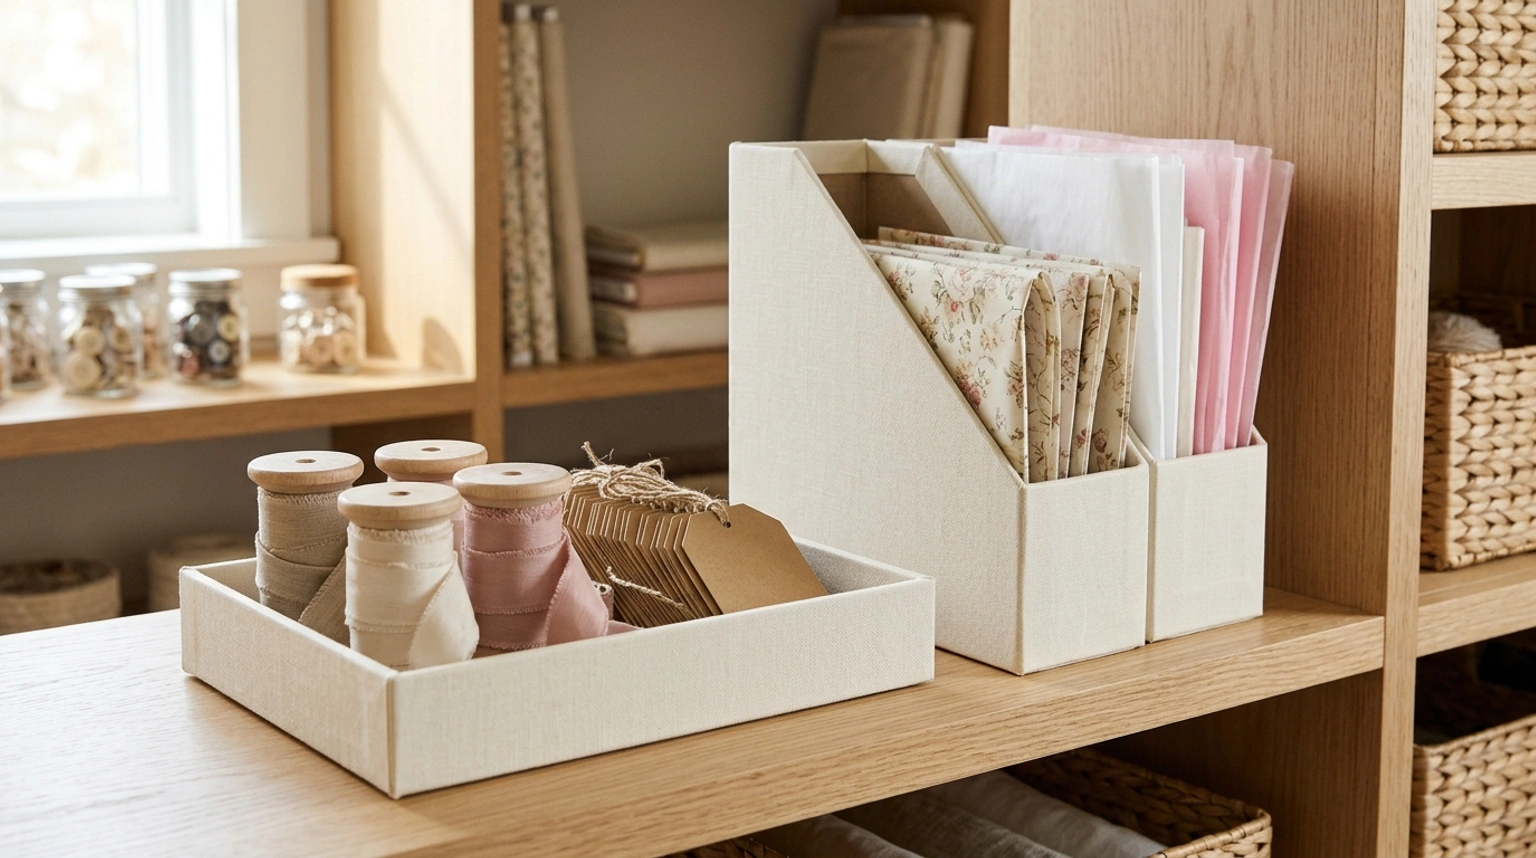
BEST FOR: Gift tags, folded tissue paper, ribbon spools, and gift bags. PRO STYLING TIP: Keep long 30-inch wrapping paper rolls in a tall basket or closet hanging rack; use cereal boxes strictly for flat folded supplies.
Organize Garden Seed Packets
Garden seed envelopes are small enough to get lost in garage drawers, yet important enough to keep dry, organized, and dated.
Turn a compact cereal box into an upright garden seed file. Cut cardboard dividers for vegetables, herbs, and flowering perennials.
Keep seeds in their original envelopes so you can easily reference planting depth, sun requirements, and harvest dates. Store the organizer in a cool, dry closet.
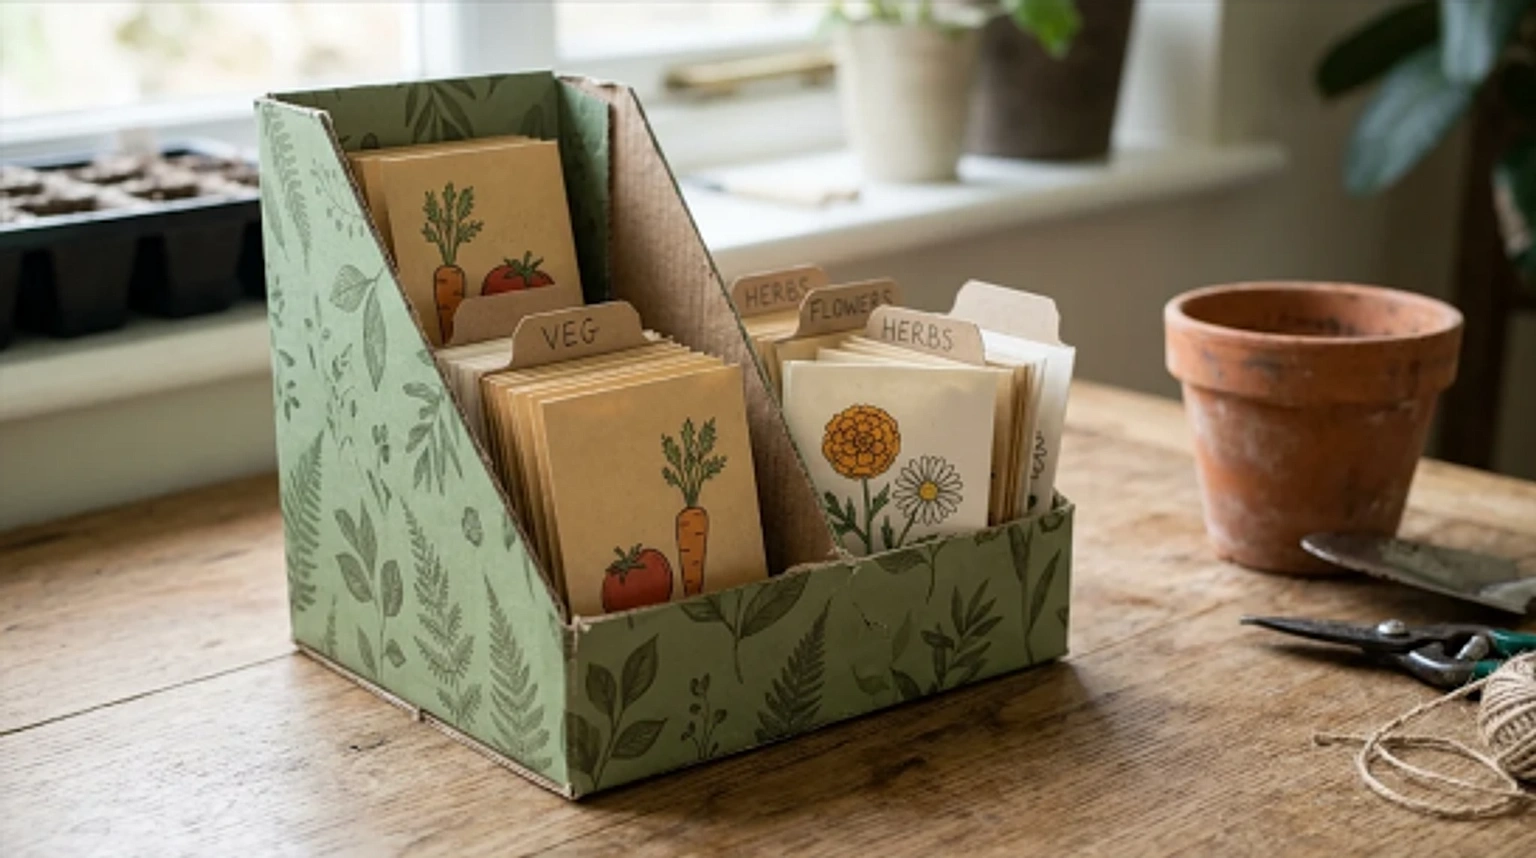
BEST FOR: Commercial seed packets and garden-planning notes. PRO STYLING TIP: This organizer groups packets for accessibility; follow seed supplier recommendations on optimal temperature and humidity for long-term viability.
Part 2: 10 Smart Ways to Organize Cereal Boxes in Your Pantry
Not everyone wants to turn an empty cereal box into a craft project. Sometimes the challenge is simply finding a better home for the cereal your family eats every morning.
These next 10 ideas focus on storing cereal boxes and keeping breakfast supplies accessible, fresh, and clutter-free.
Create a Dedicated Breakfast Storage Zone
When cereal, oatmeal canisters, granola, and honey are scattered across different kitchen shelves, morning routines take twice as long.
Designate one accessible pantry shelf or a large wooden storage bin as your dedicated breakfast zone. Store cereal boxes side-by-side with bowls and breakfast staples immediately adjacent.
The goal is not perfection—it is making the items used together every morning effortless to reach and put away.
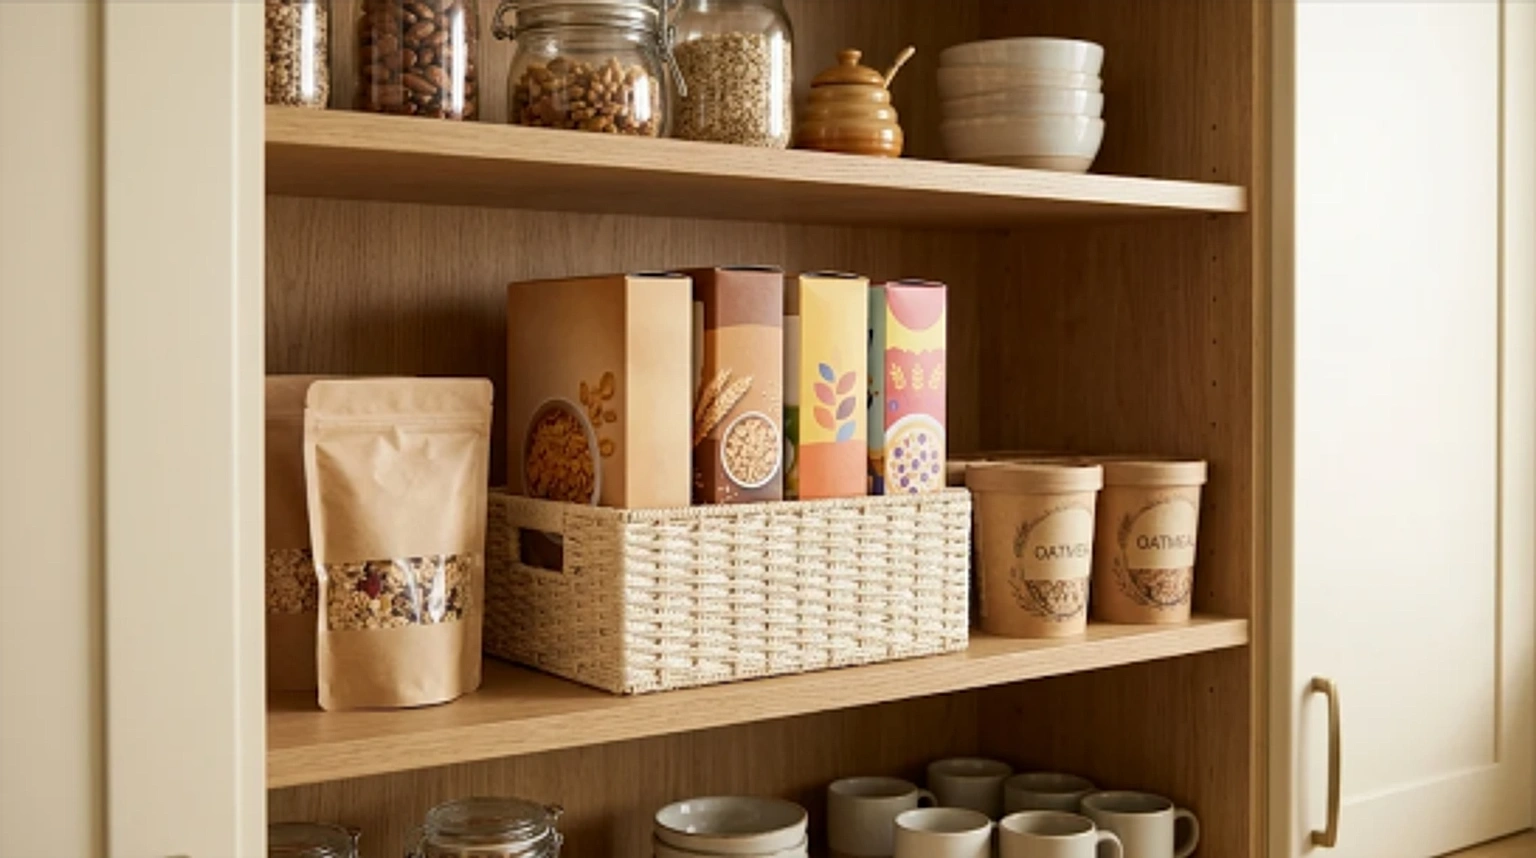
BEST FOR: Busy family kitchens and shared breakfast routines. PRO STYLING TIP: Position the breakfast zone at eye level or mid-shelf height so kids and family members can self-serve without climbing.
Use Vertical Shelf Dividers to Stop Boxes Falling Over
Tall, slim cereal boxes easily tip like dominoes when a shelf is only half full or when one box is pulled out quickly.
Vertical acrylic or powder-coated wire shelf dividers create separate compartments that hold each box upright regardless of how many packages remain.
Group similar box heights together to maximize visual symmetry and keep your pantry shelves calm and orderly.
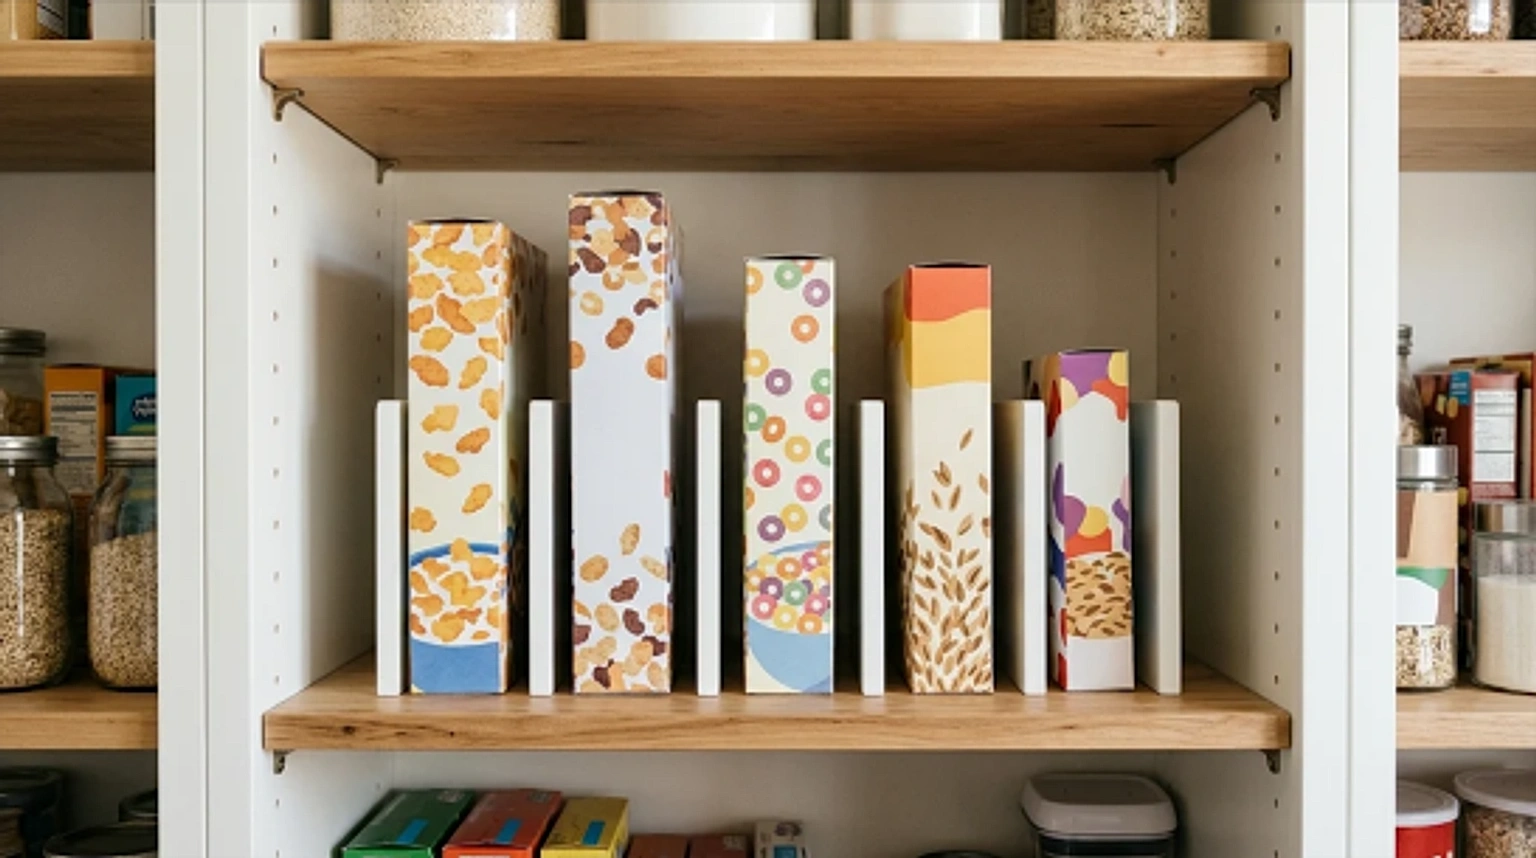
BEST FOR: Tall cereal cartons on wide, open pantry shelves. PRO STYLING TIP: Leave at least 1.5 inches of clearance between dividers so boxes slide out smoothly without scuffing.
Adjust Shelf Heights to Fit Cereal Boxes
An organized pantry starts with using the vertical space you already have.
If adjustable cabinet shelves leave a wasted six-inch gap above standard cereal boxes, move the shelf down to match the height of your tallest commonly purchased cereal box plus one inch for removal clearance.
The vertical space recovered can often create room for an additional shallow shelf dedicated to tea, snacks, or small containers.
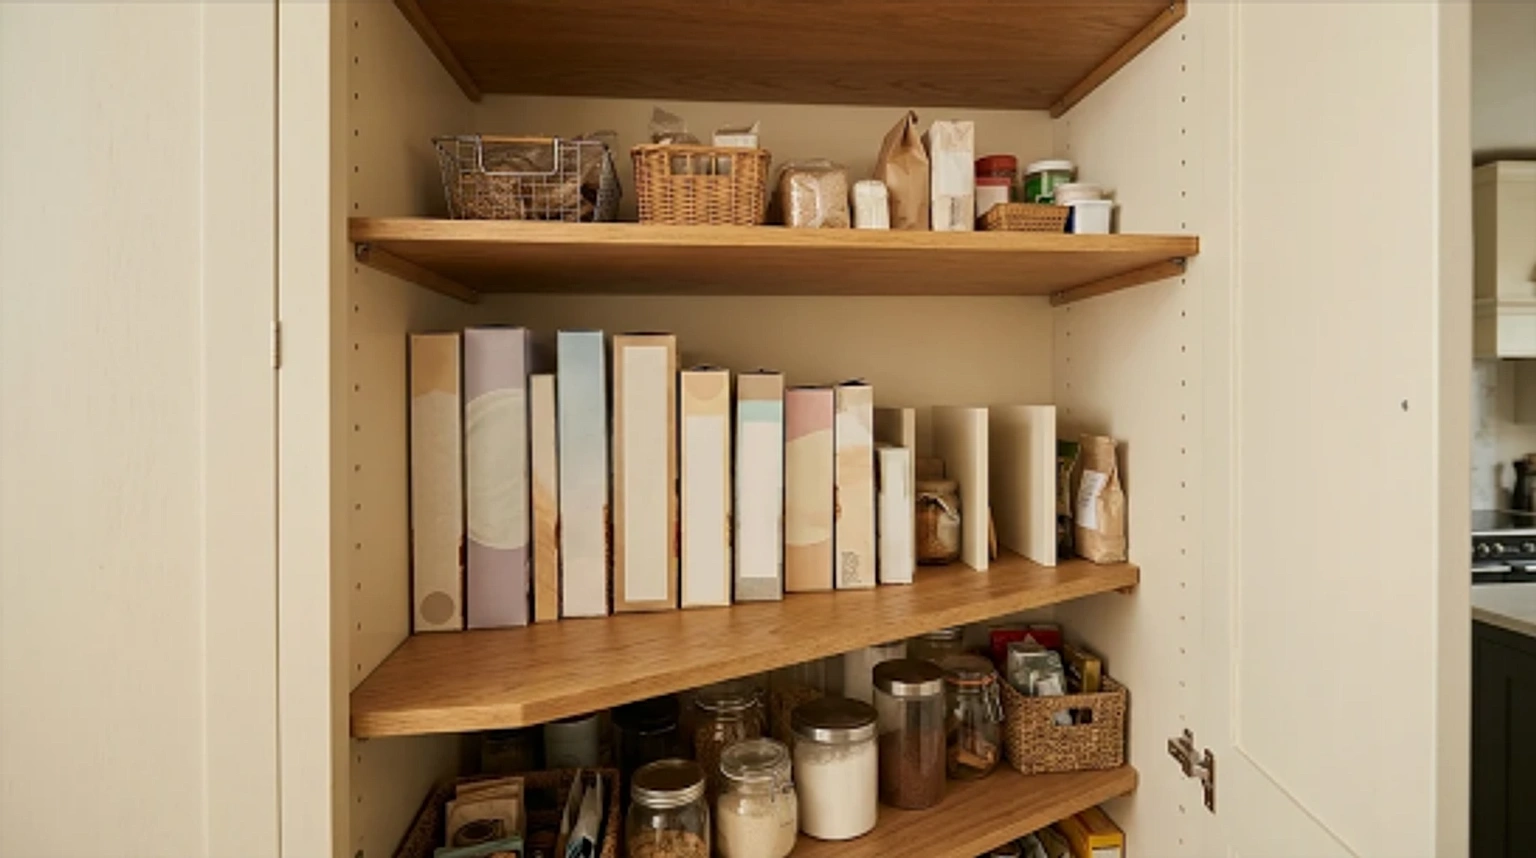
BEST FOR: Pantries and cabinets with adjustable pin shelving. PRO STYLING TIP: Measure your tallest cereal carton before shifting shelf pins, and verify cabinet weight limits.
Use Pull-Out Bins on Deep Pantry Shelves
Deep 24-inch pantry shelves provide generous volume, but boxes pushed to the back often expire forgotten in the shadows.
A deep, sturdy pull-out pantry bin turns that awkward depth into accessible storage. Line up cereal boxes front-to-back inside the bin.
Instead of blindly reaching past three packages, slide the entire bin forward to inspect inventory and grab what you need.
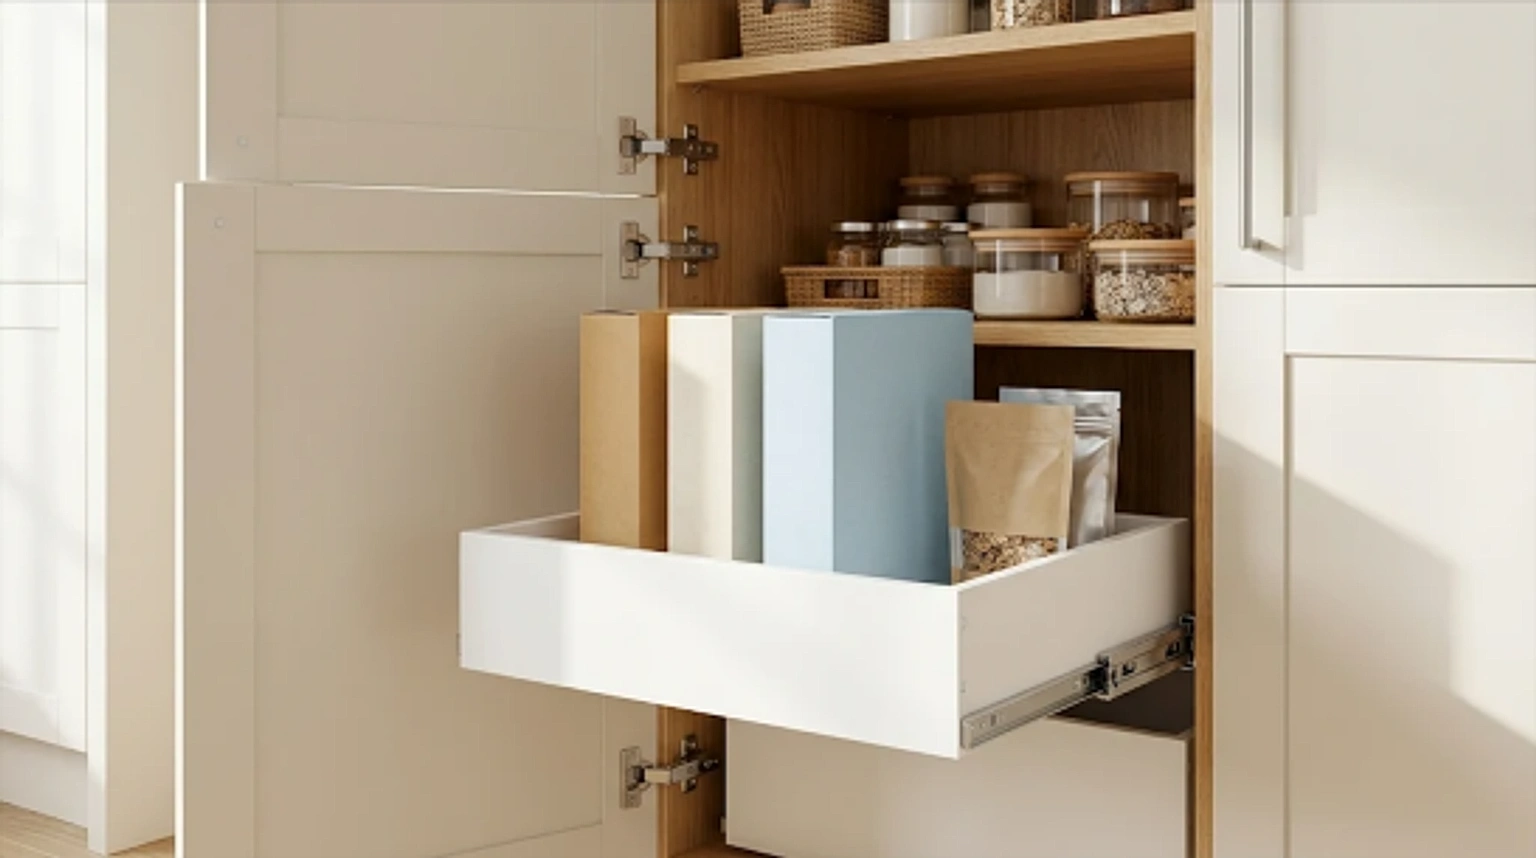
BEST FOR: Deep pantry shelving and lower kitchen cabinets. PRO STYLING TIP: Measure shelf depth including cabinet door hinges to ensure bins glide forward without hitting door frames.
Keep Family Favorites in Front-Facing Baskets
If your household rotates between four or five cereal varieties each week, keeping favorites in consistent, front-facing baskets eliminates morning friction.
Select sturdy open-top woven or metal wire baskets wide enough to comfortably support standard cartons. Keep daily favorites in the front basket and unopened backup cartons in a second basket directly behind.
This simple separation keeps pantry shelves tidy while maintaining clear visibility of current inventory.
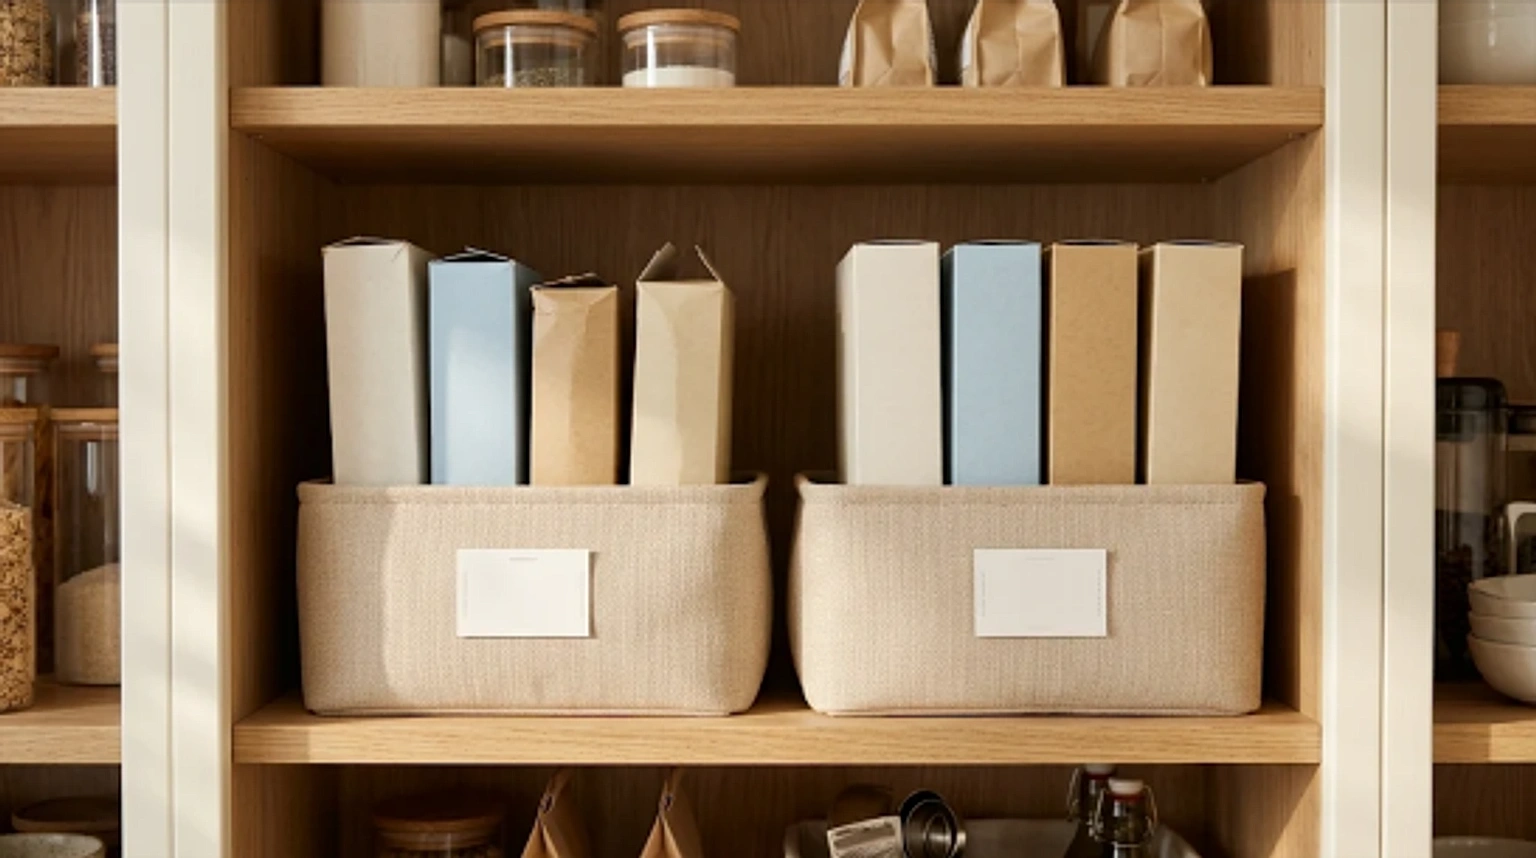
BEST FOR: Family pantries with multiple rotating breakfast options. PRO STYLING TIP: Avoid overcrowding baskets. If pulling out one carton drags the adjacent boxes with it, size up to a wider container.
Store Mini Cereal Boxes in a Shallow Tray
Single-serving mini cereal boxes from variety packs are great for quick snacks and travel, but they tumble into disarray when stacked loosely on open shelves.
Corral unopened mini cartons upright in a shallow washable storage tray. Line them up with brand faces visible like books on a shelf.
A shallow tray keeps small cartons organized, prevents them from tumbling into corners, and can be brought directly to the breakfast table.
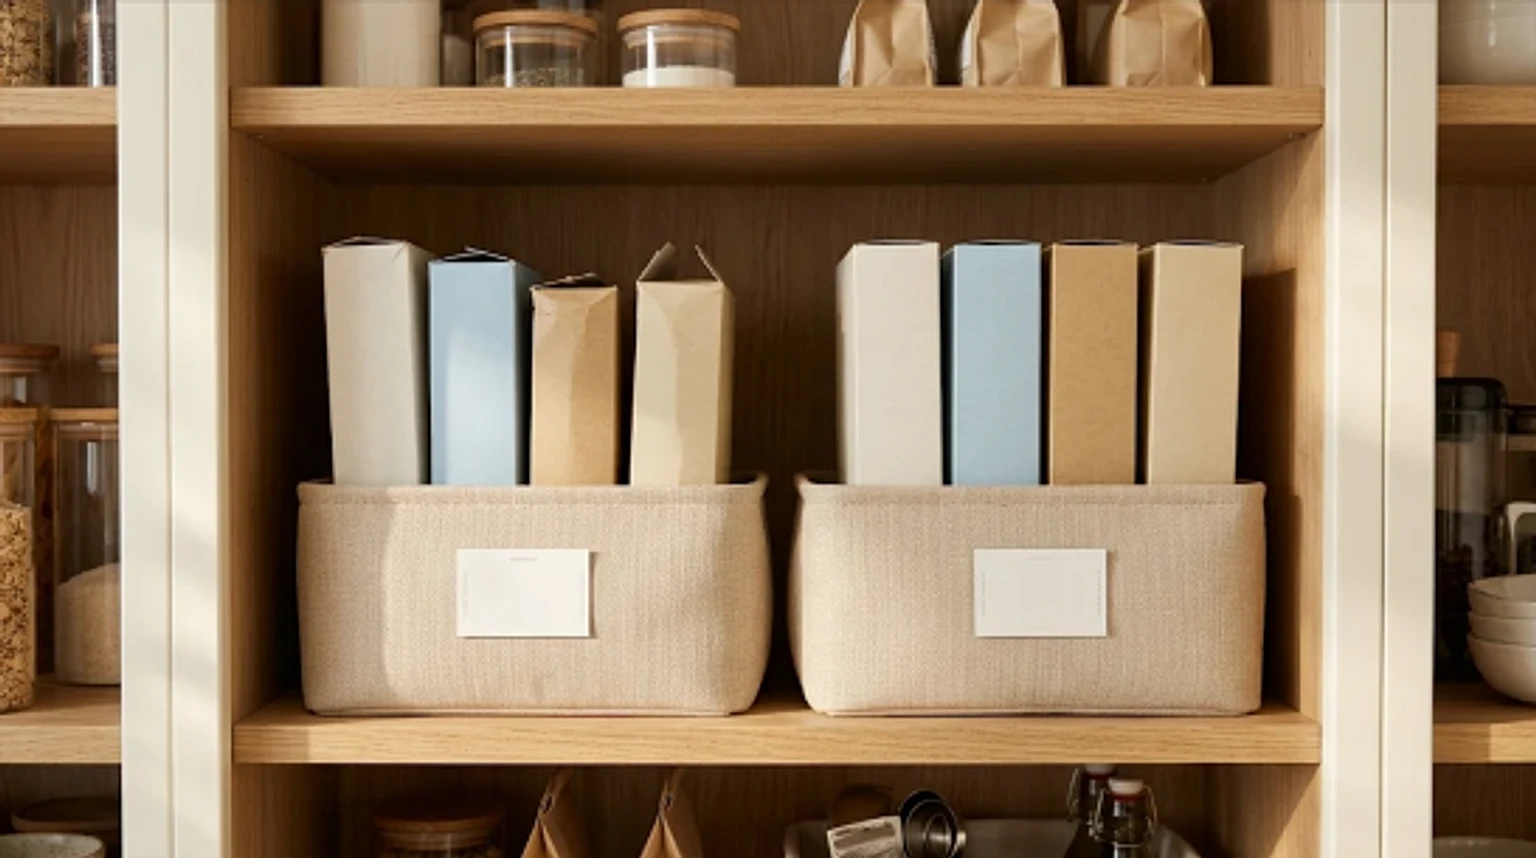
BEST FOR: Variety packs of single-serving breakfast cartons. PRO STYLING TIP: Place older cartons toward the front of the tray so they are chosen before recently purchased packs.
Add a Slim Cabinet-Door Rack
When pantry shelves are full, the interior face of a cabinet door offers valuable vertical storage real estate.
A slim, securely mounted wire or clear acrylic rack can hold mini cereal boxes, oatmeal packets, or snack bars without encroaching on main shelf depth.
Verify that the door rack clears your interior cabinet shelves and hinges when the door swings closed.
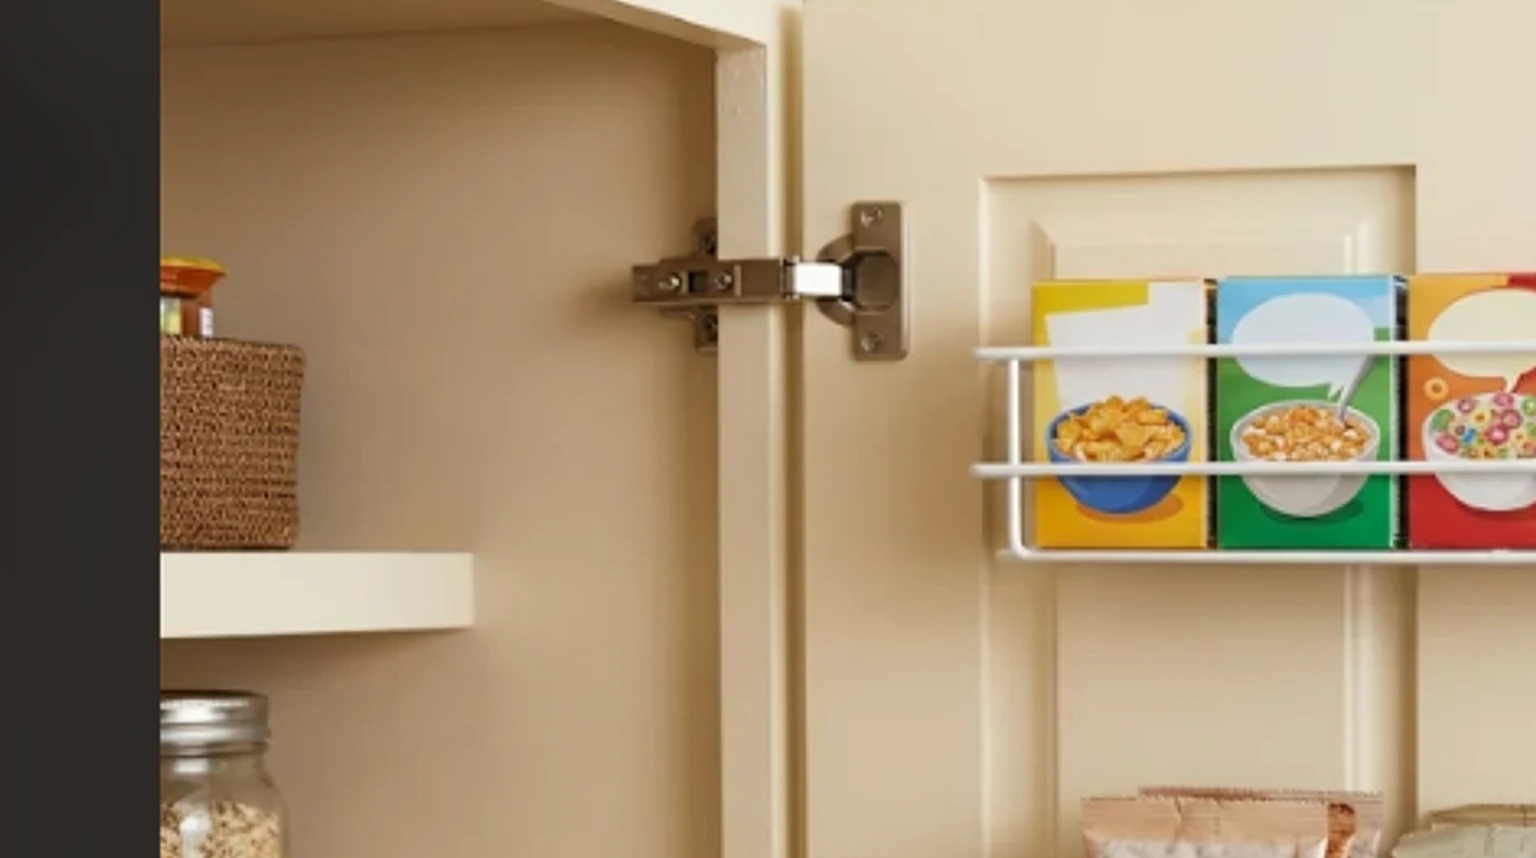
BEST FOR: Compact pantries with limited shelf depth. PRO STYLING TIP: Standard full-size cereal boxes are generally too deep for door racks; reserve door storage for mini cartons and envelope packets.
Try a Narrow Rolling Breakfast Cart
A mobile three-tier rolling cart is an ideal small-kitchen solution when built-in pantry space is tight but a small alcove or refrigerator gap is available.
Dedicate the top tier to daily cereal boxes, the middle tier to airtight breakfast canisters, and the bottom tier to backup unopened boxes.
Roll the cart to the counter during breakfast prep, then tuck it away into a pantry corner when meals are finished.
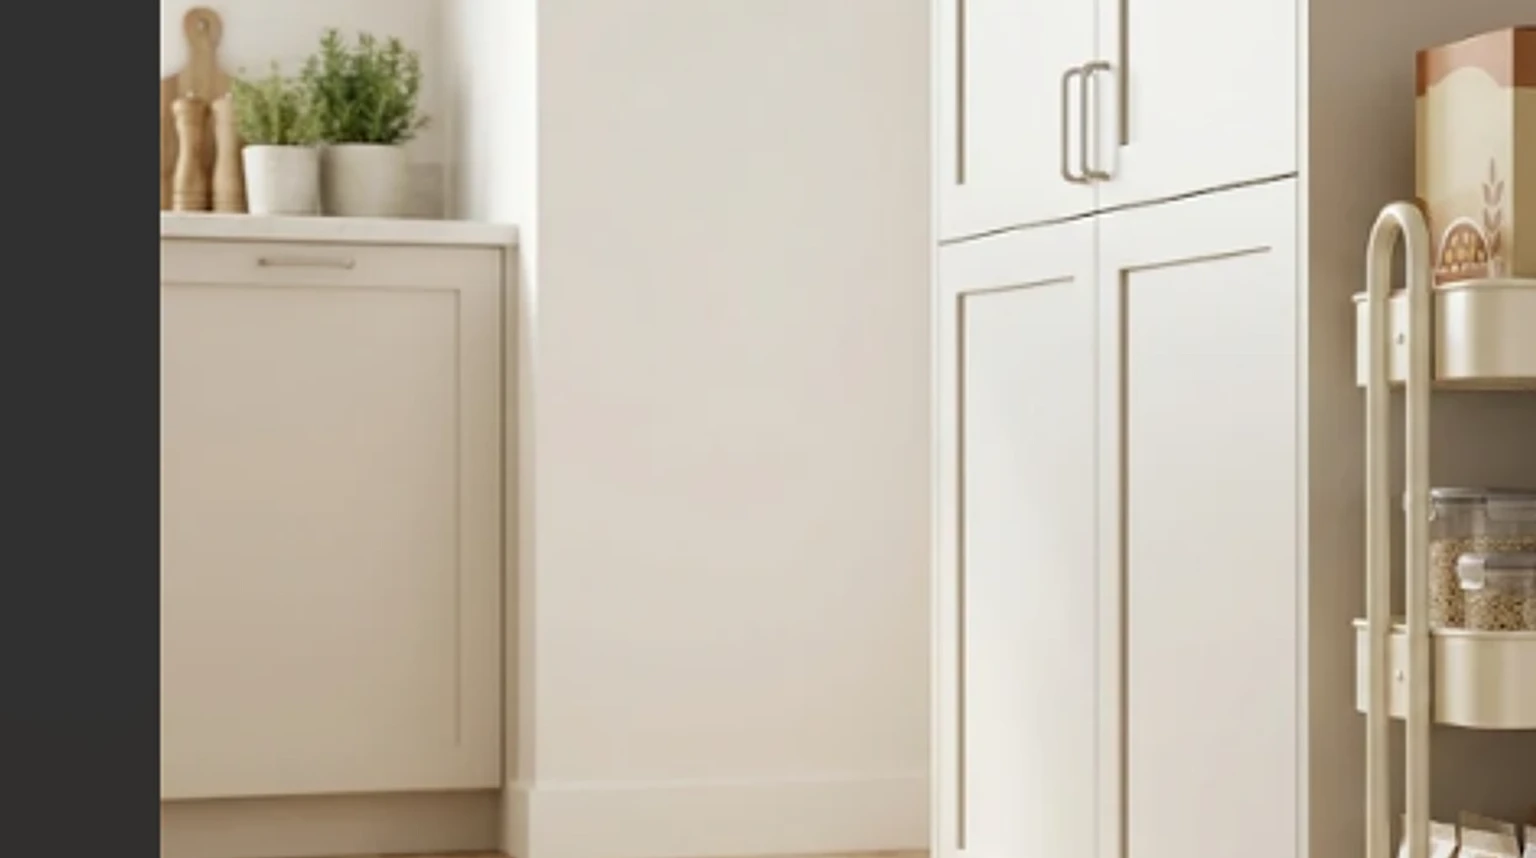
BEST FOR: Small apartments, tight kitchens, and flexible breakfast nooks. PRO STYLING TIP: Choose a metal cart with raised lip shelves so cartons remain upright when rolling across tile or hardwood.
Transfer Open Cereal to Airtight Containers
For households where cereal is a daily staple, transferring opened cereal to clear, airtight food-storage containers provides superior freshness and pest defense.
Select food-safe, BPA-free containers with silicone-gasket lids. Clear walls make inventory visible at a glance, eliminating surprise empty boxes.
Trim the expiration date and allergen panel from the original carton and slip it inside or tape it discreetly to the bottom of the container.
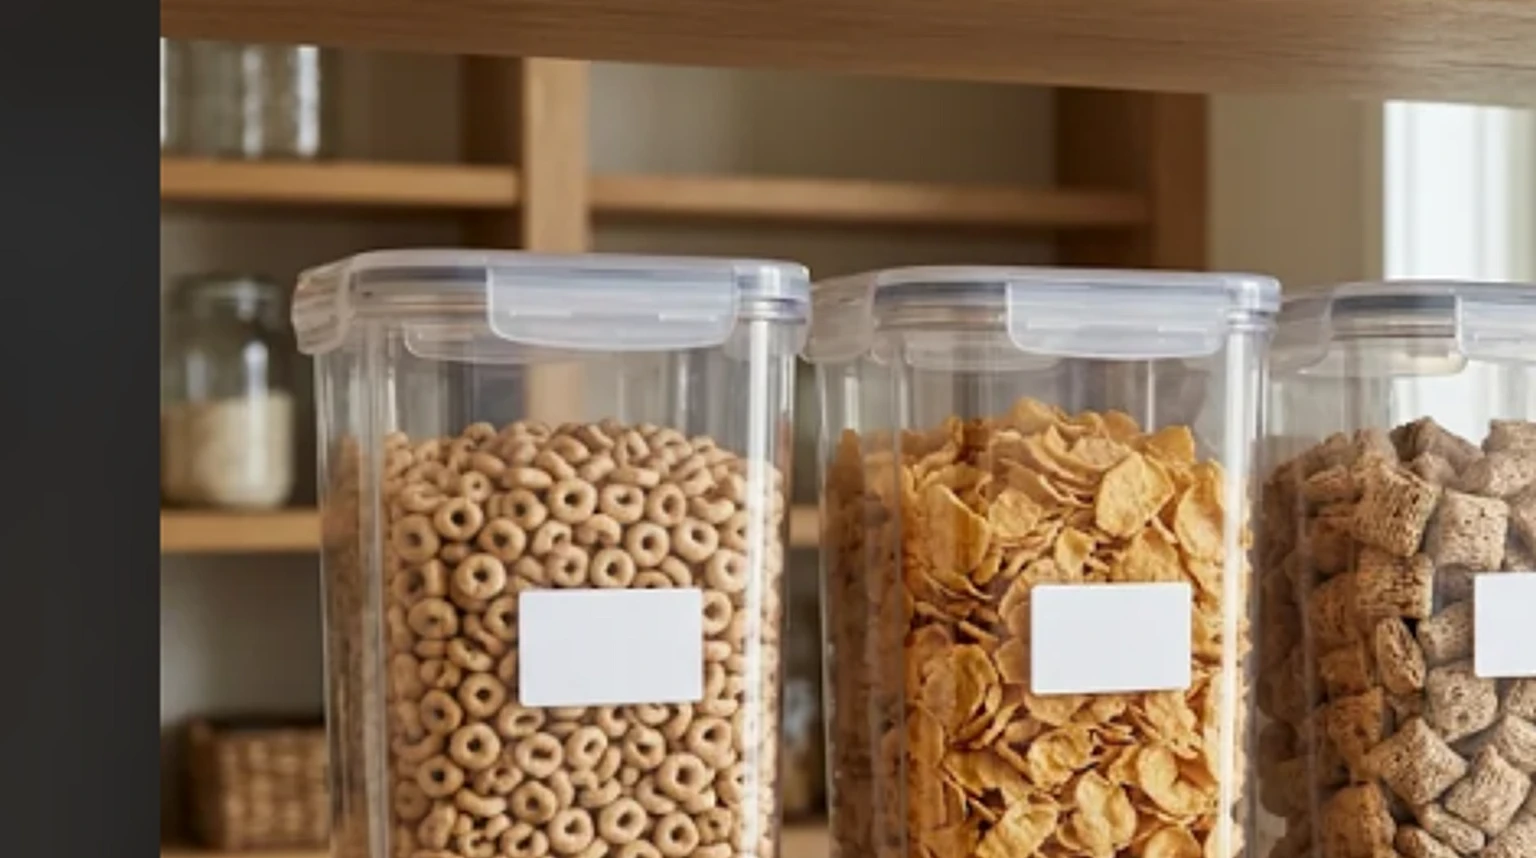
BEST FOR: Open breakfast cereals that need reliable protection from humidity and pests. PRO STYLING TIP: Never pour fresh cereal on top of old remnants. Always finish, wash, and dry the container completely before refilling.
Build a First-In, First-Out Cereal Storage System
A beautifully organized pantry is only truly functional if food gets eaten before it goes stale.
A simple first-in, first-out (FIFO) inventory routine prevents older boxes from languishing behind new groceries. When unpacking shopping bags, shift existing boxes forward and place new purchases at the back.
Keep opened cartons grouped in the front so family members finish opened cereal before breaking into backup boxes.
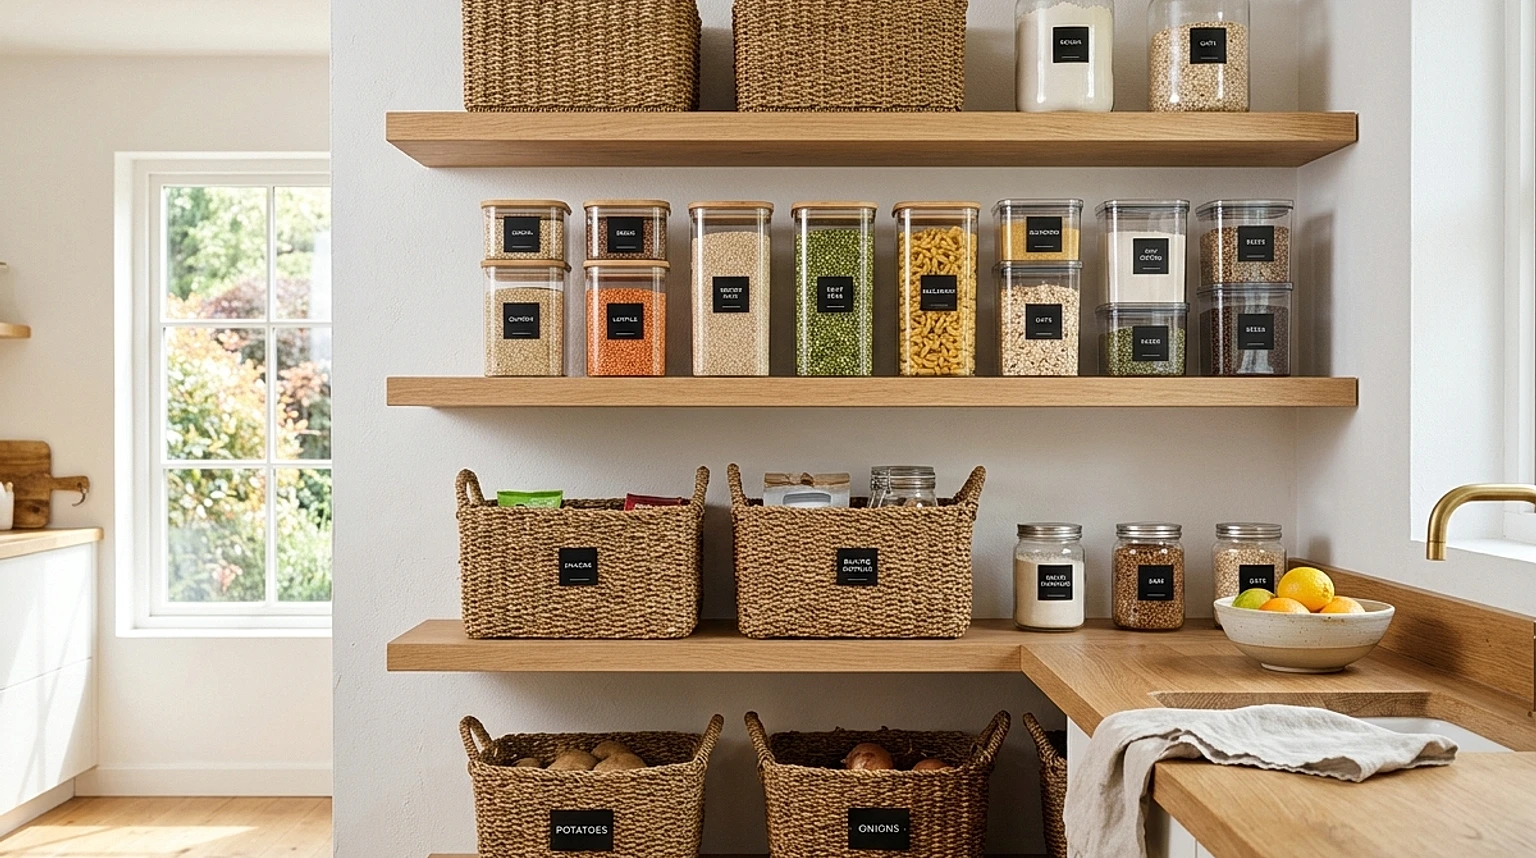
BEST FOR: Households buying cereal in multi-packs or keeping backup cartons. PRO STYLING TIP: Before shopping, check your current breakfast shelf to avoid purchasing duplicate flavors already in stock.
How to Make Cereal Box Organizers Look More Expensive
A few simple design choices can make recycled cardboard organizers look surprisingly polished and intentional:
- Choose a Coordinated Color Palette: Instead of covering each box with a completely different novelty print, stick to two or three harmonizing tones like warm ivory, sage green, natural kraft, and muted linen. In children's study corners, select complementary pastel shades rather than clashy prints.
- Cover the Cut Edges: Raw, fuzzy cardboard edges immediately signal an unfinished craft. Fold excess decorative paper over all rim cuts or apply clean strips of matching washi tape to bind edges securely.
- Use Labels Sparingly: Simple, typed or neatly handwritten category labels like 'Linens', 'Recipes', or 'Post' add polish without creating visual noise.
- Reinforce Bases for Longevity: Glue a secondary rectangular cardboard insert to the interior bottom panel to prevent sag when organizers are loaded with paper.
How to Store Cereal So It Stays Fresh
An attractive pantry layout should never come at the expense of sensible food safety and freshness.
To keep breakfast cereal at peak quality, adhere to four practical principles:
- 1Keep Food Dry and Properly Sealed: After pouring, tightly roll down the inner plastic bag and secure it with a bag clip, or decant cereal into clean, food-safe containers with silicone hermetic seals.
- 2Store Away from Heat and Moisture: Position cereal on cool, dry pantry shelves away from stoves, dishwashers, and direct window sunlight.
- 3Rotate Stock Consistently: Always place older, unexpired boxes in front of freshly purchased backup cartons.
- 4Inspect for Pantry Pests: Regularly examine stored grains and cereals for webbing or packaging damage. Promptly discard compromised food and thoroughly clean cabinet shelves.
Remember: Upcycled cardboard organizers are for household and dry supply storage, not direct loose food contact. Always keep loose cereals in original inner packaging or certified food-contact containers.
Common Cereal Box Organization Mistakes to Avoid
Even a simple cardboard DIY project can create frustration if common pitfalls are overlooked:
- Making Drawer Compartments Too Tall: Measure your drawer's interior vertical clearance before cutting boxes. Leaving a half-inch clearance ensures smooth drawer glides without catches.
- Using Paperboard in Damp Areas: Untreated cardboard absorbs moisture rapidly. Never place cardboard organizers directly beside kitchen sinks, bathroom vanities, or damp cleaning stations.
- Overloading Cardboard Capacity: Cardboard works best for lightweight objects like pens, clips, and envelopes. Heavy metal kitchen tools should reside in solid wood or acrylic trays.
- Prioritizing Aesthetics Over Ergonomics: An organizer is only successful if family members find it easy to use daily. Ensure boxes can be removed and returned without complex maneuvers.
Frequently Asked Questions
The Designer's Takeaway
You don't need a complete kitchen renovation or expensive acrylic organizing systems to bring order to your pantry and drawers.
Sometimes a simple handmade divider is enough to fix a cluttered junk drawer, and an intentional first-in, first-out pantry system is all it takes to keep breakfast supplies fresh and accessible.
Start with one of these 30 cereal box storage ideas that solves an immediate pain point in your home. You will enjoy an organized, peaceful kitchen without unnecessary spending.
Related Editorial Stories
20 Fall Kitchen Decor Ideas for 2027: Cozy, Practical Ways to Welcome Autumn
Make your kitchen feel warmer for autumn without losing prep space. Explore 20 practical, clutter-free fall kitchen decor ideas—from harvest fruit bowls and olive linens to warm lamps and peg rails.


15 DIY Wall Decor Ideas in 2027 That Make Any Room Feel Personal
Transform blank walls without big renovations using 15 approachable DIY wall decor ideas for 2027—from textured modeling-paste canvases and framed fabric scraps to renter-friendly washi tape murals.

30 Man Cave Decor Ideas in 2027 for Every Style, Space, and Budget
Discover 30 elevated man cave decor ideas for 2027: moody lounges, compact console gaming nooks, sports watch-party layouts, and budget-friendly renter solutions.