30 Kitchen Island Ideas in 2027 for Every Style, Space, and Budget
Explore 30 functional kitchen island ideas for 2027: warm white oak finishes, curved stone contours, compact rolling carts, and smart storage solutions for every layout.
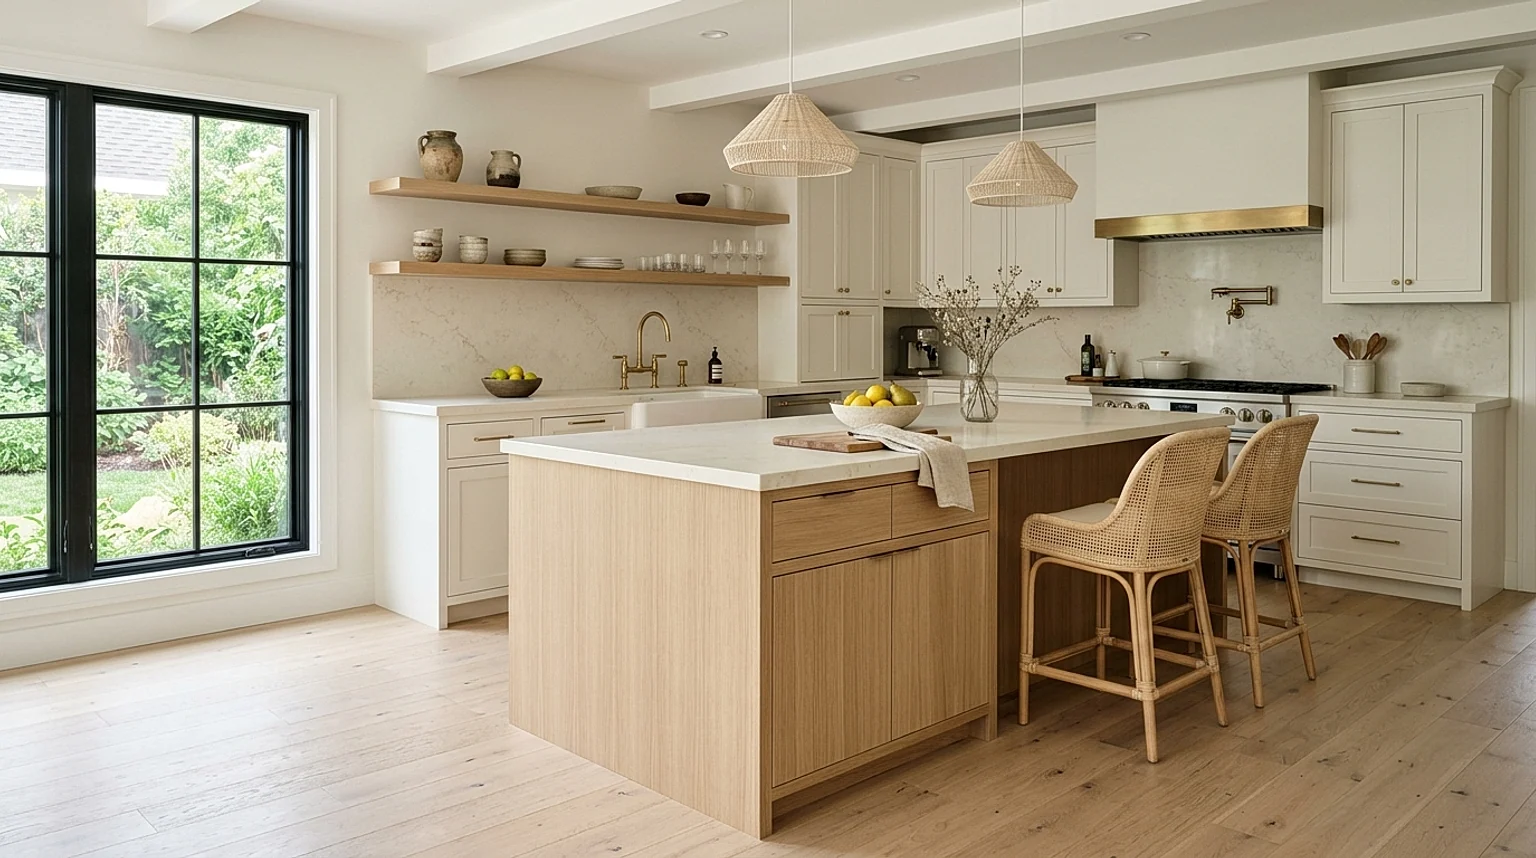
Refined white oak and honed stone kitchen island blending architectural functionality with tactile warmth.
Find Your Kitchen Island Style Quickly
A great kitchen island should do more than look beautiful. It should give you useful counter space, make storage easier, and fit the natural traffic flow of your home. Before committing to a specific cabinet profile or countertop slab, start by identifying the primary job your island must perform.
Industry insights from the National Kitchen & Bath Association (NKBA) Kitchen Trends Report highlight a clear movement toward natural wood millwork, contrasting island cabinet colors, concealed storage, and configurations customized to individual floor plans. Rather than building the largest possible island, modern kitchens prioritize deliberate functional zones that solve everyday lifestyle challenges.
| Design Parameter | Editorial Specification |
|---|---|
| Warm, Timeless Finishes | Ideas 1, 2, 5, 11 (White Oak, Walnut, Greige, Maple Butcher-Block) |
| Bold Colors & Rich Texture | Ideas 3, 4, 7 (Sage Green, Deep Navy, Fluted Wood Millwork) |
| Sculptural & Luxury Surfaces | Ideas 6, 8, 9, 13 (Curved Contours, Quartzite, Waterfall Stone, Split Surfaces) |
| Small & Flexible Footprints | Ideas 14, 15, 16, 17 (Petite Freestanding, Slim Galley, Mobile Cart, Square) |
| Social Dining & Family Seating | Ideas 19, 20, 21, 22, 23 (Double Islands, Breakfast Bar, Table Extension, Banquette, 4-Stool Bar) |
| Hardworking Culinary Workstations | Ideas 24–30 (Prep Sink, Induction Cooktop, Microwave Drawer, Dishwasher Station, Deep Drawers, Display Niche, Hidden Power) |
Warm White Oak Island
Natural white oak brings visible grain and a relaxed, furniture-like look without making the room feel heavy. Pair an oak island with warm-white perimeter cabinets, creamy stone and simple bronze or nickel hardware. This combination suits transitional, Scandinavian and contemporary kitchens, especially when the flooring has a similar undertone rather than an exact wood match. Choose a durable cabinet finish that stands up to splashes and greasy hands.
When planning this configuration, carefully consider how the island base interacts with your perimeter cabinetry, appliance swings, and surrounding floor surfaces. Seamless transitions between material sheens ensure the island feels like an intentional architectural centerpiece rather than an afterthought.
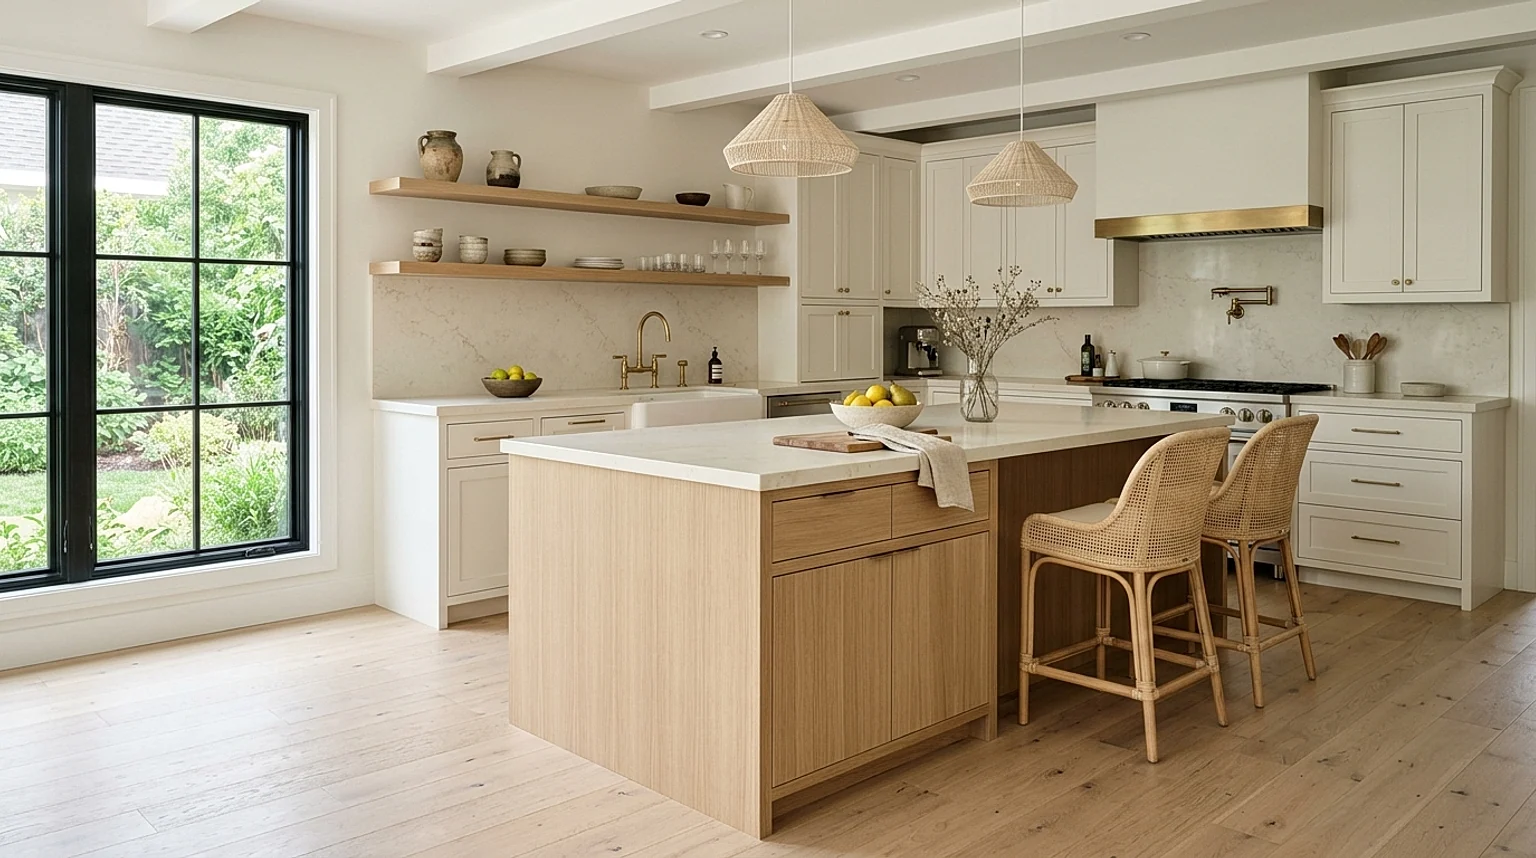
Idea 1: Warm White Oak Island — showcasing balanced residential scale and authentic material detailing.
BEST FOR: Homeowners who want warmth without a bold paint color. PRO DESIGN DETAIL: Use slab doors for a quiet look or narrow Shaker fronts for a classic one.
Walnut Furniture-Style Island
A walnut island can feel more like a treasured piece of furniture than a row of cabinets. Look for visible legs, a recessed plinth or framed panels, and a countertop that appears intentionally set on the base. Keep the wall cabinets lighter so the room stays balanced. Darker wood is particularly effective in kitchens that open to living rooms with vintage furniture, leather seating or other deep finishes.
When planning this configuration, carefully consider how the island base interacts with your perimeter cabinetry, appliance swings, and surrounding floor surfaces. Seamless transitions between material sheens ensure the island feels like an intentional architectural centerpiece rather than an afterthought.

Idea 2: Walnut Furniture-Style Island — showcasing balanced residential scale and authentic material detailing.
BEST FOR: Large and medium kitchens with plenty of natural light. PRO DESIGN DETAIL: Add discreet closed storage on the working side, not decorative doors everywhere.
Soft Sage Green Island
Sage green is a gentle way to give the island its own identity while keeping the kitchen timeless. Use a muted, grayed-down sage on the island and let surrounding cabinets remain oatmeal, cream or pale wood. A simple white or lightly veined counter keeps the color from feeling busy. Test painted samples at different times of day: a sage shade that looks calm in daylight can read surprisingly gray under cool evening bulbs.
When planning this configuration, carefully consider how the island base interacts with your perimeter cabinetry, appliance swings, and surrounding floor surfaces. Seamless transitions between material sheens ensure the island feels like an intentional architectural centerpiece rather than an afterthought.
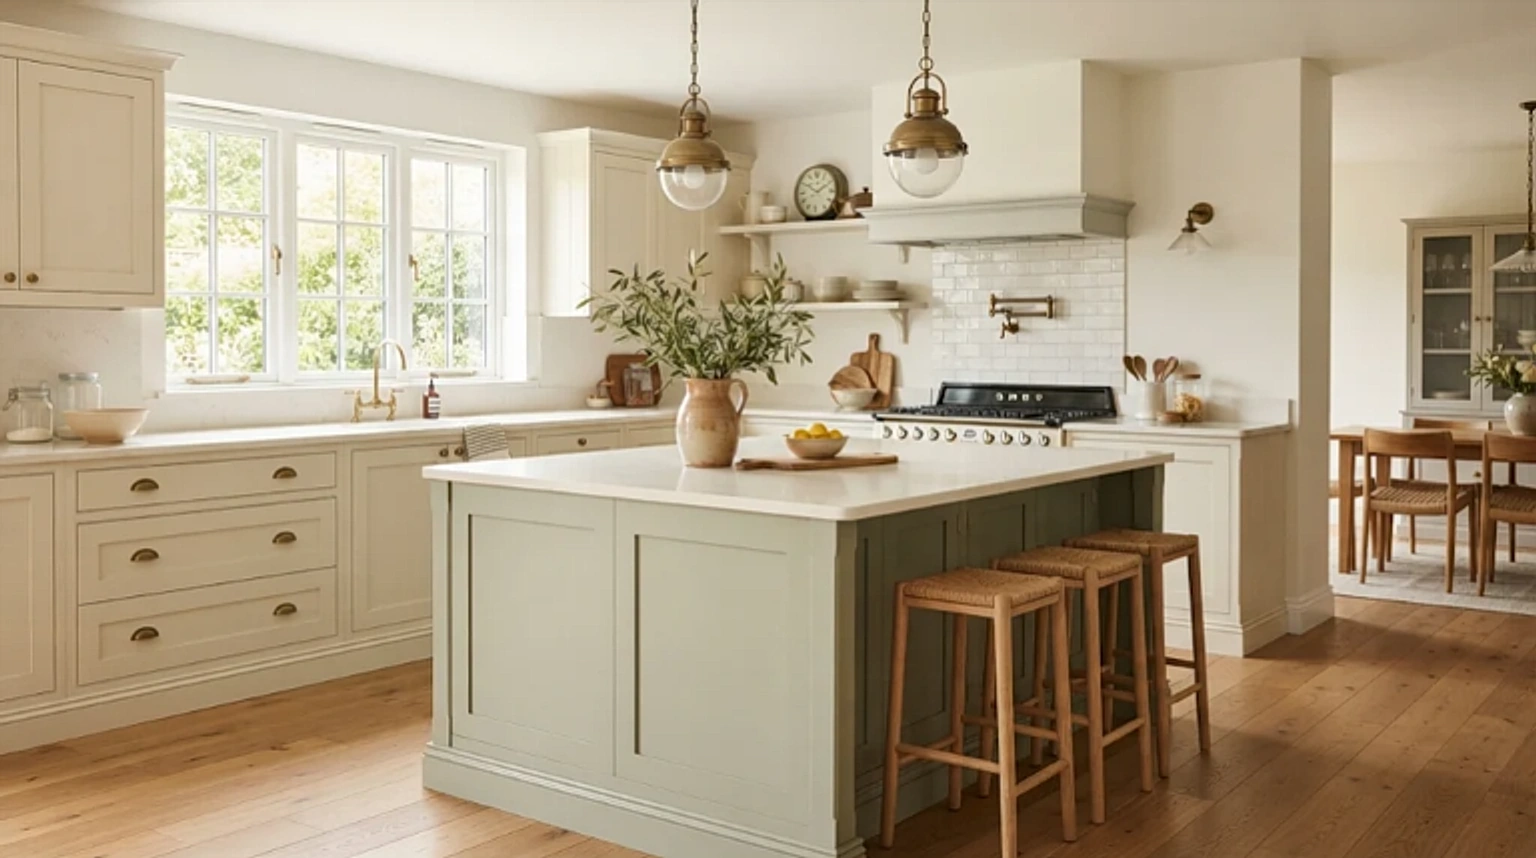
Idea 3: Soft Sage Green Island — showcasing balanced residential scale and authentic material detailing.
BEST FOR: Cottage-inspired and transitional kitchens. PRO DESIGN DETAIL: Repeat the green only once or twice in small accessories rather than painting the entire room.
Deep Navy Statement Island
Navy creates a confident focal point, especially against white or pale beige cabinets. To prevent a heavy block of color, use a lighter countertop and leave enough floor visible around the base. Satin or matte cabinetry often feels calmer than a high-gloss finish; polished brass works for a traditional look, while brushed nickel feels more restrained. This is an easy way to add character without committing every cabinet to dark paint.
When planning this configuration, carefully consider how the island base interacts with your perimeter cabinetry, appliance swings, and surrounding floor surfaces. Seamless transitions between material sheens ensure the island feels like an intentional architectural centerpiece rather than an afterthought.
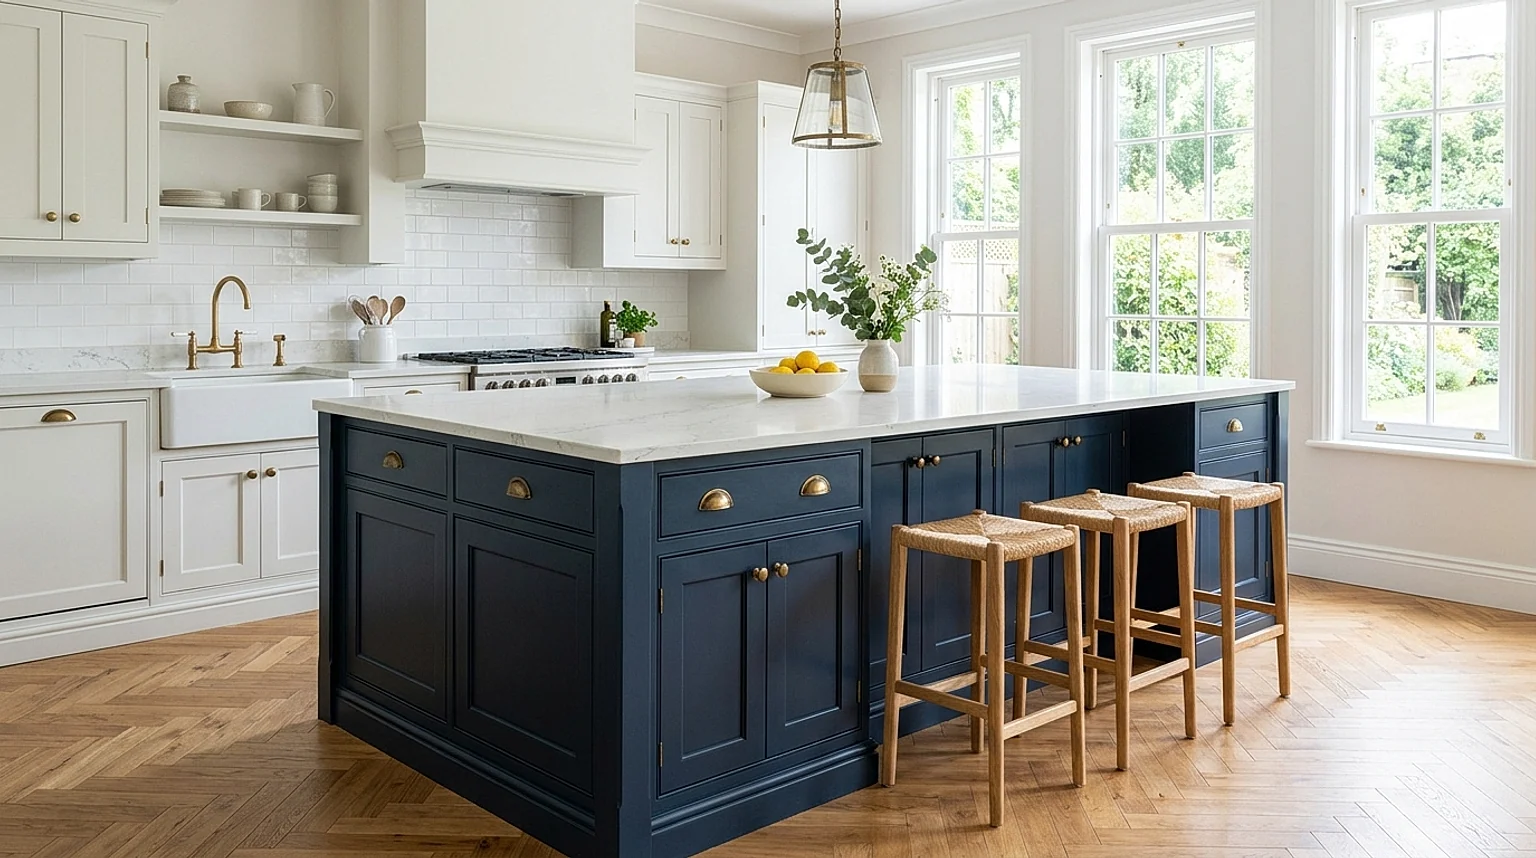
Idea 4: Deep Navy Statement Island — showcasing balanced residential scale and authentic material detailing.
BEST FOR: Bright kitchens that need contrast. PRO DESIGN DETAIL: Sample the exact navy next to your flooring before choosing hardware.
Warm Greige Minimalist Island
If you love a quiet kitchen, try a greige island with minimal seams and slim hardware. Greige blends beige warmth with a small amount of gray, making it a helpful bridge between stone countertops, oak floors and stainless appliances. The appeal is in clean proportions, not elaborate styling. A simple island can also age more gracefully than one built around a complicated decorative motif.
When planning this configuration, carefully consider how the island base interacts with your perimeter cabinetry, appliance swings, and surrounding floor surfaces. Seamless transitions between material sheens ensure the island feels like an intentional architectural centerpiece rather than an afterthought.

Idea 5: Warm Greige Minimalist Island — showcasing balanced residential scale and authentic material detailing.
BEST FOR: Minimalist and modern-organic interiors. PRO DESIGN DETAIL: Use a matte or low-sheen finish, and make sure the countertop has enough contrast to define the edge.
Curved-End Kitchen Island
A rounded island end softens a room full of straight cabinet runs and can reduce the feeling of squeezing past a sharp corner. An oval-ended countertop also invites a more sociable seating arrangement when the room allows. Curves are not automatically space-saving: the widest part still needs adequate clearance, and bespoke curved cabinetry can raise fabrication costs.
When planning this configuration, carefully consider how the island base interacts with your perimeter cabinetry, appliance swings, and surrounding floor surfaces. Seamless transitions between material sheens ensure the island feels like an intentional architectural centerpiece rather than an afterthought.
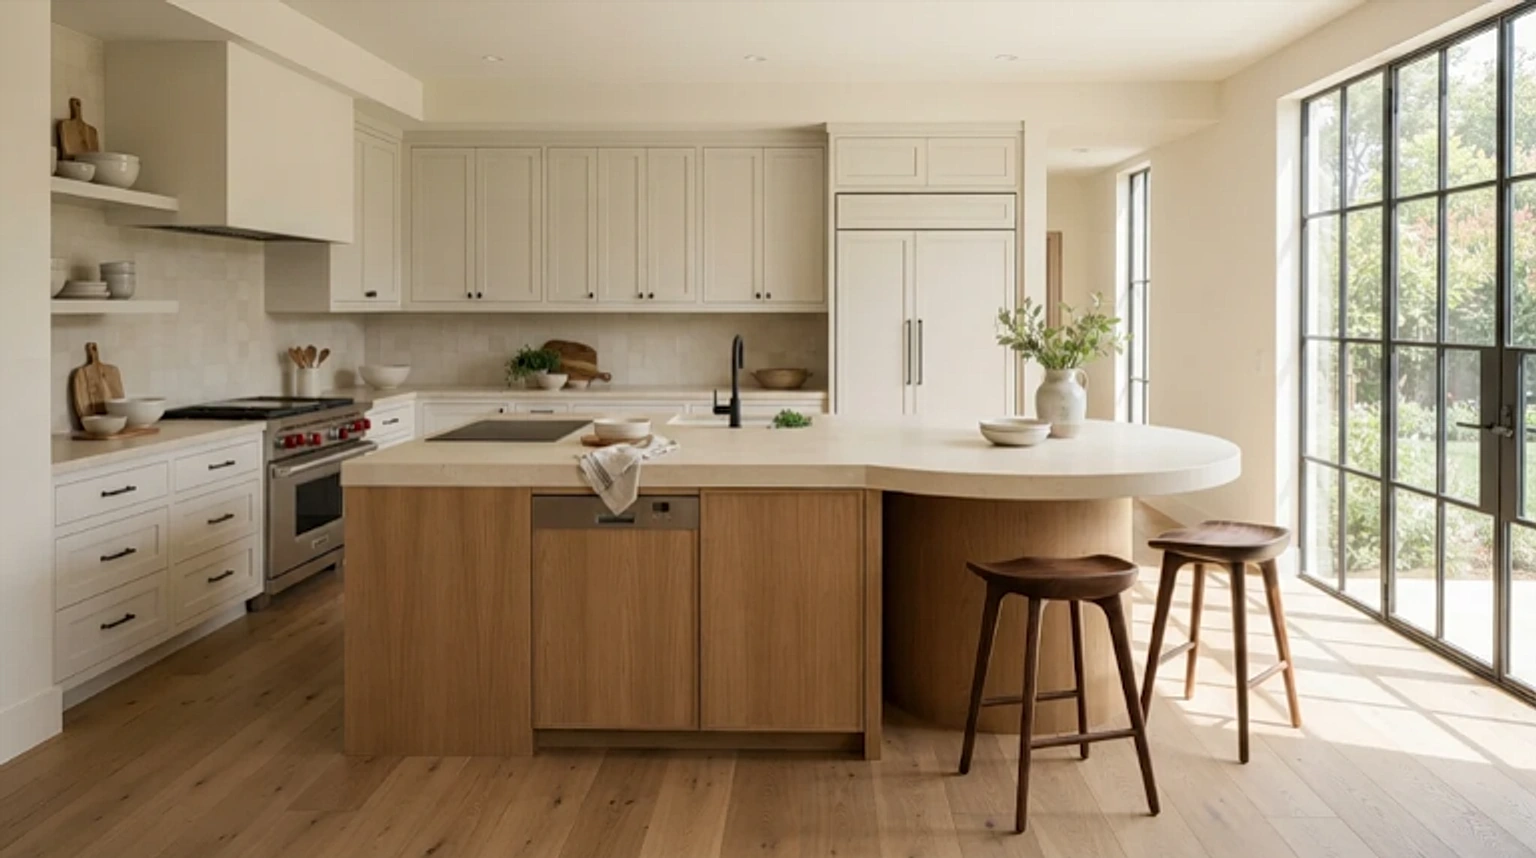
Idea 6: Curved-End Kitchen Island — showcasing balanced residential scale and authentic material detailing.
BEST FOR: Open-plan kitchens with comfortable circulation space. PRO DESIGN DETAIL: Choose one gentle radius rather than forcing every part of the island into a curve.
Fluted Wood Island Front
Fluting adds shadow and rhythm to an otherwise simple island. Narrow vertical grooves can be made in wood or suitable decorative cabinet panels, creating interest without introducing another paint color. Use the fluted surface primarily on the outward-facing side, where it can be appreciated and is less likely to collect cooking spills. For family homes, consider how easily the groove profile can be wiped clean.
When planning this configuration, carefully consider how the island base interacts with your perimeter cabinetry, appliance swings, and surrounding floor surfaces. Seamless transitions between material sheens ensure the island feels like an intentional architectural centerpiece rather than an afterthought.
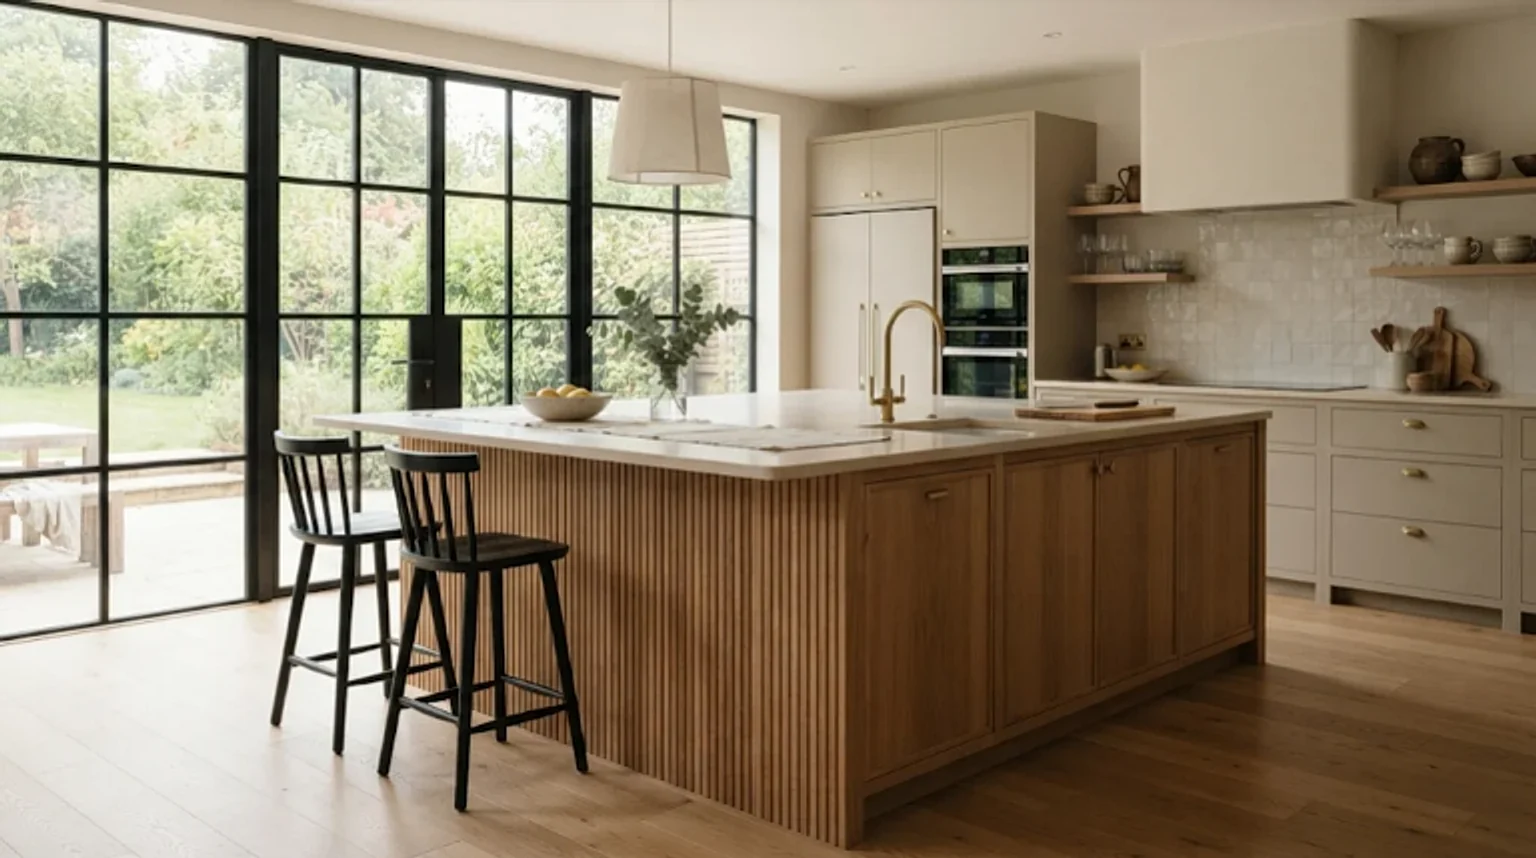
Idea 7: Fluted Wood Island Front — showcasing balanced residential scale and authentic material detailing.
BEST FOR: Modern-organic and Japandi interiors. PRO DESIGN DETAIL: Keep the countertop visually calm so the texture remains the focus.
Dramatic Quartzite Island
A strongly veined quartzite slab can turn a simple island into the room’s main visual feature. Make the stone the star: pair it with understated cabinet doors and relatively quiet wall surfaces. Before ordering, view the actual slab and discuss the vein direction, seam positions, edge finish and maintenance requirements with the fabricator. Quartzite and engineered quartz are different materials, so confirm which one is being specified.
When planning this configuration, carefully consider how the island base interacts with your perimeter cabinetry, appliance swings, and surrounding floor surfaces. Seamless transitions between material sheens ensure the island feels like an intentional architectural centerpiece rather than an afterthought.
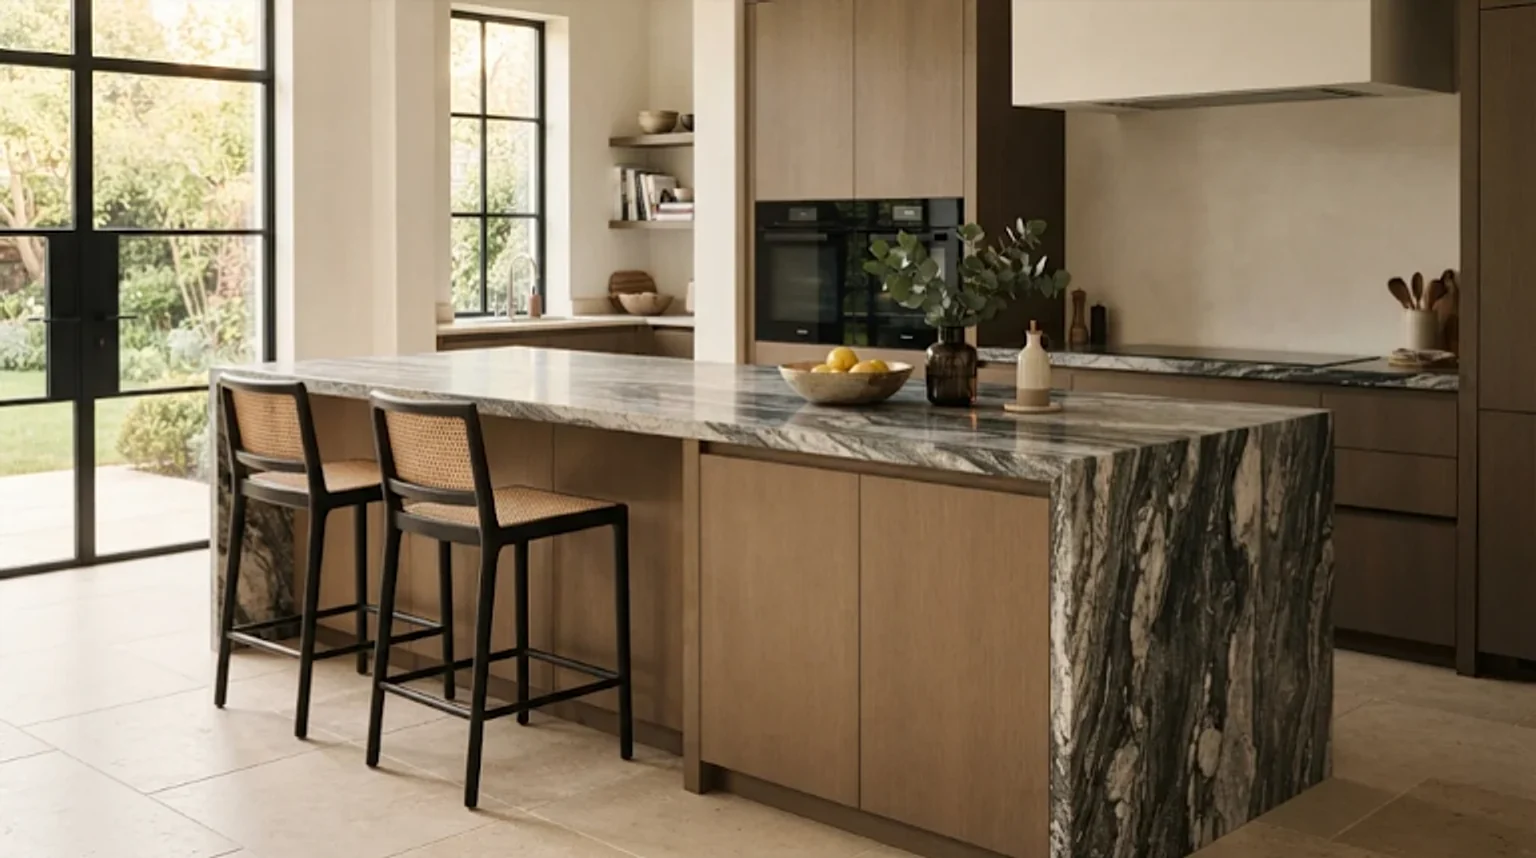
Idea 8: Dramatic Quartzite Island — showcasing balanced residential scale and authentic material detailing.
BEST FOR: Statement kitchens with a focused material palette. PRO DESIGN DETAIL: Spend time on slab selection before spending on decorative lighting.
Waterfall-Edge Stone Island
A waterfall island carries the countertop material down one or both ends to the floor. It creates a clean, sculptural silhouette, especially in contemporary spaces. The look relies on accurate mitering, matched patterns and sound structural support, making fabrication quality particularly important. Choose the waterfall side strategically: a full stone end may eliminate useful seating overhang or access to side cabinets.
When planning this configuration, carefully consider how the island base interacts with your perimeter cabinetry, appliance swings, and surrounding floor surfaces. Seamless transitions between material sheens ensure the island feels like an intentional architectural centerpiece rather than an afterthought.
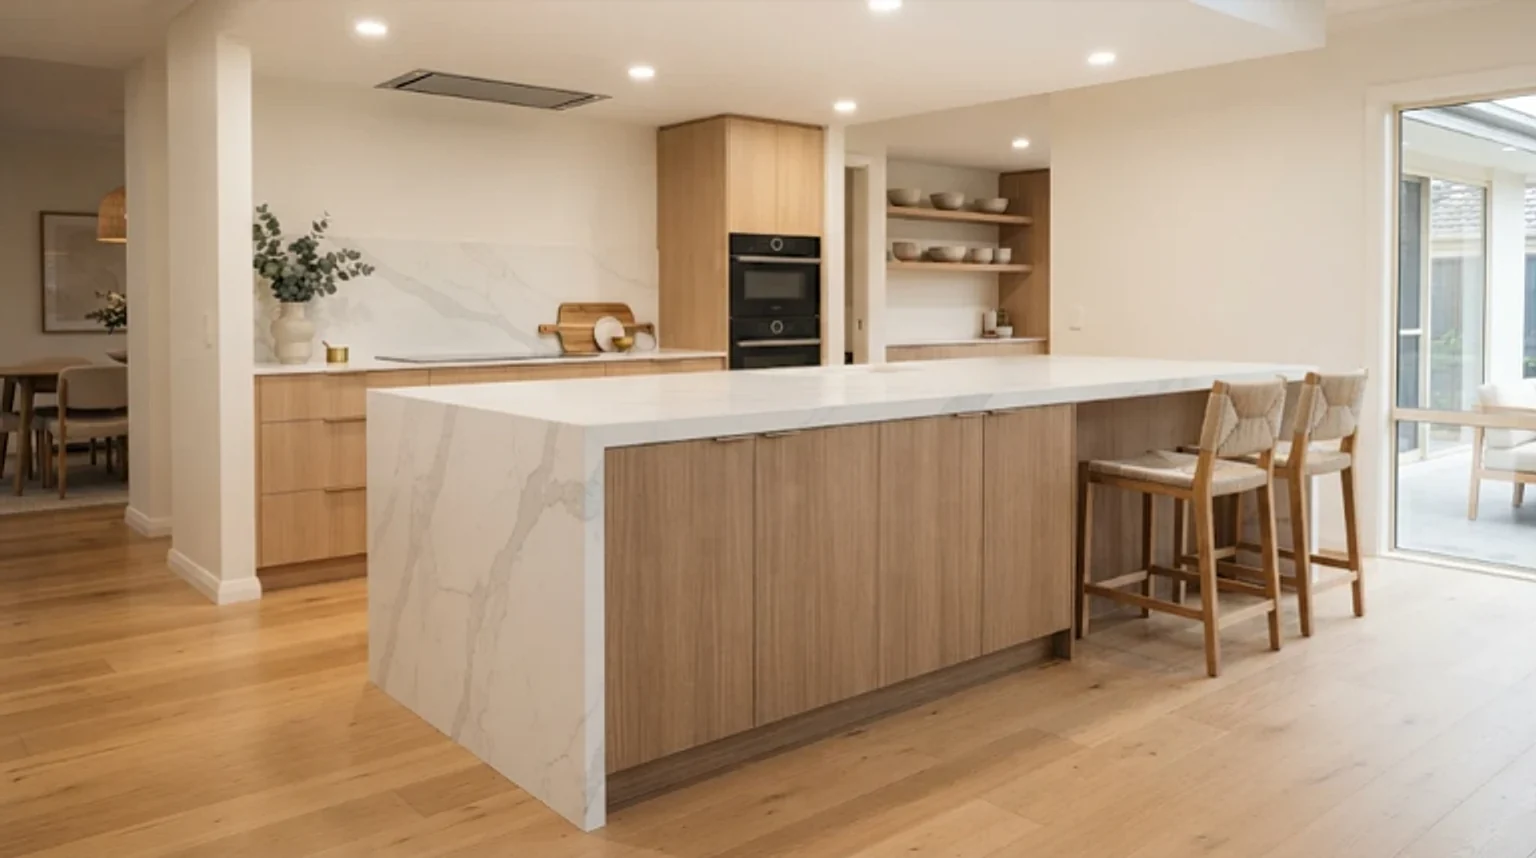
Idea 9: Waterfall-Edge Stone Island — showcasing balanced residential scale and authentic material detailing.
BEST FOR: Sleek contemporary kitchens. PRO DESIGN DETAIL: Use one waterfall end when you want the effect without enclosing the whole island.
Honed Quartz Island
Honed or matte-look quartz offers a softer visual finish than a glossy surface and works nicely with light oak or painted cabinetry. It is well suited to a kitchen where you want the island to support the overall design rather than dominate it. Examine the specific surface in person: matte finishes can show oils, fingerprints or cleaning marks differently, depending on the manufacturer. Follow the maker’s guidance for care.
When planning this configuration, carefully consider how the island base interacts with your perimeter cabinetry, appliance swings, and surrounding floor surfaces. Seamless transitions between material sheens ensure the island feels like an intentional architectural centerpiece rather than an afterthought.
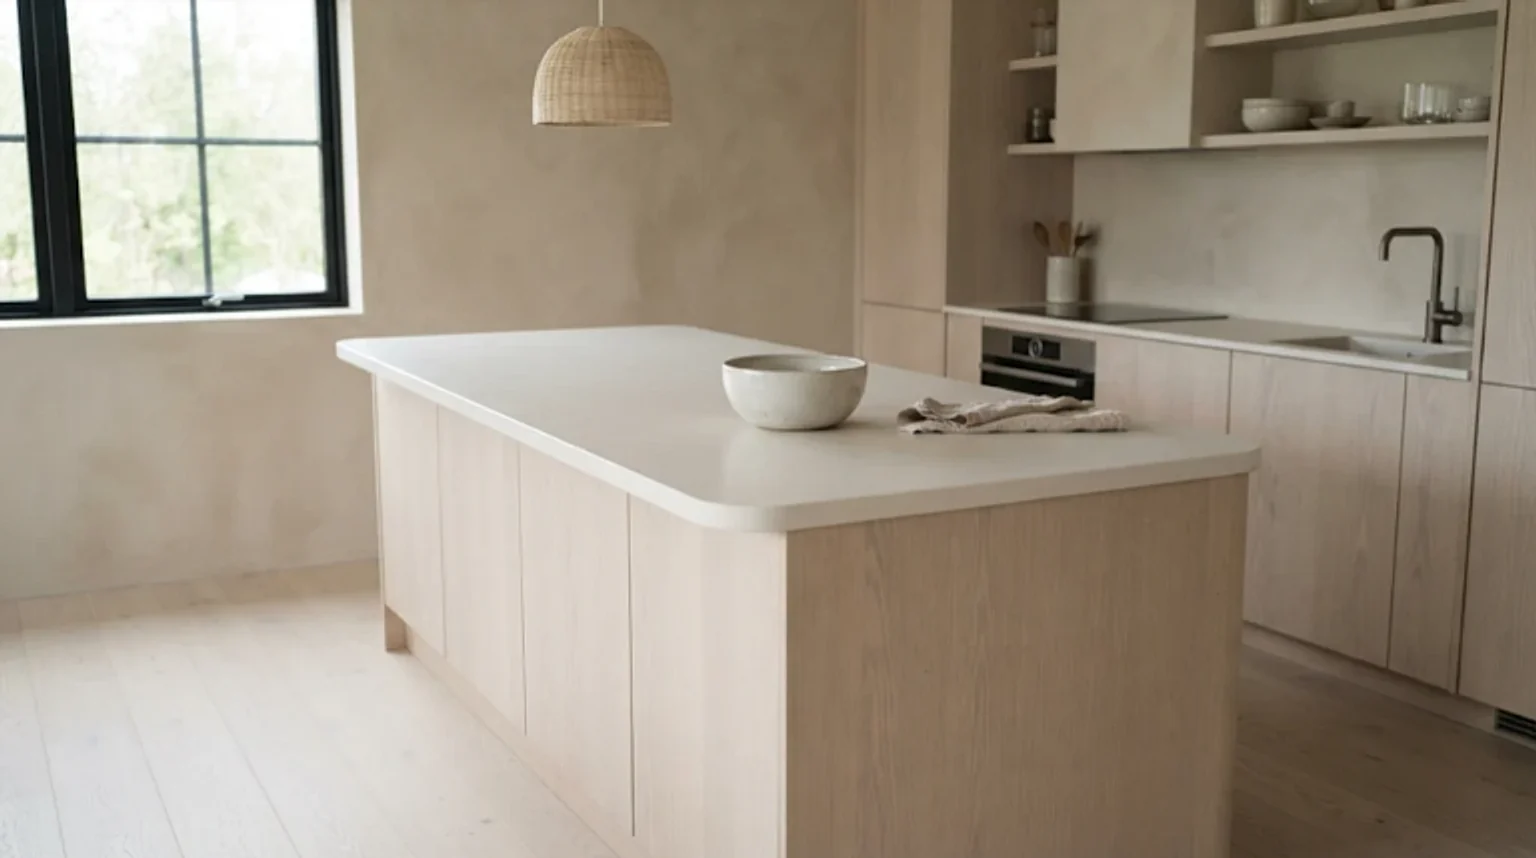
Idea 10: Honed Quartz Island — showcasing balanced residential scale and authentic material detailing.
BEST FOR: Understated modern kitchens. PRO DESIGN DETAIL: Pair the surface with rounded countertop corners for a gentler silhouette.
Butcher-Block Prep Island
A wood-topped island creates an inviting workspace for baking, assembling lunches and casual serving. It works beautifully when the surrounding kitchen uses stone or solid-surface counters, because the materials are clearly differentiated. Decide whether the top is a food-preparation surface or a decorative counter: care, sealing and cleaning expectations can differ. Avoid leaving standing water around joints and any sink cutouts.
When planning this configuration, carefully consider how the island base interacts with your perimeter cabinetry, appliance swings, and surrounding floor surfaces. Seamless transitions between material sheens ensure the island feels like an intentional architectural centerpiece rather than an afterthought.
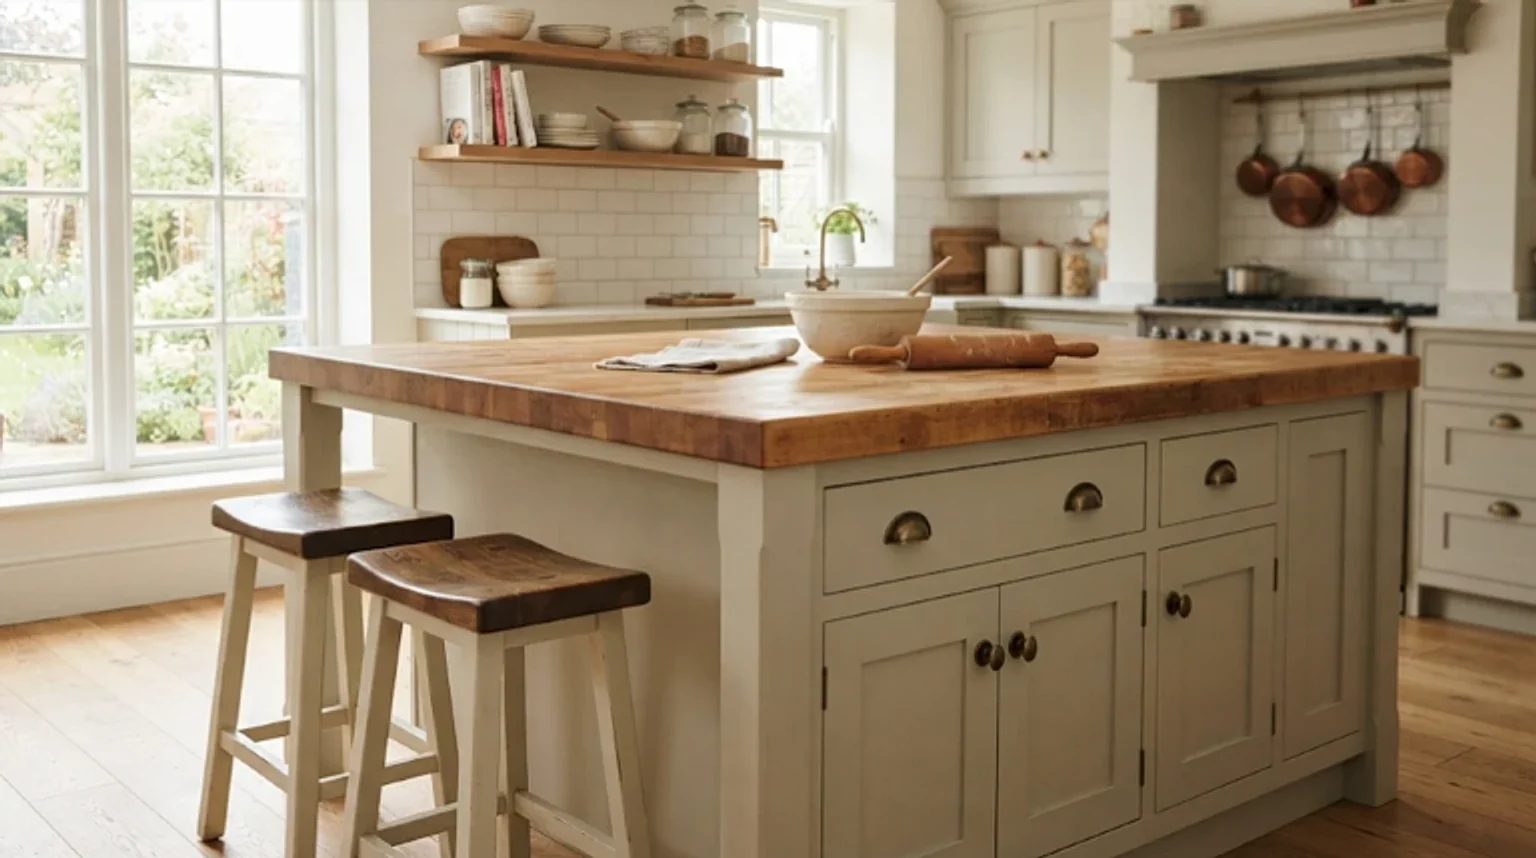
Idea 11: Butcher-Block Prep Island — showcasing balanced residential scale and authentic material detailing.
BEST FOR: Cooks who enjoy tactile, traditional materials. PRO DESIGN DETAIL: Place hot pans on appropriate trivets and maintain the wood according to the supplier’s instructions.
Stainless Steel Chef-Style Island
A stainless worktop gives a kitchen a professional, utilitarian feel and can be especially appealing to serious home cooks. Mix it with natural wood cabinets or warm plaster walls to avoid creating a cold commercial look. Stainless steel will develop visible scratches and fingerprints with use; consider whether that working patina is part of the appeal for you. Choose a suitable finish and edge design with the fabricator.
When planning this configuration, carefully consider how the island base interacts with your perimeter cabinetry, appliance swings, and surrounding floor surfaces. Seamless transitions between material sheens ensure the island feels like an intentional architectural centerpiece rather than an afterthought.

Idea 12: Stainless Steel Chef-Style Island — showcasing balanced residential scale and authentic material detailing.
BEST FOR: Contemporary kitchens built around active cooking. PRO DESIGN DETAIL: Combine the metal top with closed storage below to keep tools nearby but out of sight.
Wood-and-Stone Split Island
A two-material island can separate activities visually without building a second structure. Use a durable stone zone for chopping and cleanup and a warmer wood section for coffee, laptops or casual dining. The transition should be purposeful, with the heights and joint details planned so crumbs and spills do not become trapped. Keep the palette limited to materials already used elsewhere in the kitchen.
When planning this configuration, carefully consider how the island base interacts with your perimeter cabinetry, appliance swings, and surrounding floor surfaces. Seamless transitions between material sheens ensure the island feels like an intentional architectural centerpiece rather than an afterthought.
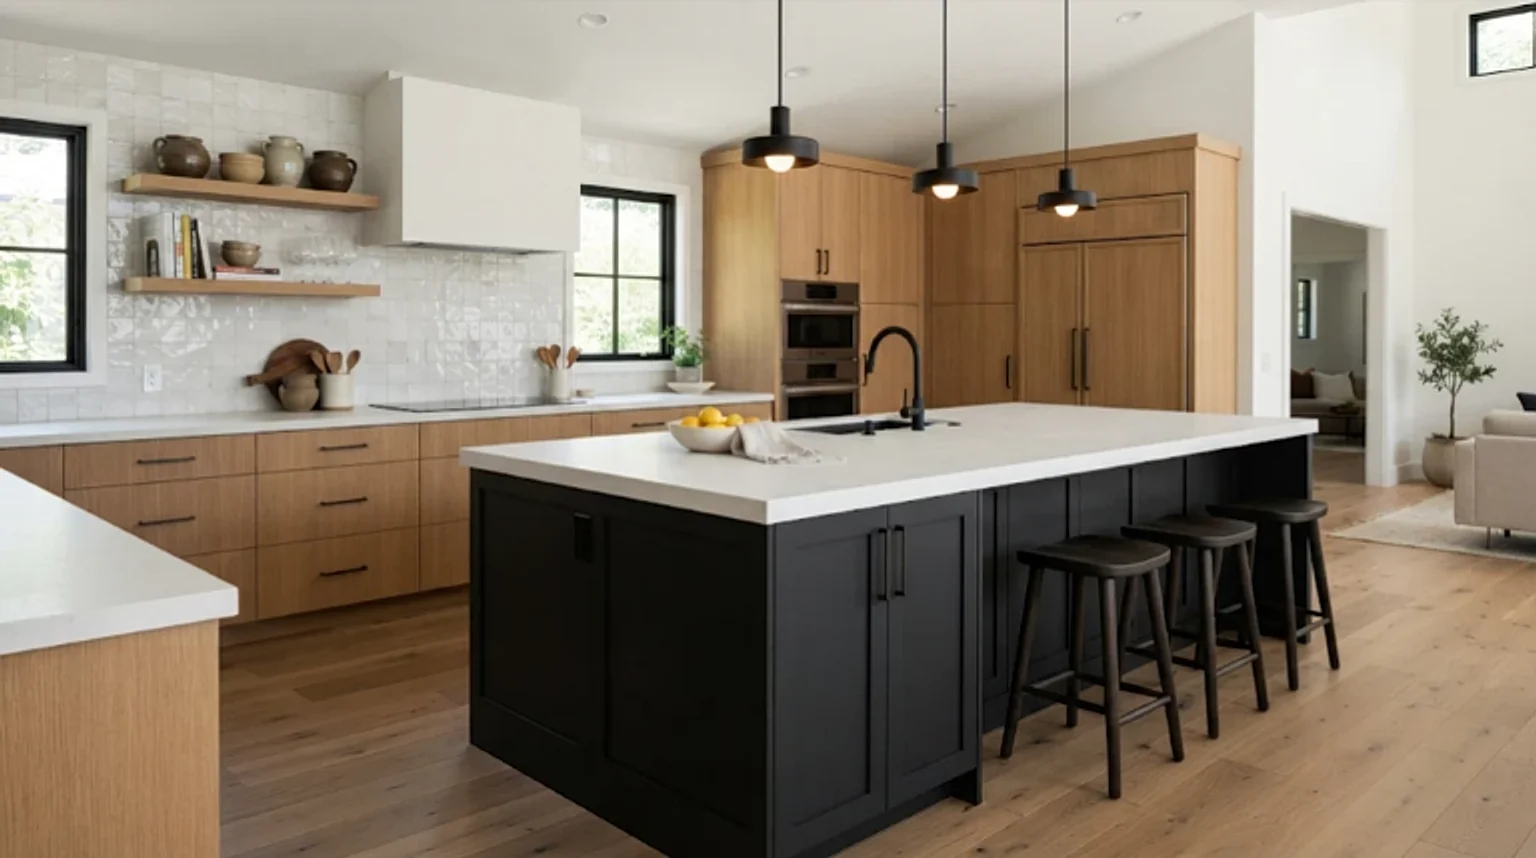
Idea 13: Wood-and-Stone Split Island — showcasing balanced residential scale and authentic material detailing.
BEST FOR: Multipurpose family kitchens. PRO DESIGN DETAIL: Ask the fabricator to sketch the material joinery before approving the plan.
Petite Freestanding Island
You do not need a huge custom island to gain an extra work surface. A compact freestanding unit with a closed cabinet, one drawer and an open bottom shelf can provide useful storage without visually filling the room. Look for proportions that leave workable walking space on every side. If the room is too tight, a narrow movable prep table may be a better choice than a fixed cabinet.
When planning this configuration, carefully consider how the island base interacts with your perimeter cabinetry, appliance swings, and surrounding floor surfaces. Seamless transitions between material sheens ensure the island feels like an intentional architectural centerpiece rather than an afterthought.
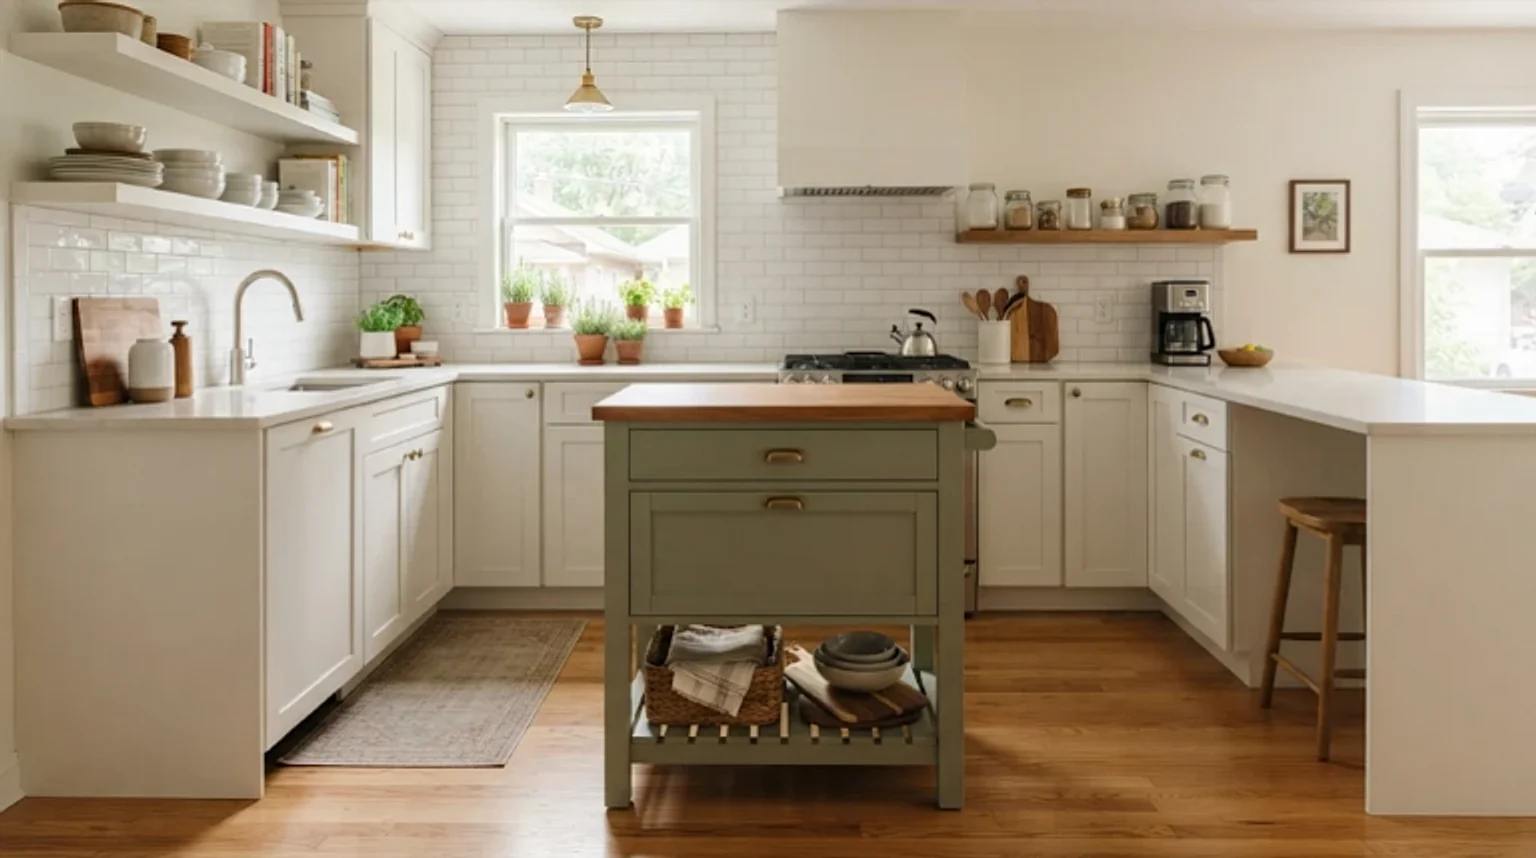
Idea 14: Petite Freestanding Island — showcasing balanced residential scale and authentic material detailing.
BEST FOR: Small kitchens with limited counter space. PRO DESIGN DETAIL: Tape the intended footprint on the floor and test opening the refrigerator and dishwasher before buying.
Slim Galley Kitchen Island
A narrow island can add a landing spot and storage to an elongated kitchen, but depth matters as much as length. Instead of squeezing stools into an already busy corridor, use the island only for prep and choose shallow closed drawers or shelves. A streamlined profile keeps traffic flowing from refrigerator to sink and range.
When planning this configuration, carefully consider how the island base interacts with your perimeter cabinetry, appliance swings, and surrounding floor surfaces. Seamless transitions between material sheens ensure the island feels like an intentional architectural centerpiece rather than an afterthought.
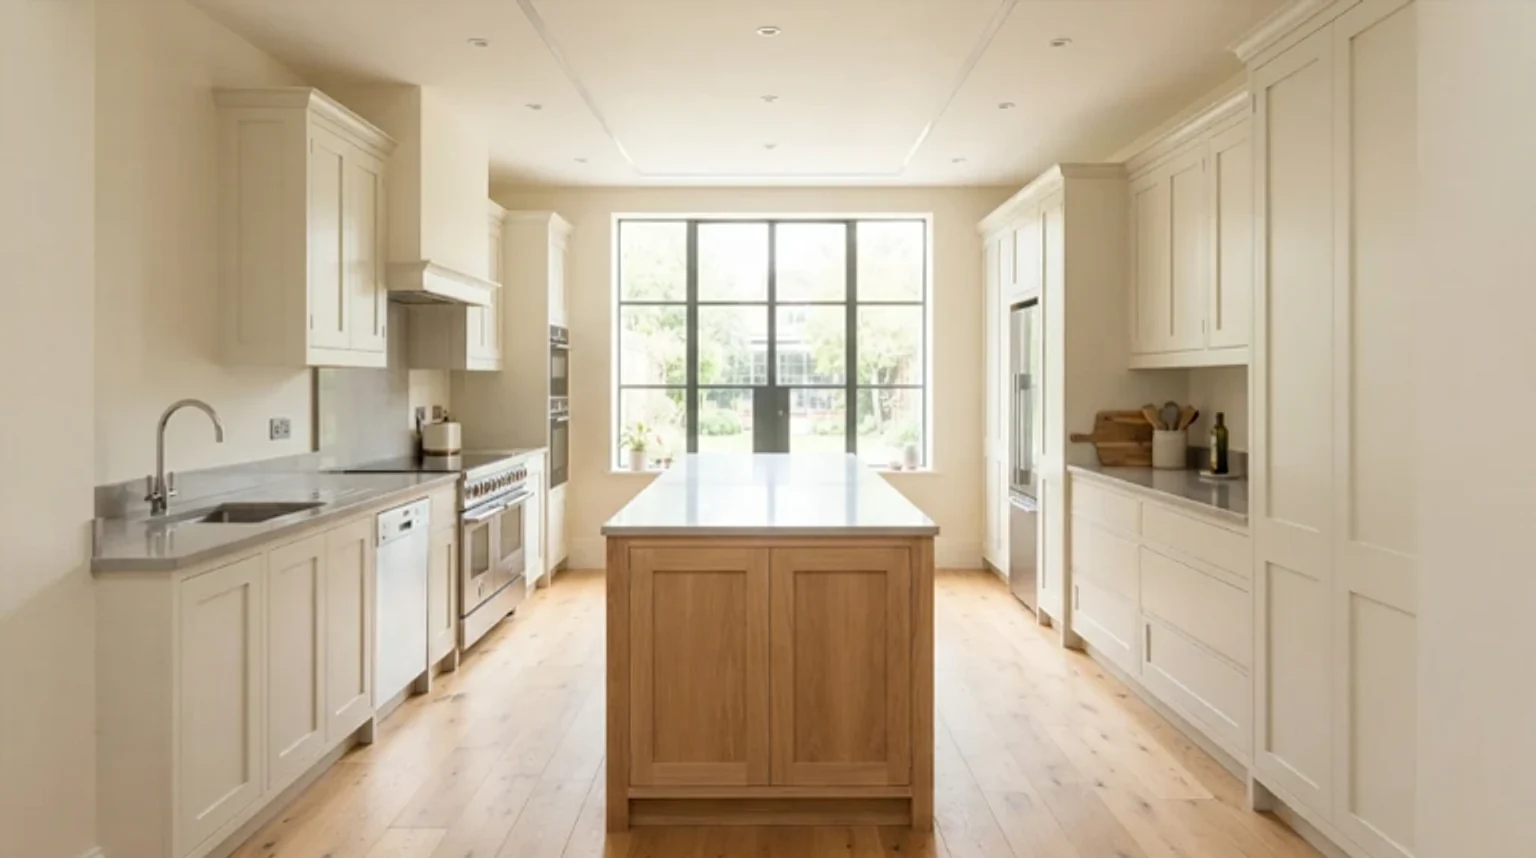
Idea 15: Slim Galley Kitchen Island — showcasing balanced residential scale and authentic material detailing.
BEST FOR: Long kitchens with enough width for safe working aisles. PRO DESIGN DETAIL: Measure from counter fronts and appliance projections, not simply wall to wall.
Rolling Cart Kitchen Island
A movable kitchen cart offers a flexible extra surface for food prep, serving or entertaining. Choose lockable casters and a sturdy top suited to the way you cook, and avoid overloading the unit. The greatest advantage is that you can roll it aside when you need room for guests or a larger task. It is not a substitute for a properly secured fixed island if you plan heavy appliances or plumbing.
When planning this configuration, carefully consider how the island base interacts with your perimeter cabinetry, appliance swings, and surrounding floor surfaces. Seamless transitions between material sheens ensure the island feels like an intentional architectural centerpiece rather than an afterthought.
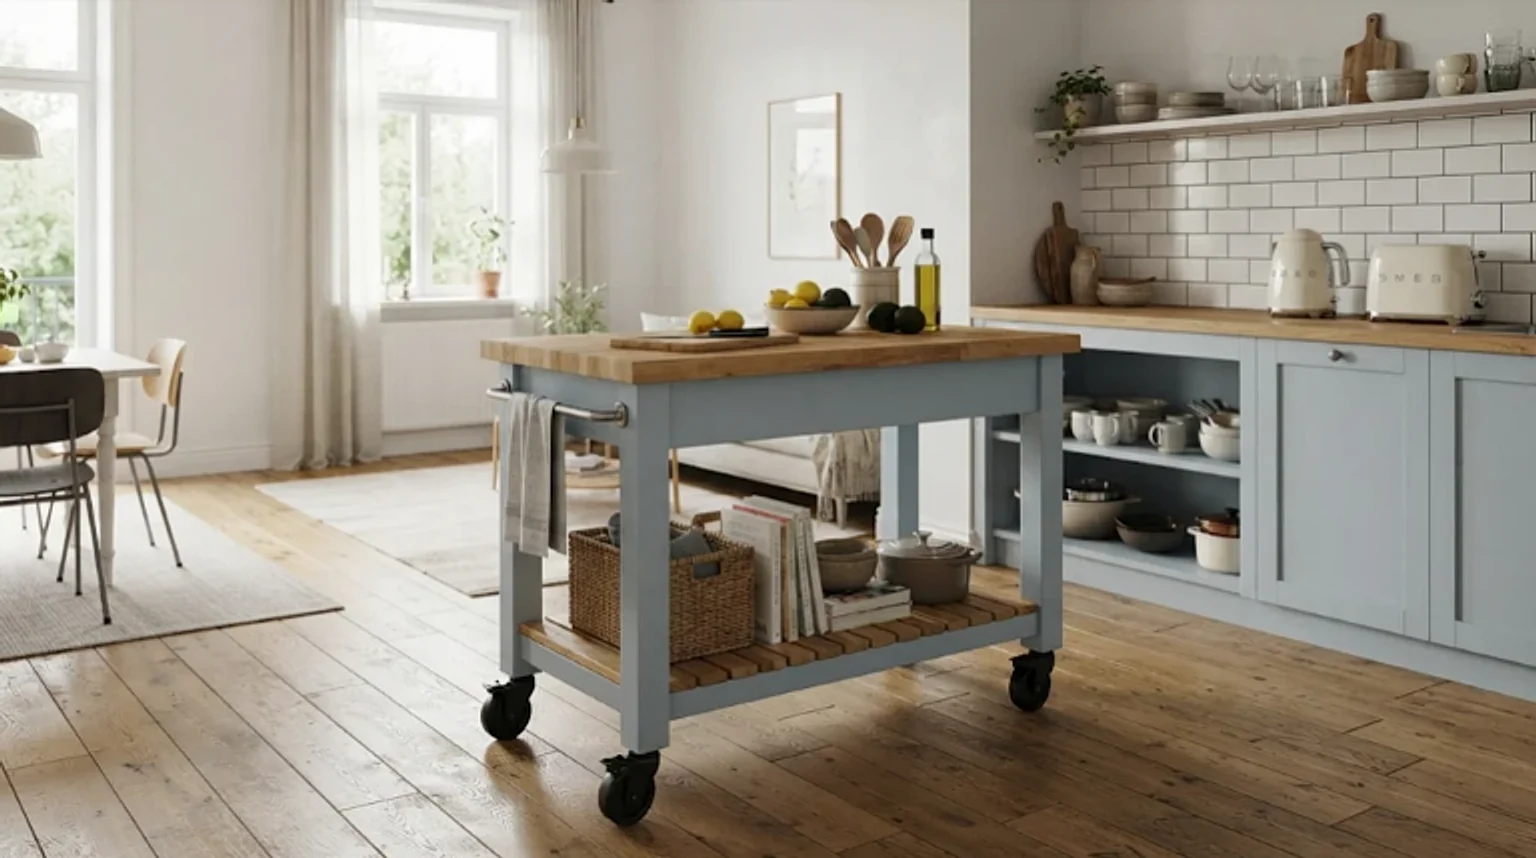
Idea 16: Rolling Cart Kitchen Island — showcasing balanced residential scale and authentic material detailing.
BEST FOR: Renters and kitchens with changing needs. PRO DESIGN DETAIL: Park the cart where its doors and drawers open safely; lock wheels before use.
Compact Square Island
A square island can be a smart fit in a reasonably wide, almost square kitchen. It creates a centralized worktop that can be reached from multiple sides and is less visually directional than a long rectangle. The main question is whether doors and traffic still work when someone stands at the island. An uncluttered top and simple drawers help the compact shape feel intentional rather than cramped.
When planning this configuration, carefully consider how the island base interacts with your perimeter cabinetry, appliance swings, and surrounding floor surfaces. Seamless transitions between material sheens ensure the island feels like an intentional architectural centerpiece rather than an afterthought.
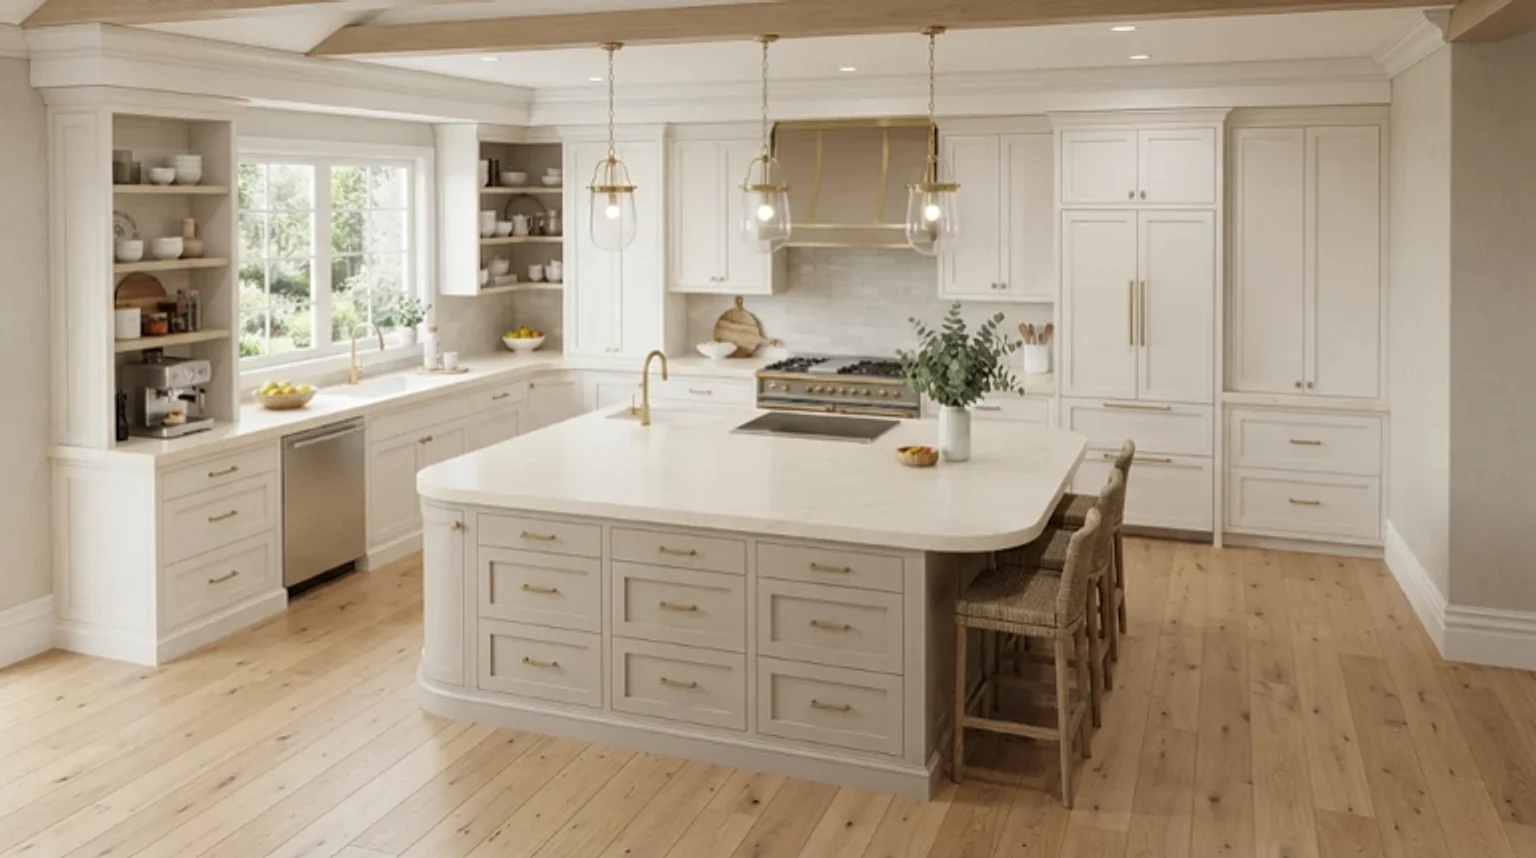
Idea 17: Compact Square Island — showcasing balanced residential scale and authentic material detailing.
BEST FOR: Balanced kitchen footprints with enough clearance on all sides. PRO DESIGN DETAIL: Round the corners slightly if they fall near frequent traffic paths.
L-Shaped Kitchen Island
An L-shaped island can define a cooking zone and a dining zone in an open-plan room. One leg might provide a clear preparation surface while the shorter return creates seating facing the living area. The arrangement needs more room than it seems on paper, especially at the inside corner where people can collide or reach awkwardly. Work out circulation with a scaled floor plan before investing in cabinetry.
When planning this configuration, carefully consider how the island base interacts with your perimeter cabinetry, appliance swings, and surrounding floor surfaces. Seamless transitions between material sheens ensure the island feels like an intentional architectural centerpiece rather than an afterthought.
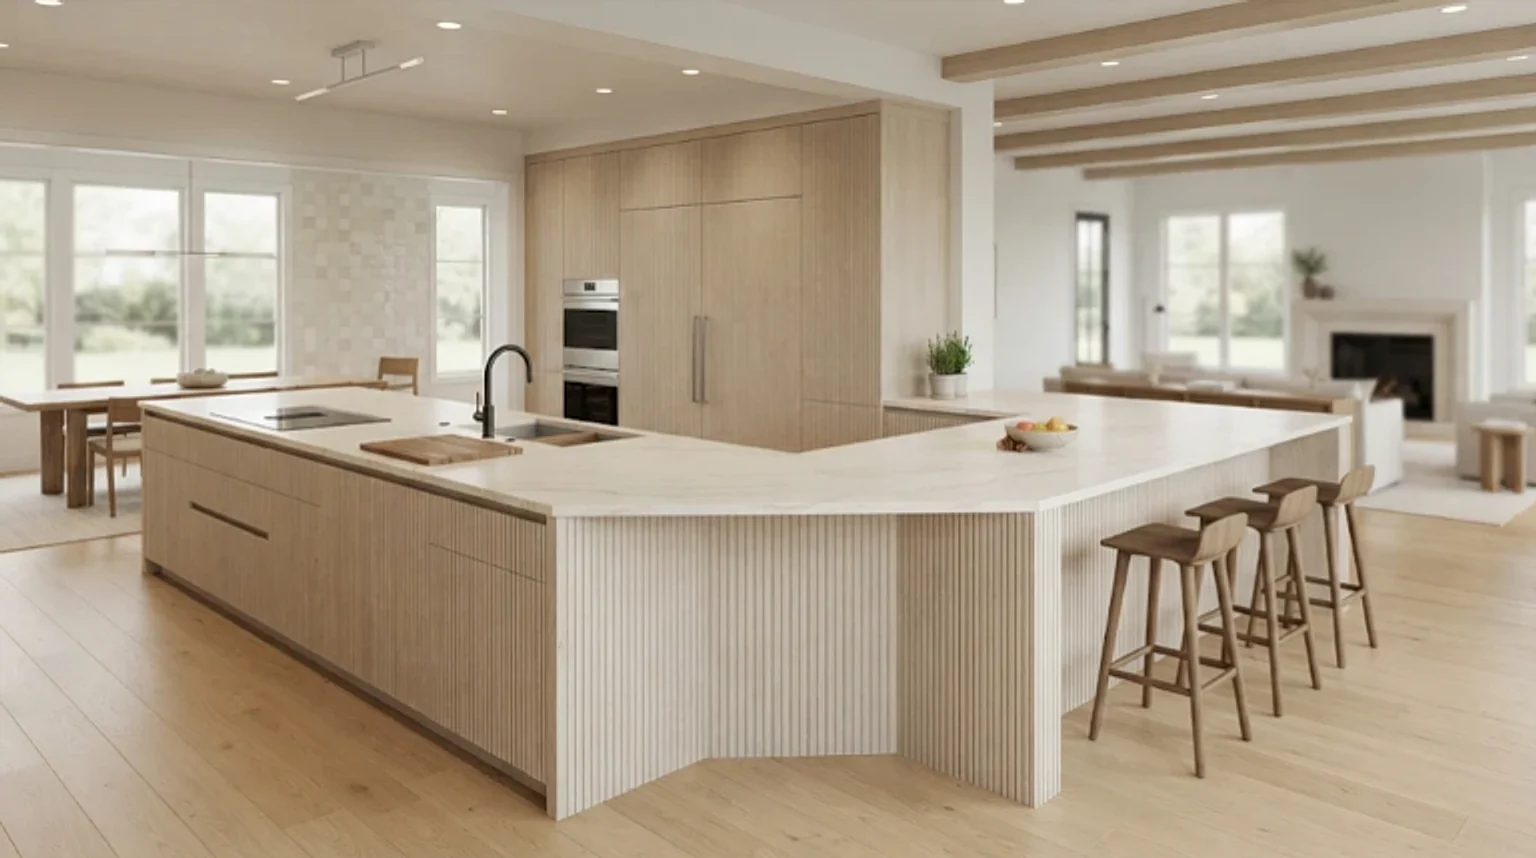
Idea 18: L-Shaped Kitchen Island — showcasing balanced residential scale and authentic material detailing.
BEST FOR: Spacious open kitchens with a distinct social side. PRO DESIGN DETAIL: Keep the inside corner clear of stool legs and swinging cabinet doors.
Double Islands for a Large Kitchen
Two smaller islands can sometimes serve a very large kitchen better than one enormous block. One can be used for food preparation and cleanup, while the other stays clear for serving and conversation. But more cabinetry also means more aisles to maintain and potentially longer walking routes. This layout makes sense only when you can preserve comfortable circulation between every active work area.
When planning this configuration, carefully consider how the island base interacts with your perimeter cabinetry, appliance swings, and surrounding floor surfaces. Seamless transitions between material sheens ensure the island feels like an intentional architectural centerpiece rather than an afterthought.
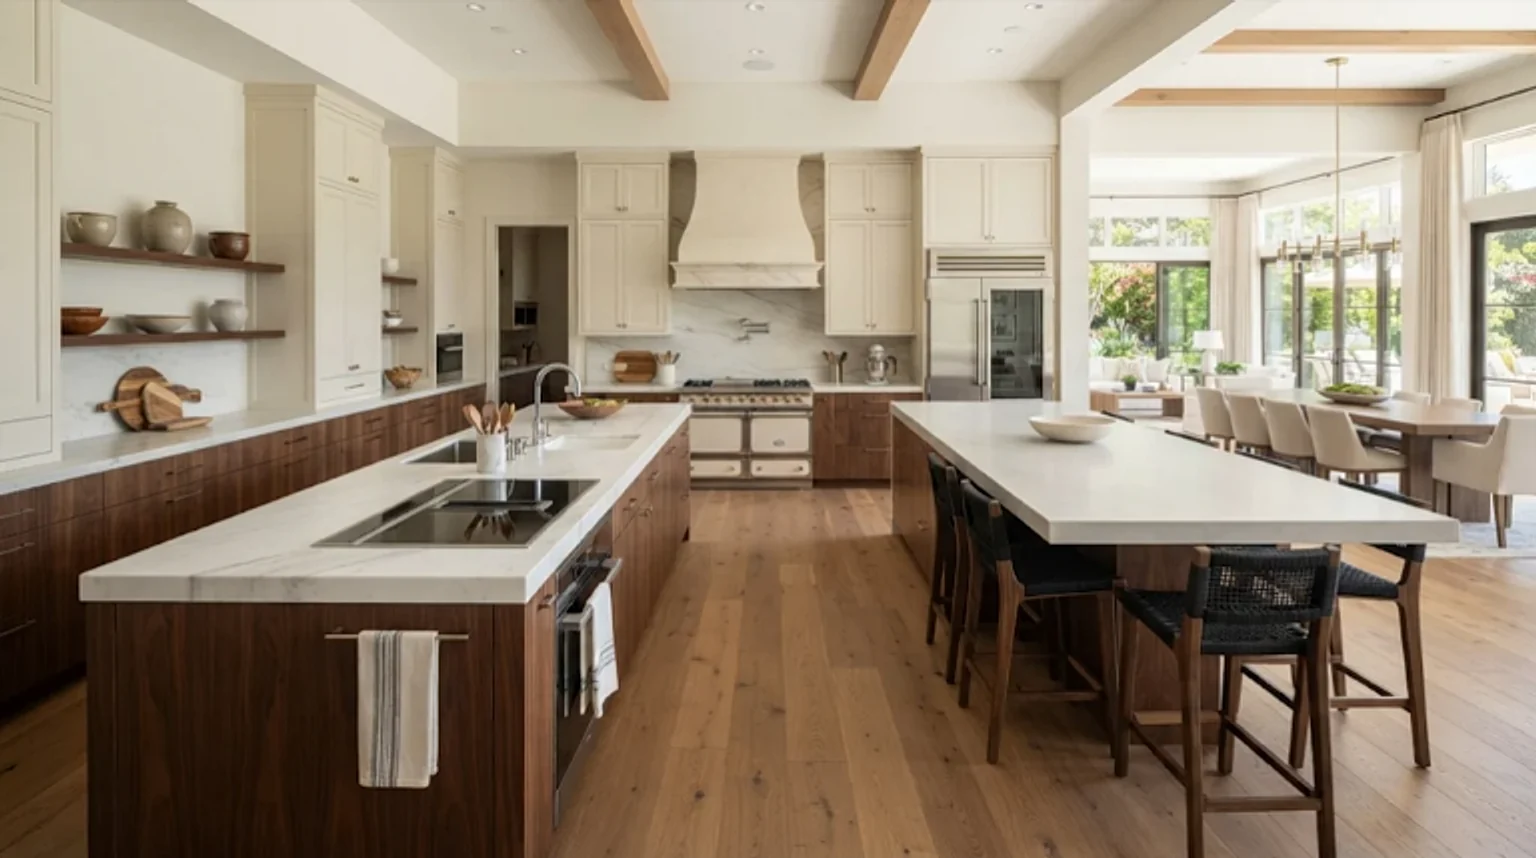
Idea 19: Double Islands for a Large Kitchen — showcasing balanced residential scale and authentic material detailing.
BEST FOR: Genuinely large kitchens that host multiple cooks. PRO DESIGN DETAIL: Give each island a distinct job instead of duplicating everything.
Two-Level Island With Breakfast Bar
A two-level island puts a working counter and a raised eating ledge at different heights. It can screen dishes from the living area and help mark a social zone without adding a wall. The trade-off is a broken countertop, which can limit the uninterrupted space available for rolling dough or setting out buffet dishes. Think about the age and mobility of everyone using the seating before choosing a high bar.
When planning this configuration, carefully consider how the island base interacts with your perimeter cabinetry, appliance swings, and surrounding floor surfaces. Seamless transitions between material sheens ensure the island feels like an intentional architectural centerpiece rather than an afterthought.
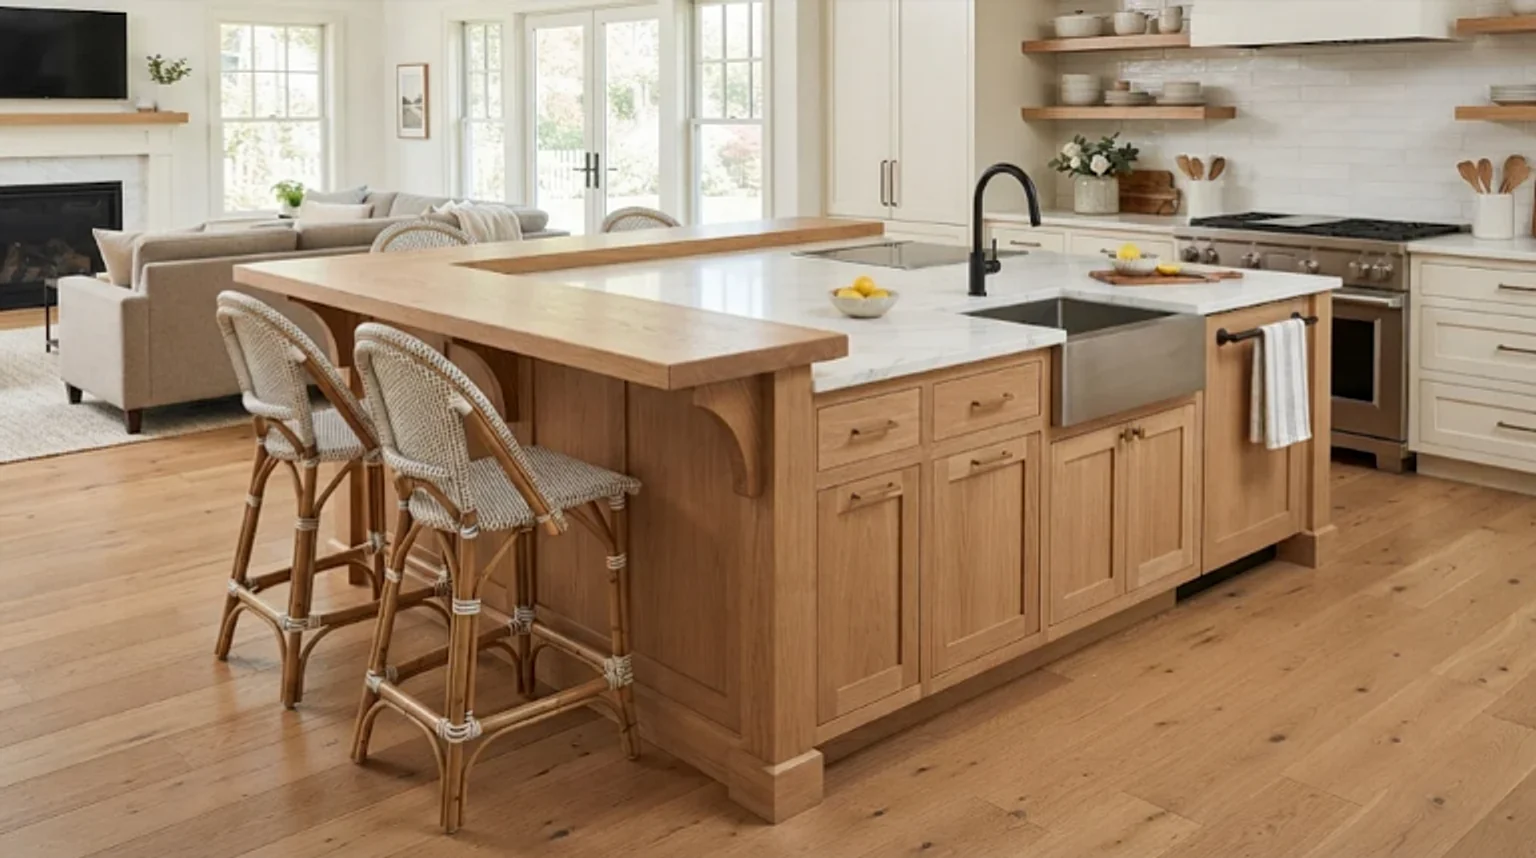
Idea 20: Two-Level Island With Breakfast Bar — showcasing balanced residential scale and authentic material detailing.
BEST FOR: Families who want distinct cooking and seating zones. PRO DESIGN DETAIL: Provide adequate knee space at the selected seat height.
Island With an Attached Dining Table
A kitchen island with a lower table extension creates a relaxed eating spot that feels more like a regular dining table than a row of stools. It is useful for homework, long breakfasts and guests who prefer chairs with backs. The dining extension should look deliberate, whether it runs off one end or meets the island at a right angle. Plan chair pullback space and strong structural support rather than simply adding a long unsupported slab.
When planning this configuration, carefully consider how the island base interacts with your perimeter cabinetry, appliance swings, and surrounding floor surfaces. Seamless transitions between material sheens ensure the island feels like an intentional architectural centerpiece rather than an afterthought.
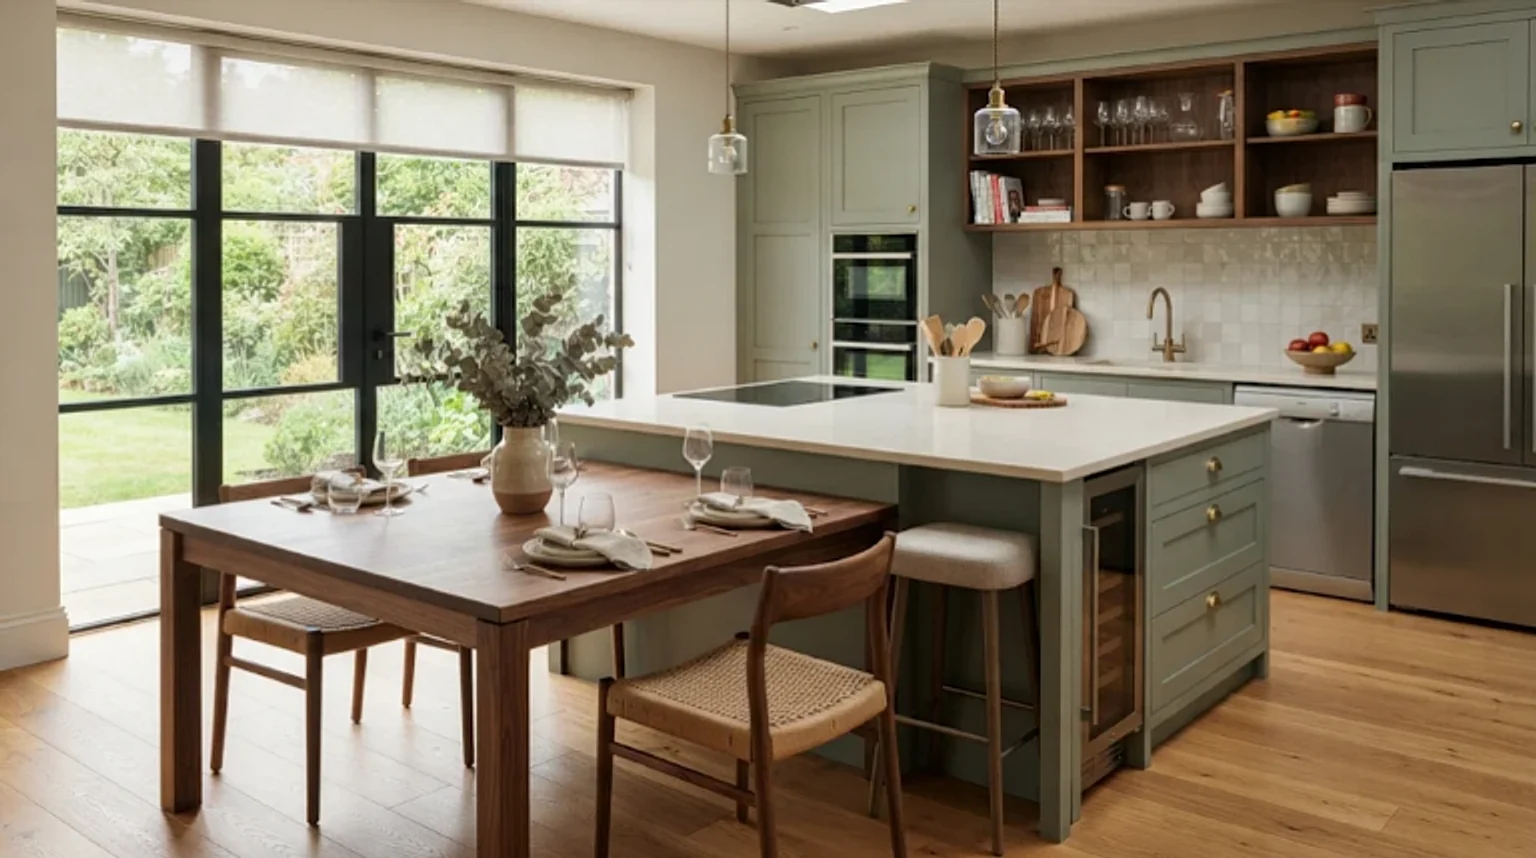
Idea 21: Island With an Attached Dining Table — showcasing balanced residential scale and authentic material detailing.
BEST FOR: Households that eat most meals in the kitchen. PRO DESIGN DETAIL: Use comfortable dining-height chairs where appropriate.
Island With Banquette Seating
Instead of stools along the edge, a built-in bench can create a cozy breakfast nook attached to the island’s dining side. Upholstery introduces softness, especially in a kitchen with hard stone and tiled floors. The bench and table need separate planning from the working island, including comfortable seat depth, easy access and cleanable materials. Avoid blocking cabinetry or the main cooking route.
When planning this configuration, carefully consider how the island base interacts with your perimeter cabinetry, appliance swings, and surrounding floor surfaces. Seamless transitions between material sheens ensure the island feels like an intentional architectural centerpiece rather than an afterthought.
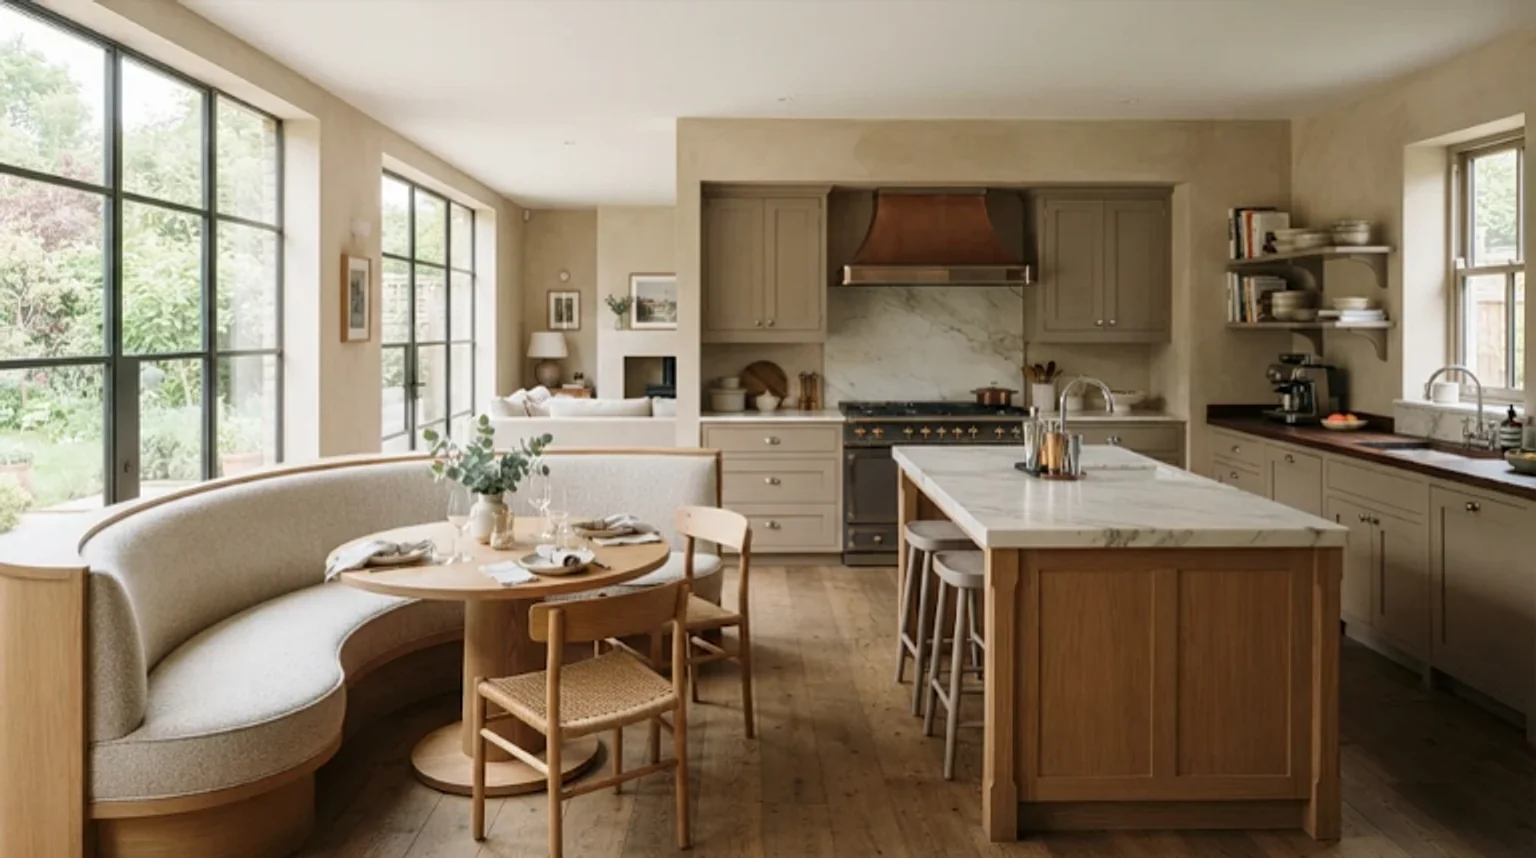
Idea 22: Island With Banquette Seating — showcasing balanced residential scale and authentic material detailing.
BEST FOR: Eat-in kitchens that favor lingering over quick counter meals. PRO DESIGN DETAIL: Use stain-resistant upholstery and keep the bench out of the splash zone.
Family Island With Seating for Four
Four stools can make the island the daily center of family life, but they need more than a pretty countertop. Allow sufficient width per person, comfortable knee room and a route behind occupied seats. If everyone sits in a straight line, conversation can feel awkward; seating on two adjoining sides may work better when the counter shape and circulation allow it.
When planning this configuration, carefully consider how the island base interacts with your perimeter cabinetry, appliance swings, and surrounding floor surfaces. Seamless transitions between material sheens ensure the island feels like an intentional architectural centerpiece rather than an afterthought.

Idea 23: Family Island With Seating for Four — showcasing balanced residential scale and authentic material detailing.
BEST FOR: Busy family kitchens with room around the seating edge. PRO DESIGN DETAIL: Test the actual stool width before ordering the overhang and cabinets.
Island With a Prep Sink
A small prep sink can help a busy kitchen when the main cleanup sink is elsewhere, especially if two people frequently cook together. It works best when placed off-center so a generous continuous work surface remains on one side. Before committing, consider plumbing routes, countertop landing space and the fact that a second sink creates another fixture to clean.
When planning this configuration, carefully consider how the island base interacts with your perimeter cabinetry, appliance swings, and surrounding floor surfaces. Seamless transitions between material sheens ensure the island feels like an intentional architectural centerpiece rather than an afterthought.
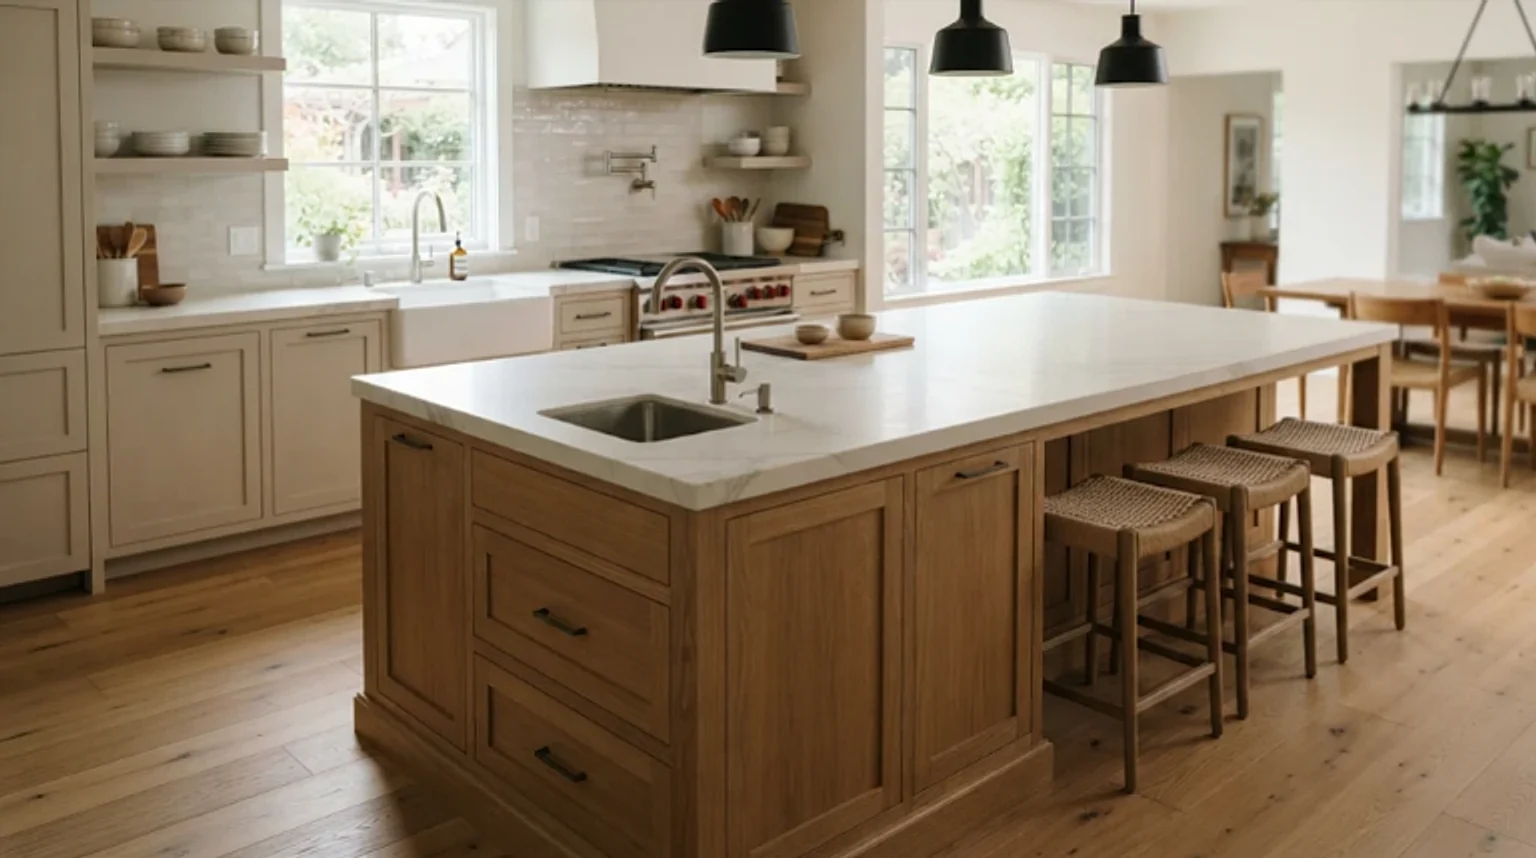
Idea 24: Island With a Prep Sink — showcasing balanced residential scale and authentic material detailing.
BEST FOR: Larger kitchens with a clear two-cook workflow. PRO DESIGN DETAIL: Plan faucet reach, waste access and uninterrupted chopping space together.
Island With an Induction Cooktop
Placing an induction cooktop in the island can let the cook face the room, but it requires thoughtful ventilation, electrical planning and safe separation from seating. Keep sufficient worktop landing areas around the cooking surface and consider splatters, pan handles and sightlines. A ceiling hood or suitable downdraft system should be specified to suit the cooking appliance and room, not selected purely for appearance.
When planning this configuration, carefully consider how the island base interacts with your perimeter cabinetry, appliance swings, and surrounding floor surfaces. Seamless transitions between material sheens ensure the island feels like an intentional architectural centerpiece rather than an afterthought.
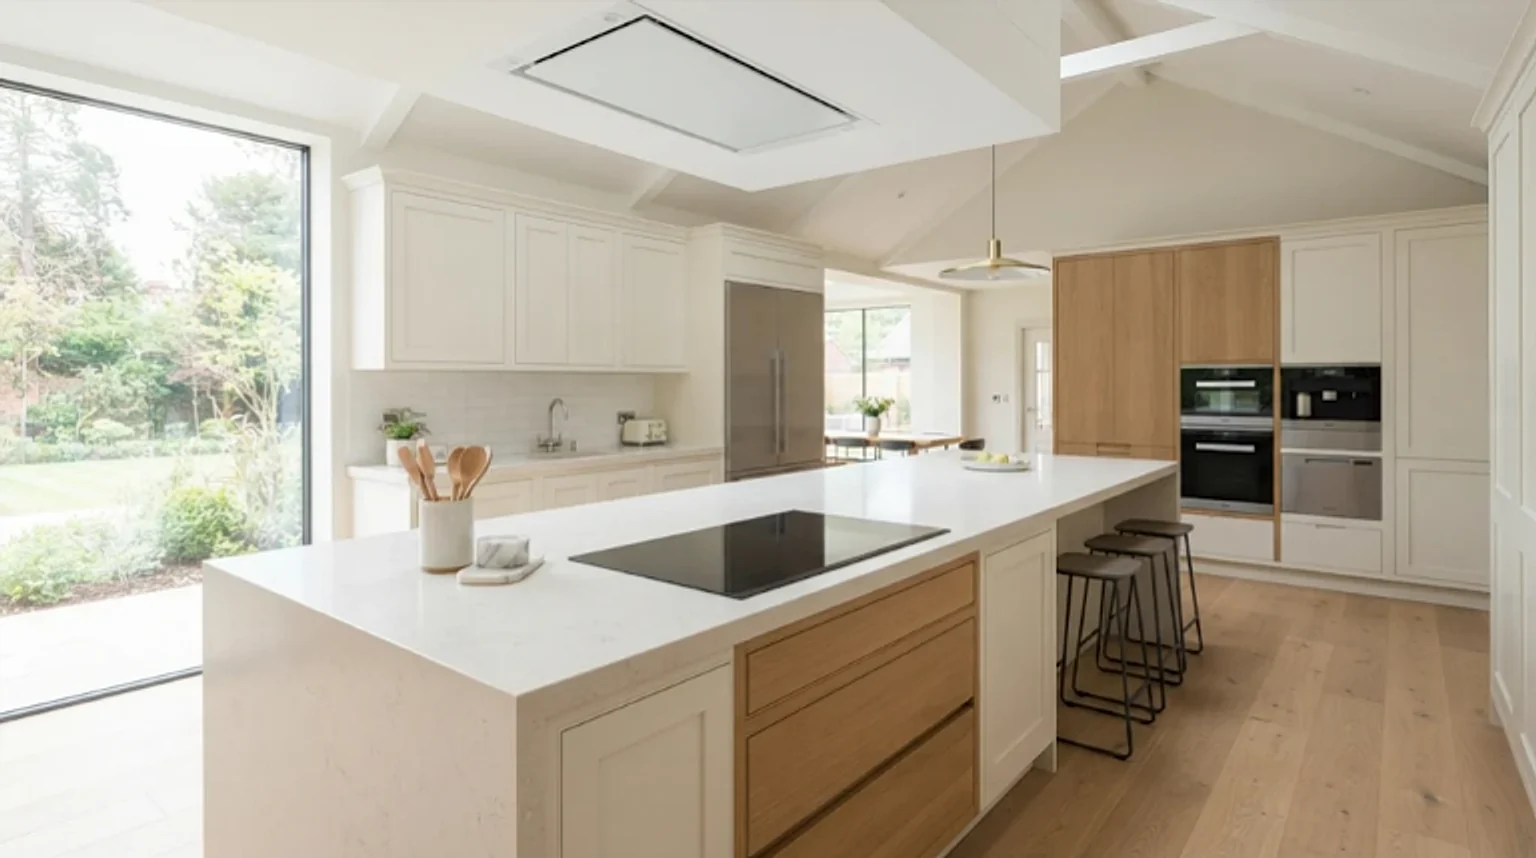
Idea 25: Island With an Induction Cooktop — showcasing balanced residential scale and authentic material detailing.
BEST FOR: Carefully planned renovations with professional installation. PRO DESIGN DETAIL: Do not put seating immediately behind or beside active hot cooking zones.
Island With a Microwave Drawer
An integrated microwave drawer can keep a frequently used appliance off the main counters. It can be particularly helpful when the surrounding cabinetry is already busy with coffee equipment, a toaster and pantry storage. Place it where users can access it safely without obstructing traffic, and follow the appliance manufacturer’s installation and clearance requirements.
When planning this configuration, carefully consider how the island base interacts with your perimeter cabinetry, appliance swings, and surrounding floor surfaces. Seamless transitions between material sheens ensure the island feels like an intentional architectural centerpiece rather than an afterthought.
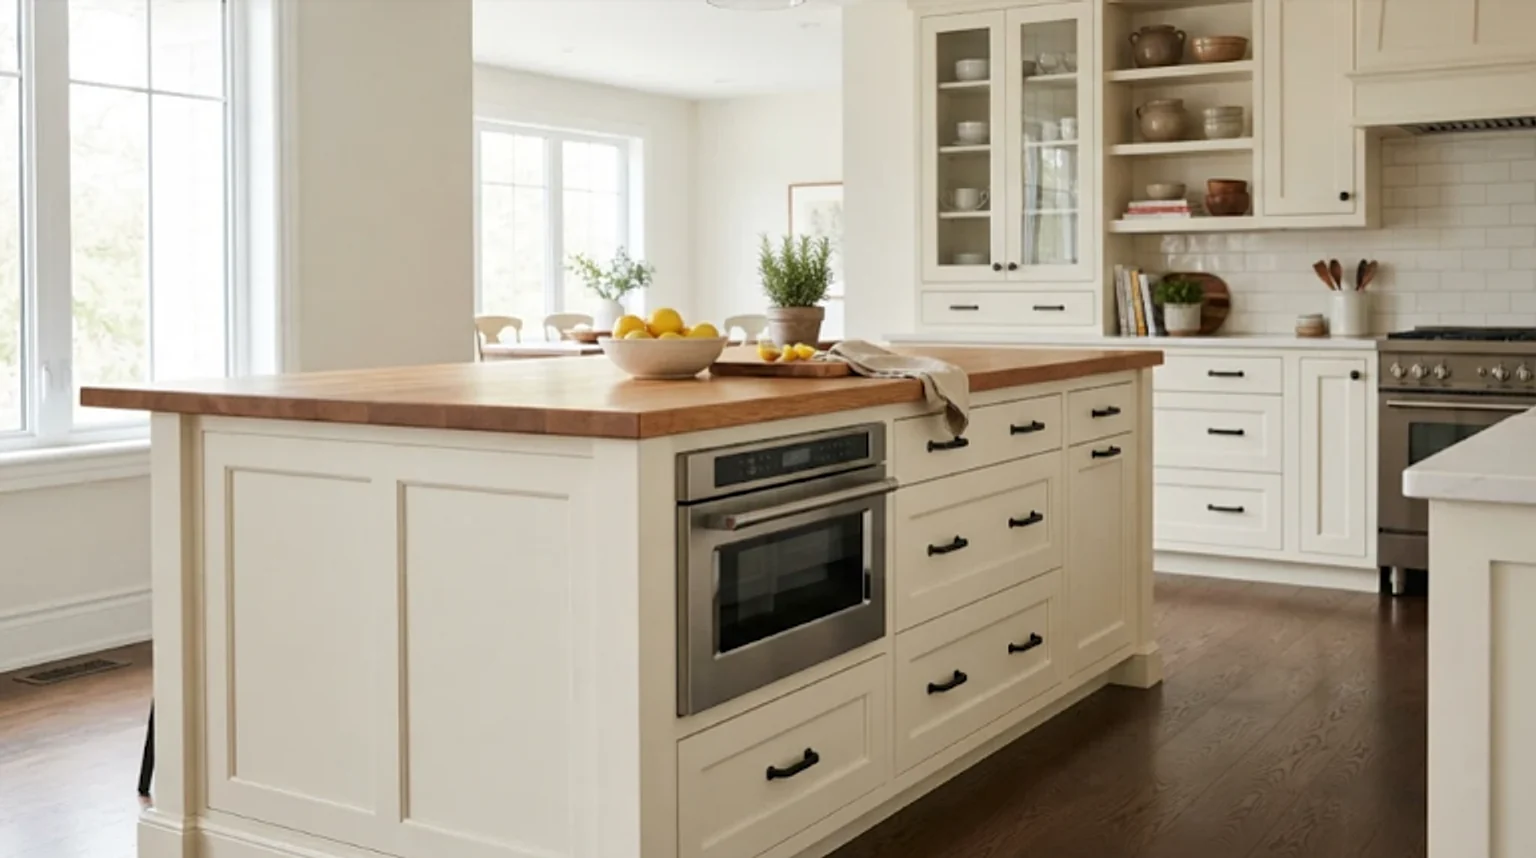
Idea 26: Island With a Microwave Drawer — showcasing balanced residential scale and authentic material detailing.
BEST FOR: Kitchens that want a less cluttered countertop. PRO DESIGN DETAIL: Position the drawer away from seated knees and where children’s access can be managed appropriately.
Island With Dishwasher and Sorting Bins
Keeping the dishwasher and waste pull-outs close to a sink can streamline everyday cleanup. The important detail is how the doors move when open: a dishwasher door should not block the only route through the kitchen, and bins should be easy to reach while preparing food. Use durable interior hardware and keep a clear area for loading dishes.
When planning this configuration, carefully consider how the island base interacts with your perimeter cabinetry, appliance swings, and surrounding floor surfaces. Seamless transitions between material sheens ensure the island feels like an intentional architectural centerpiece rather than an afterthought.
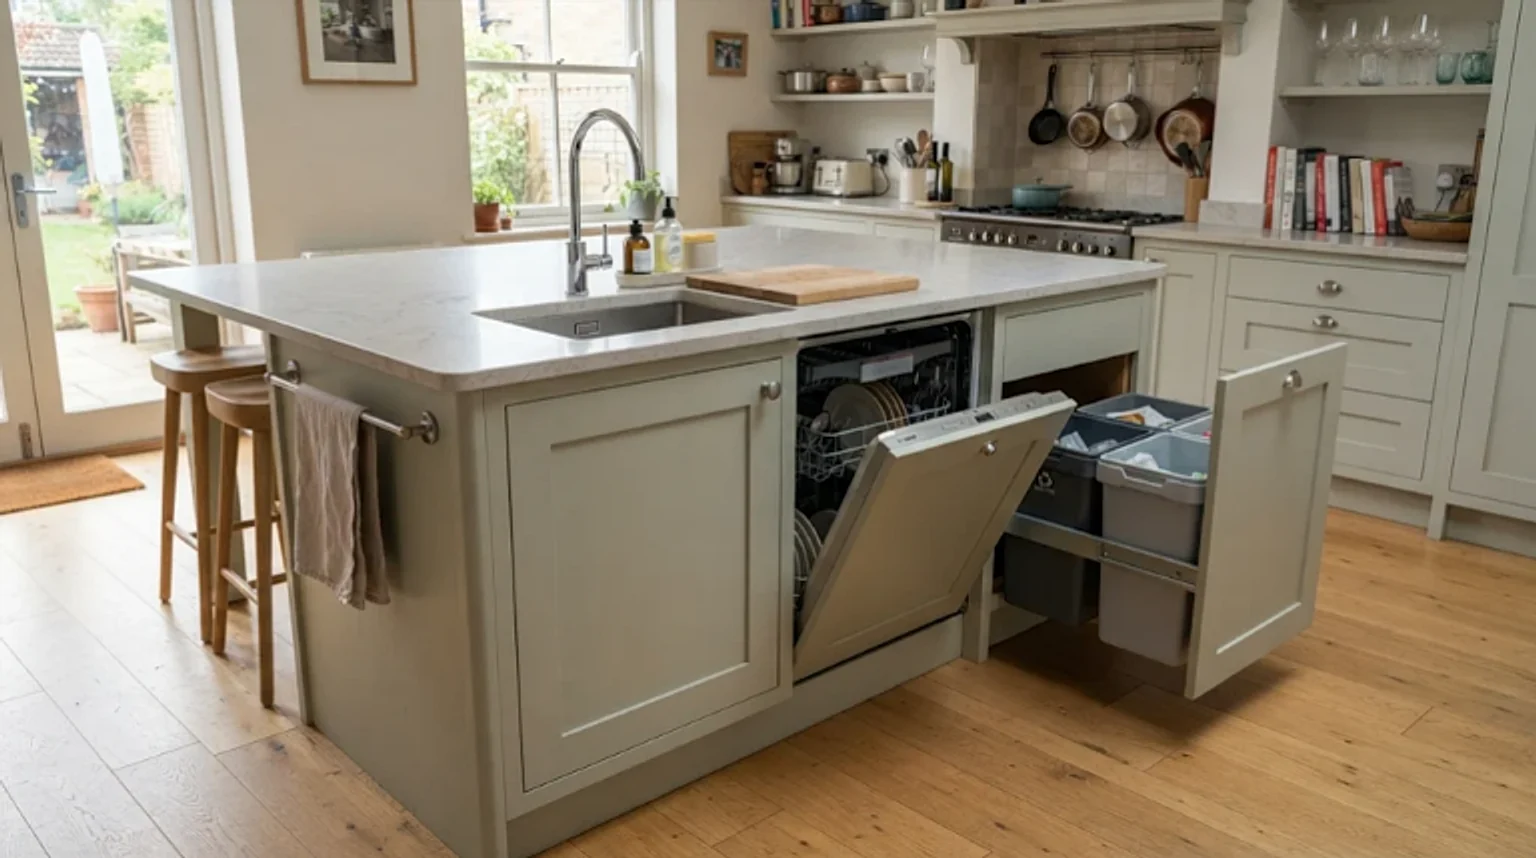
Idea 27: Island With Dishwasher and Sorting Bins — showcasing balanced residential scale and authentic material detailing.
BEST FOR: Family kitchens where the island hosts the main cleanup sink. PRO DESIGN DETAIL: Plan dishwasher, sink and pull-out bins as one working station, not three unrelated add-ons.
Island With Extra-Deep Organized Drawers
An island is a natural home for pots, mixing bowls, food containers and everyday utensils. Deep drawers make items easier to find than a large cabinet with fixed shelves. Use a mix of drawer heights rather than making every compartment extra deep; slim utensils and lids benefit from dedicated organizers. Take an inventory of what you own before the cabinet maker assigns the layout.
When planning this configuration, carefully consider how the island base interacts with your perimeter cabinetry, appliance swings, and surrounding floor surfaces. Seamless transitions between material sheens ensure the island feels like an intentional architectural centerpiece rather than an afterthought.
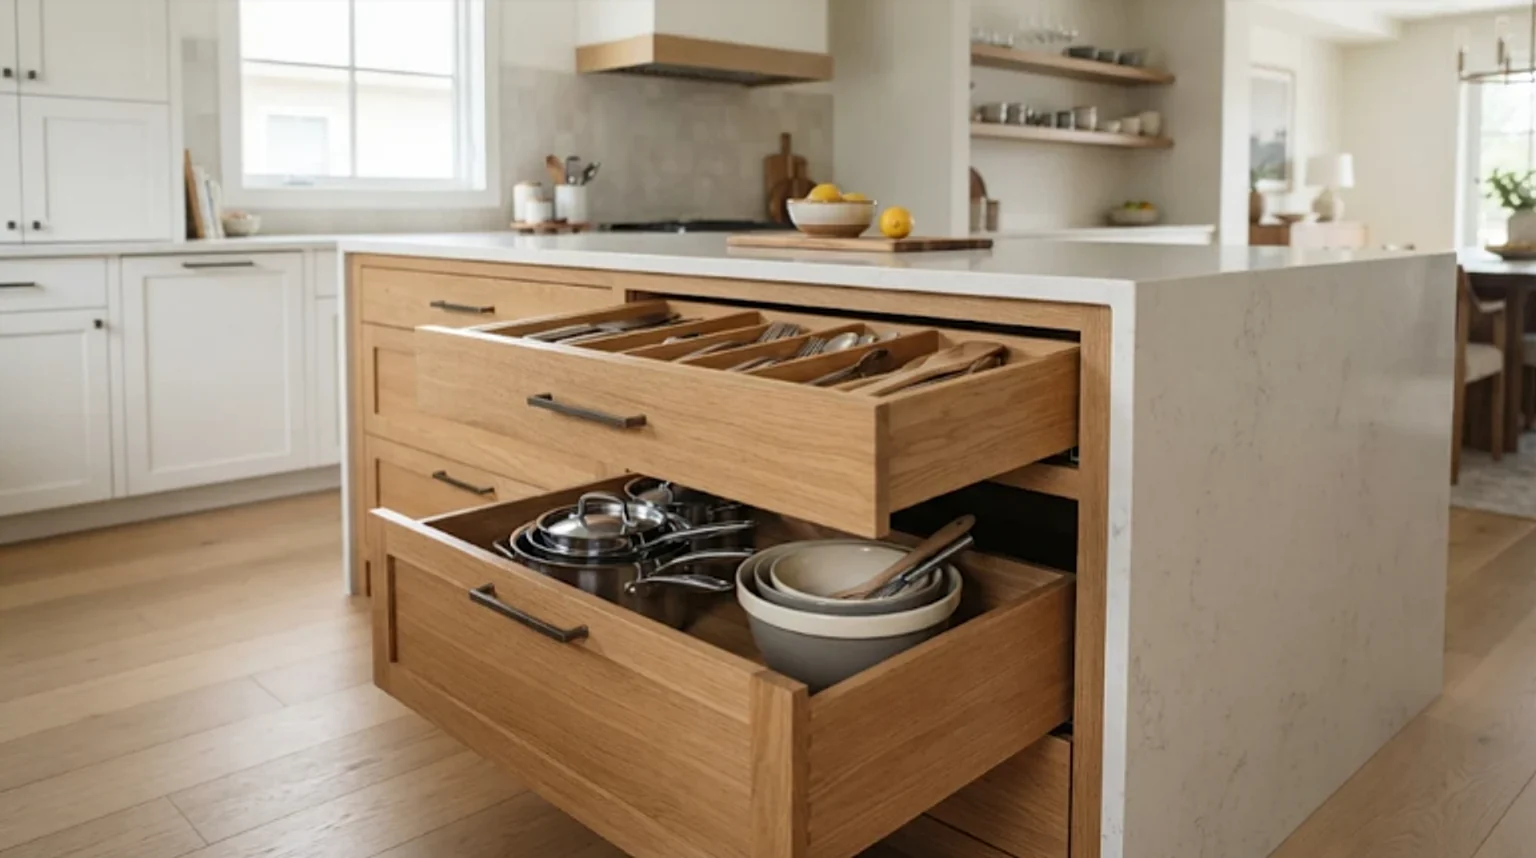
Idea 28: Island With Extra-Deep Organized Drawers — showcasing balanced residential scale and authentic material detailing.
BEST FOR: Any kitchen where storage matters more than decorative open shelving. PRO DESIGN DETAIL: Reserve the strongest drawer slides for heavy cookware.
Island With One Open Display Niche
A single recessed display niche is a charming alternative to a whole wall of exposed shelves. It can hold a stack of cookbooks, a favorite ceramic bowl or a few woven baskets while the rest of the island stays closed and practical. Keep the niche on the social-facing side, away from active splashes and greasy cooking. Too many open compartments can make the island feel visually busy.
When planning this configuration, carefully consider how the island base interacts with your perimeter cabinetry, appliance swings, and surrounding floor surfaces. Seamless transitions between material sheens ensure the island feels like an intentional architectural centerpiece rather than an afterthought.
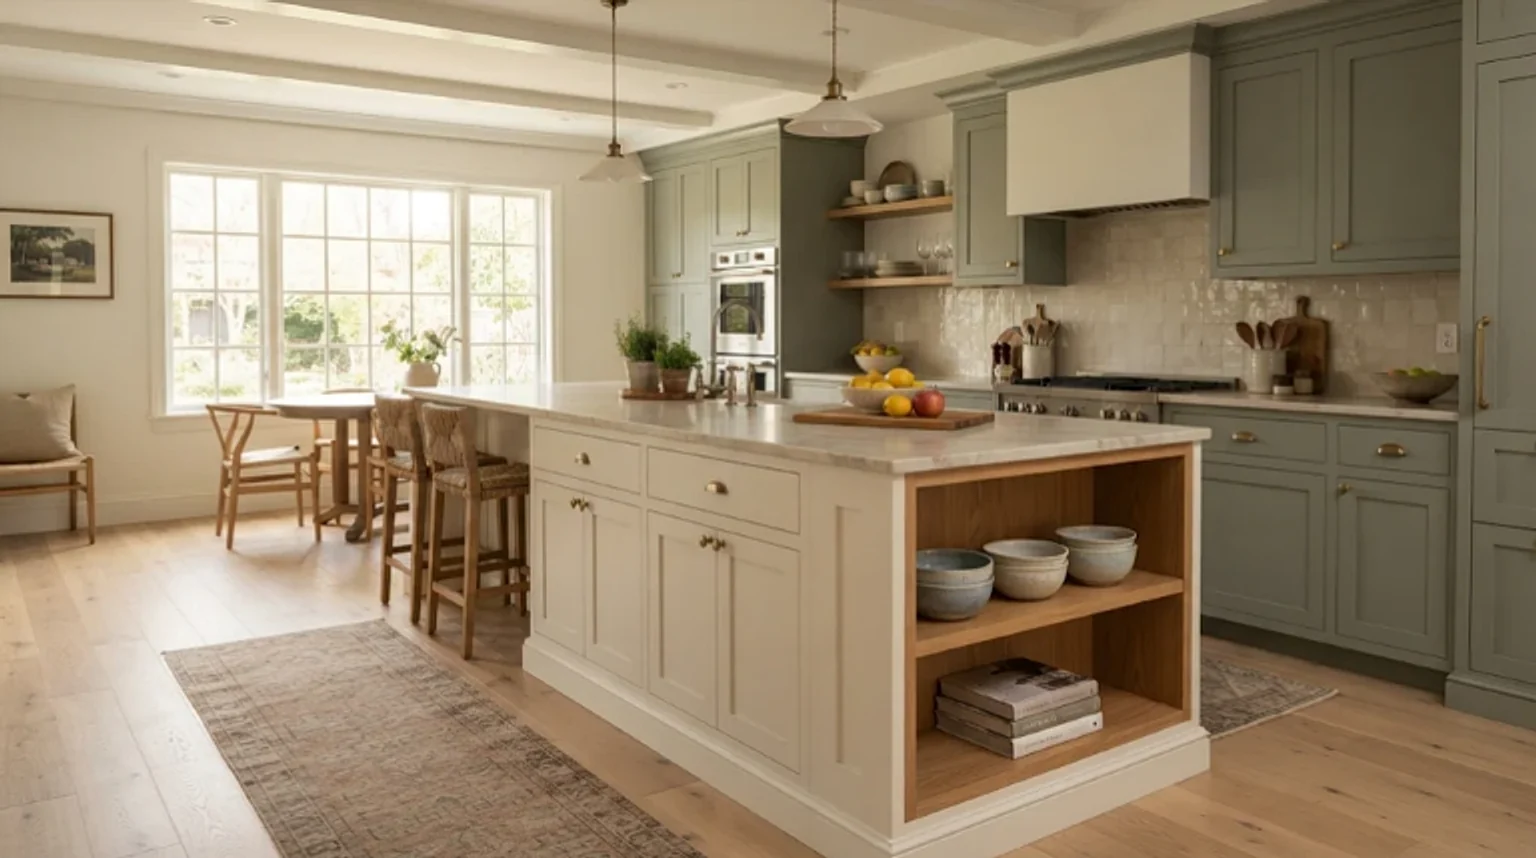
Idea 29: Island With One Open Display Niche — showcasing balanced residential scale and authentic material detailing.
BEST FOR: Kitchens that need warmth and a personal touch. PRO DESIGN DETAIL: Style the niche lightly and give it enough depth for what you actually intend to store.
Island With Discreet Charging and Lighting
An island can support everyday technology without looking like an electronics station. Plan appropriate power for small appliances, discreet charging for devices, and subtle task or toe-kick lighting where it makes sense. Keep cords away from spills, heat and walking paths; electrical receptacle placement and future wiring provisions must meet the code adopted locally. The smartest version of this idea is the one that stays useful after the novelty wears off.
When planning this configuration, carefully consider how the island base interacts with your perimeter cabinetry, appliance swings, and surrounding floor surfaces. Seamless transitions between material sheens ensure the island feels like an intentional architectural centerpiece rather than an afterthought.

Idea 30: Island With Discreet Charging and Lighting — showcasing balanced residential scale and authentic material detailing.
BEST FOR: Modern households that use the kitchen for several activities. PRO DESIGN DETAIL: Decide on electrical and lighting needs before countertops and finished panels are installed.
How to Choose an Island That Actually Fits
It is tempting to pick the most eye-catching design first, but successful kitchen architecture begins with an honest, measured floor plan. Mark existing counters, refrigerator doors, range clearances, dishwasher drop-downs, and primary walkways before settling on island dimensions. Always measure from the outermost countertop edges and handle projections rather than base cabinet boxes alone.
Essential Working Clearances
Professional kitchen planning guidelines recommend at least 42 inches of width for a dedicated work aisle used by a single cook, expanding to 48 inches for households where multiple cooks prepare meals simultaneously. A minimum of 36 inches is required for general walkways. Where counter stools back onto a major thoroughfare or doorway, allow 44 inches from counter edge to the opposite wall so family members can walk comfortably behind seated diners.
Ergonomic Seating Benchmarks
To ensure comfortable dining, allocate approximately 24 inches of counter width per seated person. Knee depth clearance varies strictly with counter height: provide 18 inches of knee depth at a standard 30-inch dining table height, 15 inches at a standard 36-inch counter height, and 12 inches at an elevated 42-inch raised bar ledge.
| Design Parameter | Editorial Specification |
|---|---|
| Prep-Only Island | Prioritize uninterrupted continuous countertop space; avoid appliance cutouts. |
| Seating-First Island | Ensure 15-inch knee overhang and 44-inch rear walking clearance. |
| Cleanup/Sink Island | Pair undermount sink with integrated pull-out recycling bins and dishwasher. |
| Cooking/Cooktop Island | Maintain minimum 12-18 inches landing space on all sides; plan overhead or downdraft ventilation. |
| Mobile Cart Island | Select heavy-duty locking casters; store securely without blocking main appliance swings. |
Three Expensive Kitchen Island Mistakes to Avoid
- 1Installing an Oversized Island in a Medium Room: An island that looks proportional in a sprawling showroom can overwhelm residential kitchens and restrict refrigerator or oven door openings. Always tape the full countertop footprint on your finished floor with blue painter's tape and test daily cooking movements for a full week before placing cabinet orders.
- 1Crowding Seating Without Knee or Aisle Space: Adding stools without factoring in adequate knee depth or pullback space forces diners to sit sideways and blocks room walkways. Calculate stool width, counter overhang support brackets, and walking clearances behind occupied seats prior to stone fabrication.
- 1Selecting Porous or Fragile Countertops Without Maintenance Planning: High-contrast natural marble and untreated butcher-block look breathtaking on day one but require diligent sealing and specialized cleaning. Match your surface selection—whether forgiving engineered quartz, heat-resistant quartzite, or warm sealed timber—to your actual household cooking habits.
Frequently Asked Questions About Kitchen Island Ideas
Final Thoughts: Designing a Kitchen Island for Everyday Living
The most enduring kitchen island is one designed around how your household lives, cooks, and gathers each day. Whether your ideal space centers on a tactile white oak island with creamy stone surfaces, a compact mobile cart that rescues a modest kitchen, or an expansive double-island configuration built for multi-cook family holidays, let function dictate the footprint and let craftsmanship elevate the finishes.
Review your clearances, evaluate surface durability against your cooking habits, and consult experienced kitchen joinery specialists to bring your 2027 culinary vision to life.
Related Editorial Stories
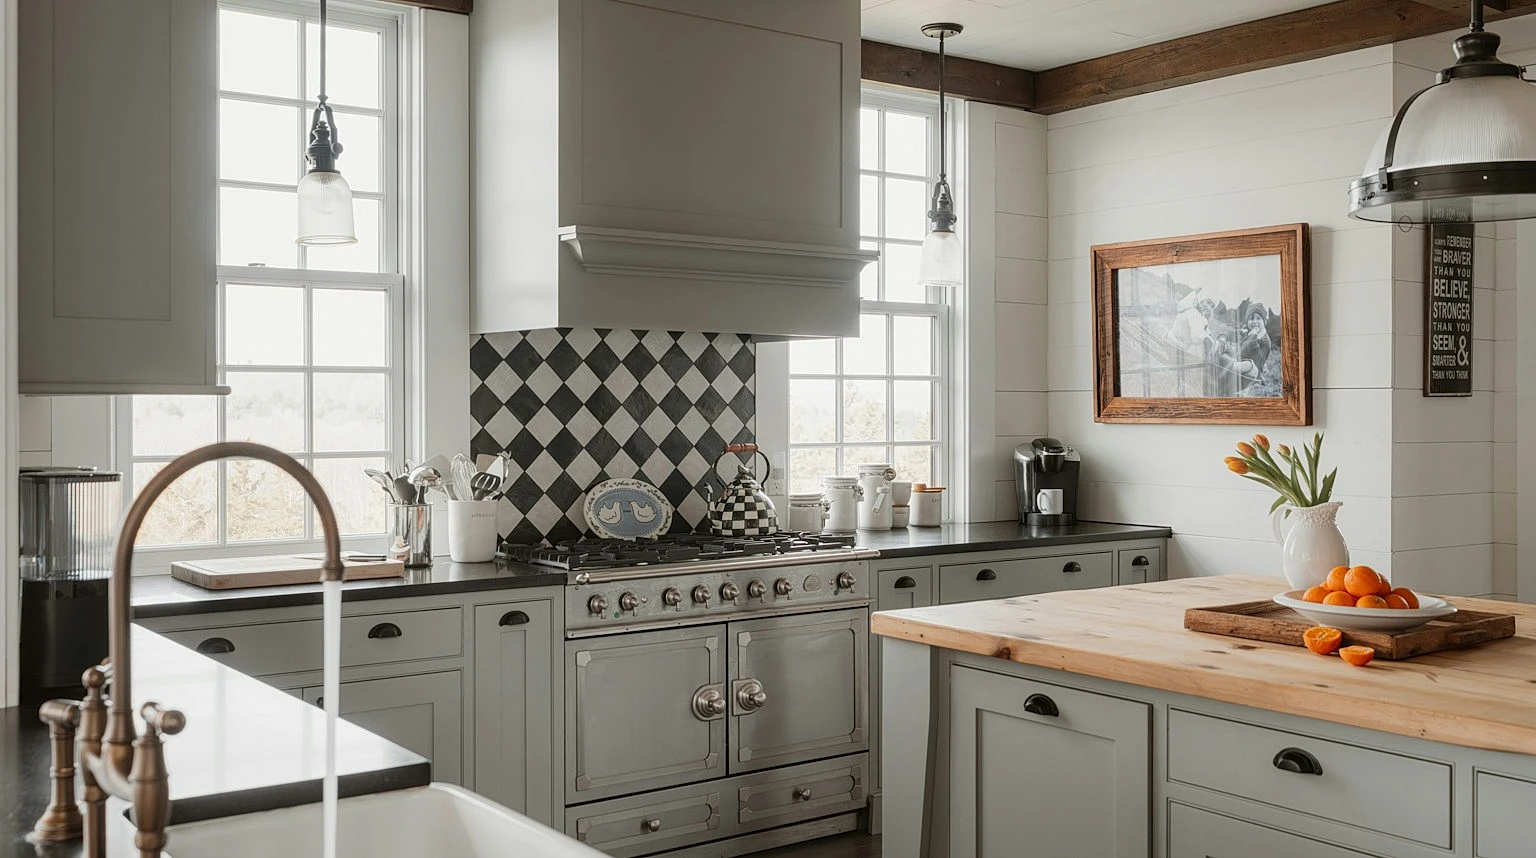
30 Gray and White Kitchen Ideas for 2027 That Feel Warm, Modern, and Timeless
Discover 30 elevated gray and white kitchen ideas for 2027: warm two-tone cabinetry, charcoal islands, marble backsplashes, brass hardware, and cozy breakfast nooks.

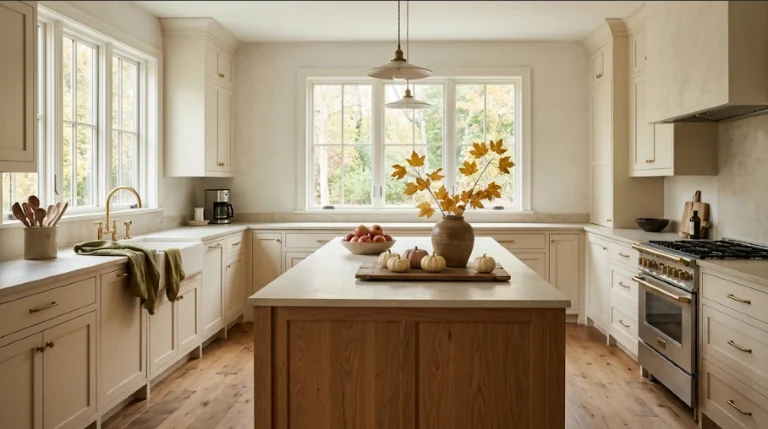
20 Fall Kitchen Decor Ideas for 2027: Cozy, Practical Ways to Welcome Autumn
Make your kitchen feel warmer for autumn without losing prep space. Explore 20 practical, clutter-free fall kitchen decor ideas—from harvest fruit bowls and olive linens to warm lamps and peg rails.
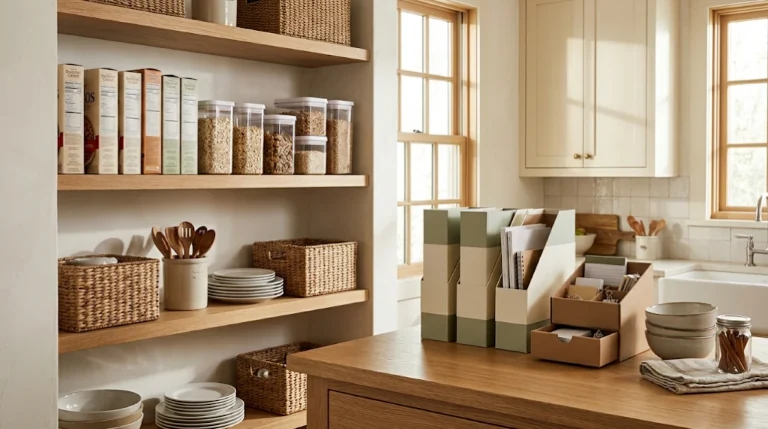
30 Cereal Box Storage Ideas in 2027: Clever DIY Organizers and Pantry Hacks
Discover 30 clever cereal box storage ideas for 2027: creative cardboard upcycling crafts, custom drawer trays, and space-saving pantry organization hacks.